Options - Messaging
- Go to Options.

- Select Messaging and click Email Settings.
When you click on the Messaging tab in CRD's Options window, you will see that you have two separate messaging options (shown on the tabs): Email Settings and SMS Settings. On this page, we will discuss the various email options available to you when using CRD and how to set them up.
No separate server is required in order for CRD to send e-mail. However, if you are unfamiliar with your organization's e-mail settings, you may want to have a system administrator set these for you.
MAPI
You should choose MAPI from the Mail Type drop down if your organization uses a MAPI compliant system (such as Outlook or Exchange). In order to utilize the MAPI mail type, you will need to install the Collaboration Data Objects component from your Outlook or Office installation disk.
Once the CDO component is installed, you may need to register them again.
To verify whether or not you already have the Collaboration Data Objects installed, click the Housekeeping tab on the far left. Then, under the Components tab, verify that Collaboration Data Objects is listed. If it is not, you will need to install them.

To use the MAPI mail type, use the following credentials:
- MAPI Profile: Enter the name of your MAPI Profile.
- Password: Enter your password.
The MAPI Profile is how CRD will communicate with your email system, global address book, and other email functions. Depending on the version of Windows you are running, it may also communicate with your security rights and the service packs you have installed. The drop-down may not show the list of profiles which exist on your PC.
If you are unsure of your MAPI Profile name, you can find it by going to Windows Control Panel > Mail and taking a look to see what your default profile is set to be. Then, simply type this profile's name into the field. More often than not, the profile name will be Outlook or MS Exchange Settings, but this is not always the case.
In the MAPI Section, click on the More... The More button allows you to specify additional settings for the MAPI messaging. You can choose to set CRD to use the Exchange Server, to email reports using Exchange or Office 365, or to use Stand-Alone Outlook.
Setting CRD to use Exchange Server
If you would like to set CRD to run from just the Exchange Server, perform the following:
- From the drop-down menu, select Exchange Server.
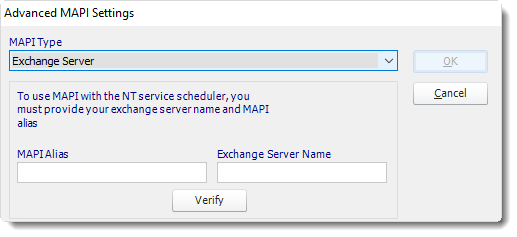
- Once you select the Exchange Server option, enter in the MAPI Alias and your Exchange Server Name in the applicable fields.
- Click Verify.
You must verify the MAPI Alias and Exchange Server Name or you will be unable to save the settings.
- Click OK to return the main messaging settings page.
- Skip to the Test Settings section at the bottom of this page to complete the Email Settings configuration.
Setting CRD to use the Exchange Web Service
If you would like to set CRD to use the Exchange Web Service, perform the following:
- From the drop-down menu, select Exchange Web Service (2007 or later).
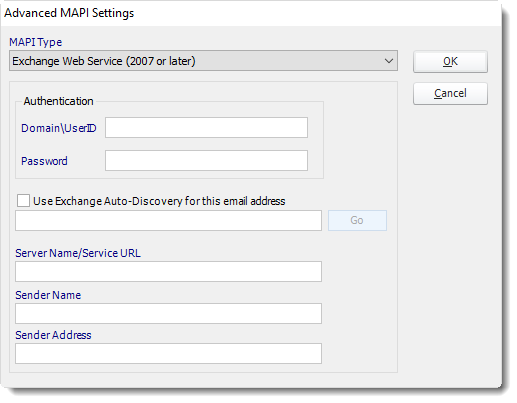
- Enter the following credentials:
- Domain\UserID: Domain and User ID
Office 365 users should enter their full email address in this field instead.
- Password: Enter your password.
- Use Exchange Auto-Discovery: This will enable you to automatically gather your exchange server settings. Enter your Email Address, click Go, and CRD should return the following settings:
- Server Name/Service URL: The name of your exchange server.
- Sender Name: Your sender name.
- Sender Address: Your sender address.
- If the settings are correct, click OK to save. You can test these settings on the main setup screen.
- Check the box next to Use currently logged in user to send emails during manual execution if you would like CRD to use the currently logged in Windows account (rather than the MAPI profile you are currently inputting) for emails that are sent when a schedule is manually executed.
- Skip to the Test Settings section at the bottom of this page to complete the Email Settings configuration.
Setting CRD to use Stand-Alone Outlook
- If you want CRD to interface directly with your Outlook profile, select Stand-Alone Outlook from the drop-down menu.
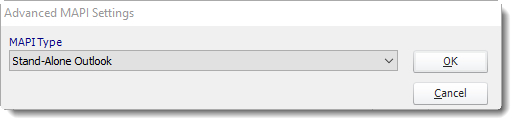
- Click OK. There is no need to enter in any additional credentials.
Using this option, CRD will not send emails if you are not logged into the server with Outlook open. This is the case even if you are running CRD as an NT service.
Skip to the Test Settings section at the bottom of this page to complete the Email Settings configuration.
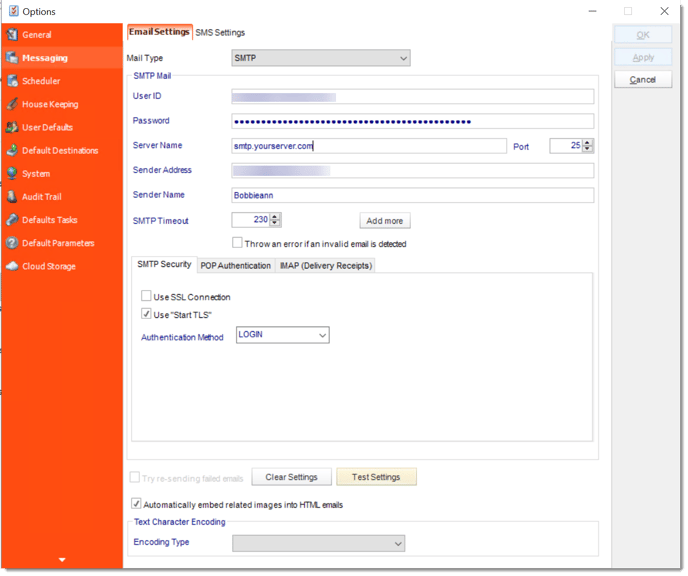
SMTP
If you wish to connect to an SMTP mail server, perform the following:
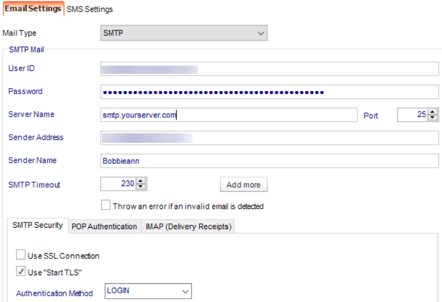
- Then enter the following credentials:
- User ID: Enter the User ID provided by your email administrator.
- Password: Enter the password provided by your email administrator.
- Server name: Enter your SMTP server details. You can use the mail server name or the IP address.
- Sender Address: When the email is received, this will be the From address displayed.
- Sender Name: When the email is received, this will be the displayed Sender Name.
- SMTP Timeout: Use this to determine how long CRD will wait for a connection from your SMTP server before declaring a failure. The default is 30 seconds, but you may need to adjust this depending on your preference.
- If you would like to set up options such as POP before SMTP (if they are required by your SMTP server) or to set your server settings for Read Receipts, click Advanced. Then, select the appropriate option from the drop down and enter the requested credentials.
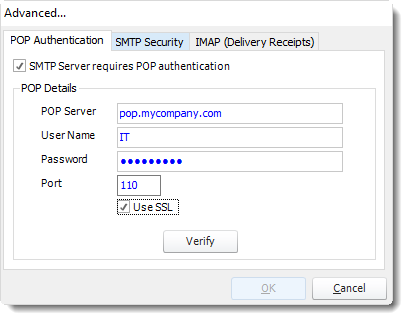
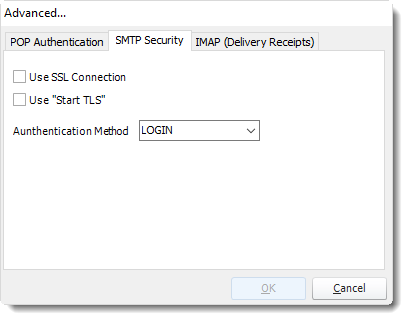
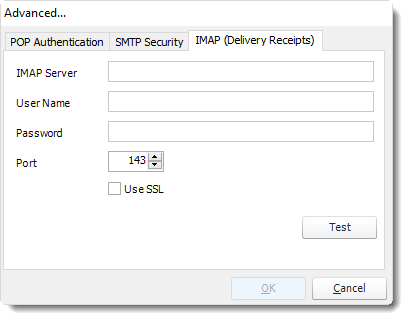
You must select Verify or Test after entering the relevant credentials in the Advanced pop-up window. If you do not verify or test the settings, you will not be able to save them.
- If you would like CRD to notify you when an invalid email address is entered, check the box next to Throw an error if an invalid email is detected.
- Skip to the Test Settings section at the bottom of this page to complete the Email Settings configuration.
Office 365
If you need to use Modern Authentication (Auth2.0 token-based authorization) to set up your messaging then select Office 365 as your mail type.
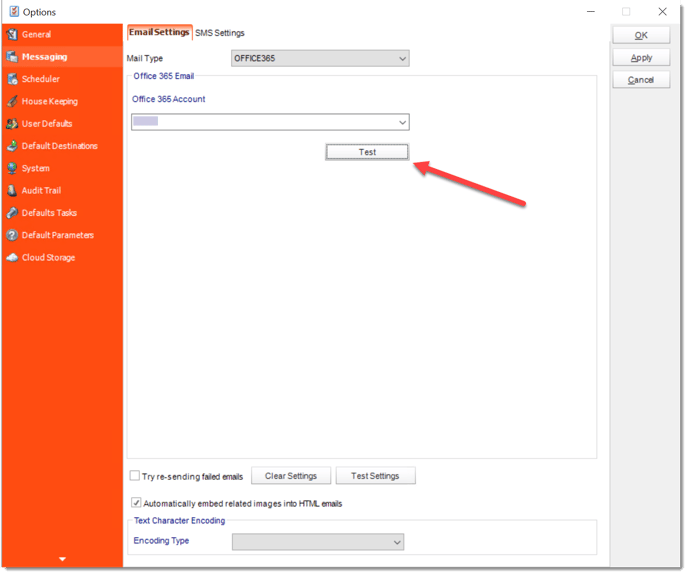
- You will then be prompted to select your Office 365 account.
- Following this, you will need to click Test to test your new email type.
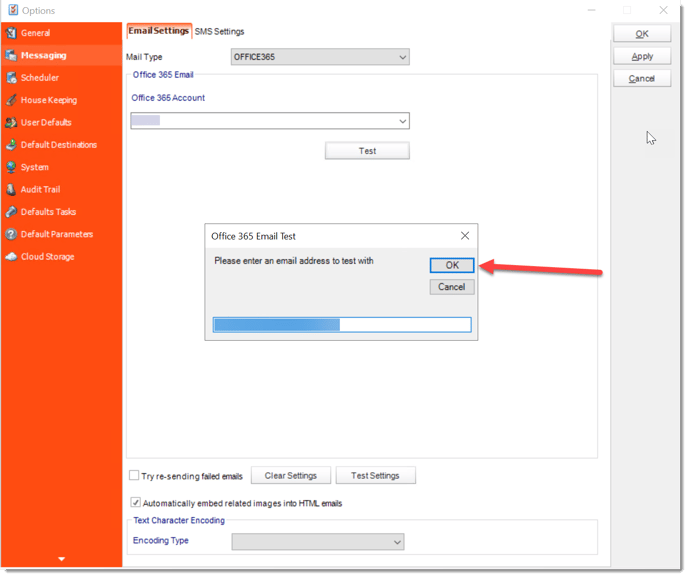
- Enter an email you would like to test with and select OK.
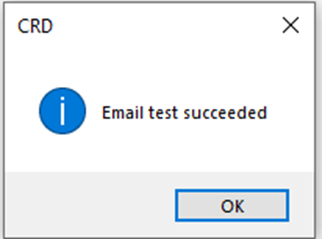
- A pop-up will appear, showing you that the email test was successful.
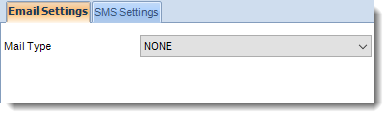
NONE
If you will not be using CRD to send emails, perform the following:
This does not affect other aspects of CRD. You will still be able to use CRD to print, export to folder, or export to an FTP destination, etc.
Test Settings
In this section, we will test your Mail Type settings to verify they work as expected. Testing the settings ensures that CRD will not encounter errors when trying to send out emails while running schedules. To test the settings, perform the following:
Verify the settings work
- Click Test Settings
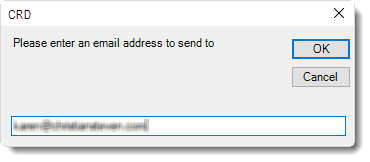
- Enter an email address to send the test email to.
- Click OK.
- You should receive a pop-up stating "Email sent successfully!".
- Click OK.
If you receive an error message, verify that your server information is listed correctly.
Check the appropriate options
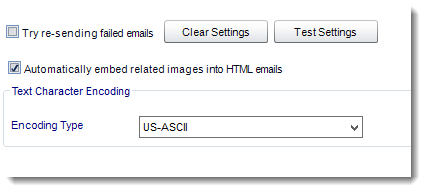
- If you wish to clear the currently entered mail settings and start over, click Clear Settings.
- If you would like CRD to keep trying to send emails after they've failed to send once, click the checkbox next to Try re-sending failed emails.
- If you would like CRD to Automatically embed related images into HTML emails, verify the checkbox next to this option is checked.
By default, CRD will automatically embed an image if the link is placed in the body of an HTML email. Keep this box checked if you wish for this to occur. If you would rather the image link be placed in the HTML email body (rather than the image itself), then uncheck this box.
- If you would like to change the Text Character Encoding, select the appropriate choice from the drop-down.
Encoding is used by Operating Systems to determine how to display emails on the recipient's PC. US-ASCII is standard for most languages. However, if you are using Japanese characters, then you should select ISO-2022-JP.
- Click Apply at the bottom of the Options window.