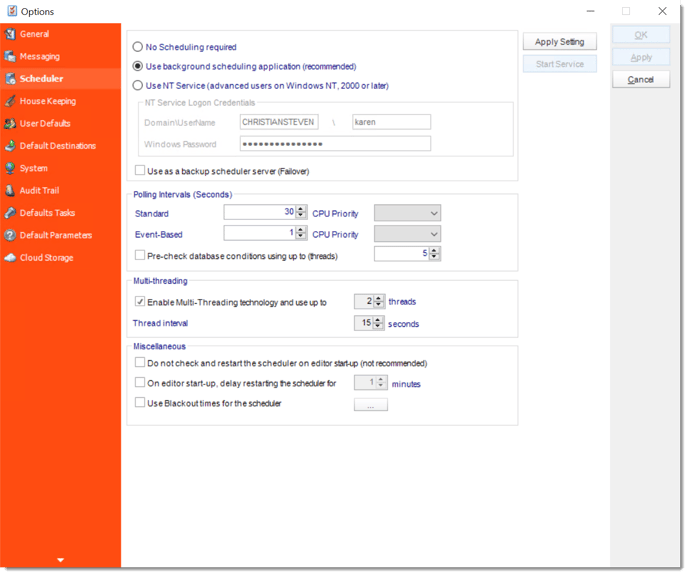
Options - Scheduler
- Go to Options.

- Select Scheduler.
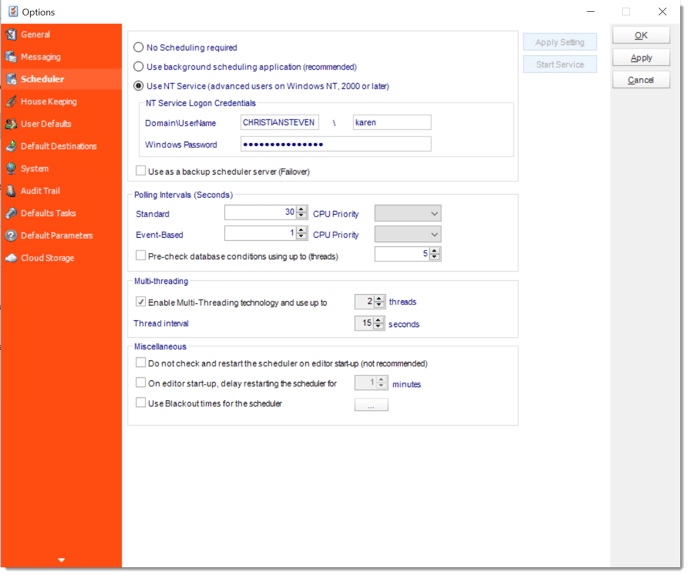
The Scheduler is the key function that determines when and how tasks are triggered. Rather than using Windows Task Scheduler, CRD uses ChristianSteven's proprietary scheduler to execute tasks. This creates a far more reliable, dedicated scheduling system.
Within CRD, the following scheduling options are available:
- No Scheduling required
- Use background scheduling application (recommended)
- Use NT Service (advanced users on Windows NT, 2000 or later)
No Scheduling required
CRD can be used as an ad-hoc report managing tool with no scheduling. If you do not want any automated scheduling, select this option. However, this means you will need to execute each schedule manually.
This option is also used to uninstall any previously installed scheduling services.
To choose this options, perform the following:
- Click the radio button next to No Schedule Required.
- Click Apply Setting. This will uninstall any previously installed Schedulers and apply the new settings.

Use Background Scheduling application (recommended)
The background application scheduler is a windows application which monitors CRD and fires off reports when they become due.
The background scheduler is an application independent of CRD. Therefore, it will stop working if the user logs off or the server is shut down. If you want to be able to log off the server without stopping CRD scheduling, then you must install and use the Windows (NT) Service Scheduler.
To use the background application scheduler, perform the following:
- Select the radio button next to Use background scheduling application (recommended).
- Click Apply Setting.
- Click Start Service to start the scheduler.
- Click Apply at the bottom right of the Options window.

Use NT Service (advanced users on Windows NT, 2000 or later)
The NT service is a Windows service. It installs into the Windows "Services" control panel. As this is a windows service, it will continue to run scheduled reports even when there is no user logged on to the PC.
The server MUST be powered on in order for the NT Service to work. If the server is not on, the NT Service cannot run and schedules will not kick-off as scheduled.
IMPORTANT
Prior to selecting the NT Service option as your Scheduler, you must ensure that the following pre-requisites have been met:
- You are logged onto the server as the NT Service user
- The above listed NT Service user has the following windows security rights on the PC you are installing it on:
- Act as part of the operating system
- Log on as a service.
- Is a member of the Local Administrators security group
- If you are using MS Exchange Server, the above listed NT Service user must have full rights to the designated email account.
These security requirements are required by Windows. If you are unsure how to set up Windows security settings, your system administrator will be able to help.
Setting up the NT Service
Once you have ensured that the above prerequisites have been met, perform the following:
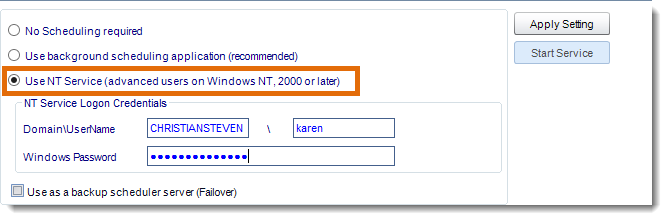
- Select the radio button next to Use NT Service (advanced users on Windows NT, 2000 or later).
- Enter the following credentials:
- Windows Domain: Type in the Domain name. If you are using MS Exchange Server, then this must be your network domain so that CRD can connect to your Exchange server.
- Windows User Name: Enter the username for the above user.
- Windows Password: Enter the password for the above user.
- Click Apply Setting.
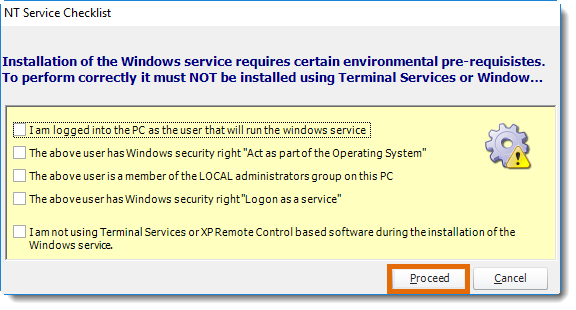
- Verify that each of the requirements listed on the NT Service Checklist window have been met. If so, check each of the boxes and click Proceed.
If you have not completed the listed requirements and/or do not check all of the boxes, you will be unable to continue setting up the NT Service.
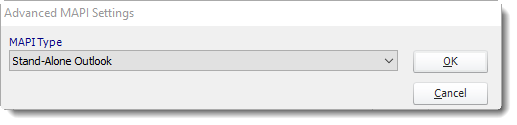
- If you have configured CRD to use MAPI mail, you will be prompted to select the type of email system you are using with CRD: Stand Alone Outlook, Exchange Server, or Exchange Web Service. Once you have selected the appropriate option from the drop-down menu, click OK.
- The NT Service will now install. Once completed, the service will be visible in the windows "Services" control panel and will be known as CRD. You should also see CRD Monitor. This is a monitoring service which ensures that the CRD service is continually running.
- If it is not already grayed out, select Start Service.
- Click Apply at the bottom right of the Options window, if available.
If any of the above credentials are changed (e.g. the password is changed or times out), the service will stop running. Under these circumstances, you will have to uninstall it and re-install it ensuring you enter the new credentials correctly. We recommend that your system administrator ensures that the NT user's credentials never change and never time out.
Additional Scheduling Options
- Use as Backup Scheduler: CRD's Fail over module can shunt the processing load from a failing server to a backup server. This option guarantees that your schedules will execute even if the primary server is non-functioning.
- The primary server must have its scheduler active.
- The primary CRD server must have its database stored in an ODBC compliant database.
- The intended backup installation must be connected to the ODBC compliant database.
Polling Intervals
- Standard: The schedule polls the CRD schedule database at regular intervals to see if there are any schedules to execute. The polling interval defines how often you wish scheduler to check.
- Event Based: Event-Based Schedules run on their own thread.
- Pre-Check Database conditions using multiple threads: Using Multi-threading technology, CRD will check multiple conditions for multiple schedules using up to 5 threads. This option can increase the speed at which CRD runs Event Based Schedules.
Multi-Threading
- This section allows up to 8 reports to be exported simultaneously.
System resources will be shared, so this will not always mean that reports will take 1/8 the normal time.
EXAMPLE: You have 4 reports. Each one takes 15 minutes to export. Using a single thread, it would take 1 hour to complete the export. Using multiple threads, you would expect it to take 15 minutes for all 4. However, the sharing of your system resources by 4 reports may result in each report taking longer than 15 minutes and the total time for 4 reports may be more than 15 minutes, but it will be less than an hour.
Miscellaneous
- Do not check and restart: Used if multiple people are logging into the server while using background scheduling.
- On editor start-up, delay restarting: Upon logging into server the scheduler should be delayed to restart.
- Use blackout times for scheduler: Set days and times when you do not want the scheduler to run.
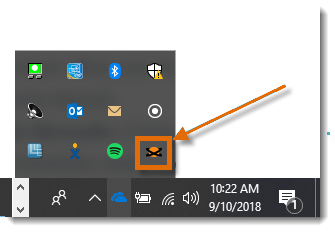
CRD/Scheduler Agent
Once you have successfully set up the scheduler you will be using, you will gain access to the CRD/Scheduler Agent, which gives you easy access to many scheduling options. The CRD/Scheduler Agent appears as a red and white bell icon that is visible in the system tray (next to the clock) when the Scheduler is running. It looks like this:
- Double-clicking this icon will bring up the full Scheduler Agent.
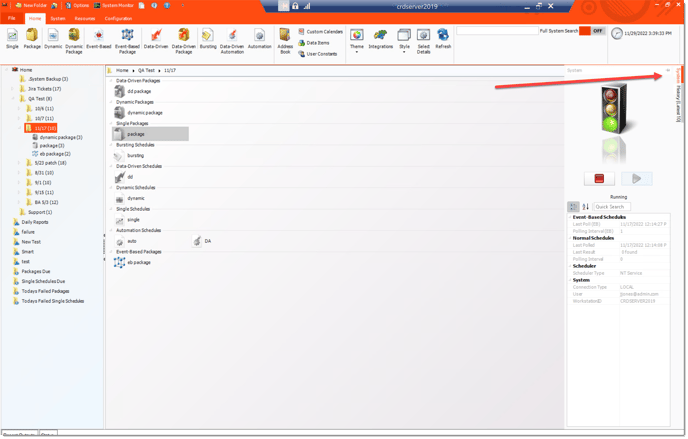
- The full Scheduler Agent is also available within CRD on the right-hand side of the screen (after you click System).
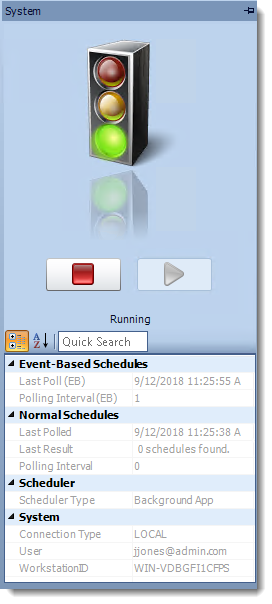
- Stopping the Scheduler: To stop the scheduler using the Agent, open the scheduler agent, and click the Stop button. The stop light will switch to yellow then red. This will stop the scheduler and no reports or task will execute. If you open CRD, the scheduler will automatically restart.
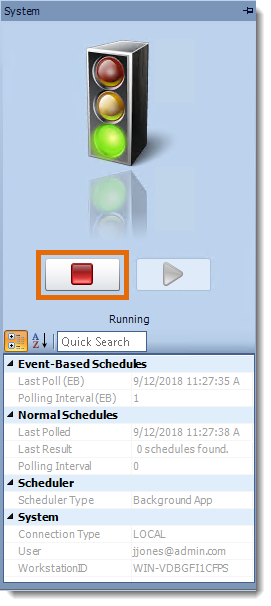
You can turn off the automatic restart of the Scheduler using the instructions listed in the Miscellaneous section above.
- Starting the Scheduler: To start the Scheduler using the Agent, open the Scheduler Agent, and click the Start button. The light will switch from red to yellow to green. Once enabled, your schedules will resume their normal running.

You can also review other system information such as the polling interval, the number of schedules found during the last poll, and the type of Scheduler the system is using.
If you do not wish to open the CRD/Scheduler Agent, right-click the system tray icon to gain access to the following functions:
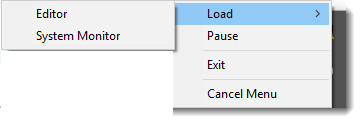
- Load Editor: Opens CRD
- Load System Monitor: Opens just the CRD System Monitor.
- Pause: Pause the schedule.
- Exit: Closes the CRD/Scheduler Agent.
- Cancel Menu: Cancel the schedule.