Automation Schedule
Automation Schedules give you the ability to write automated processes using CRD standard Custom Actions.
Automation Schedules make up the Business automation arm of CRD. Beyond reporting, you can automatically update databases, set registry keys, move files, and even create reports directly from database data.
Combine multiple tasks to automate database maintenance, integration, or as an automated way to communicate. Combine these functions with other schedules such as the Event-based Schedule to unlock even more powerful functionality.
To combine automation tasks with a schedule type, use a custom task. Custom tasks are usually created toward the end of a Report schedule Wizard.
How do I Create an Automation Schedule?
- Go to Automation.

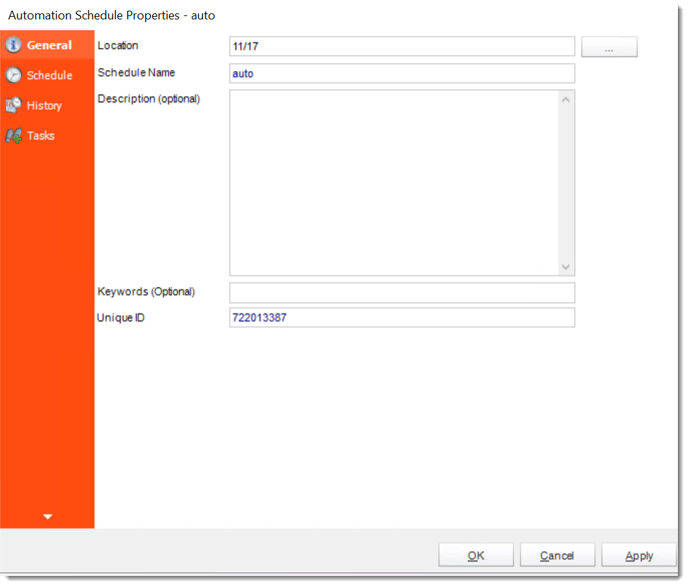
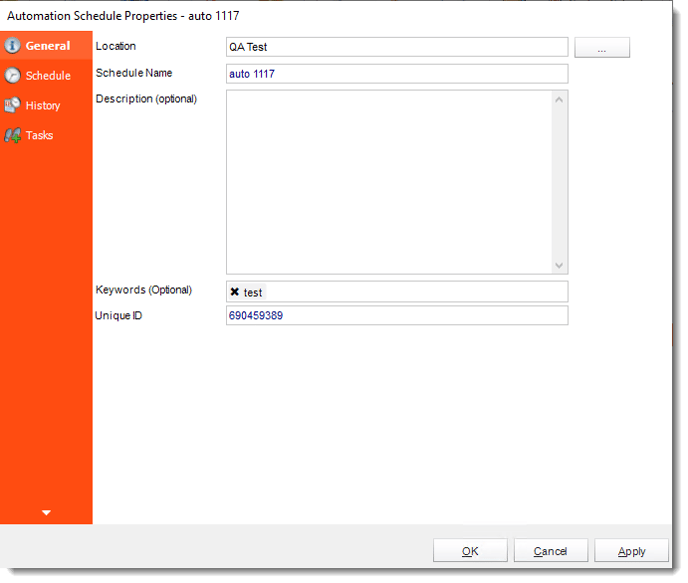
General Wizard
- Parent Folder: The CRD folder where the package is stored.
- Schedule Name: The name of the package.
- Description: Add a Description to the schedule to better identify it.
- Keyword (optional): Enter some keywords which can be used later by Smart Folders to identify this schedule.
Click Next to go to the next wizard section.
Schedule Wizard
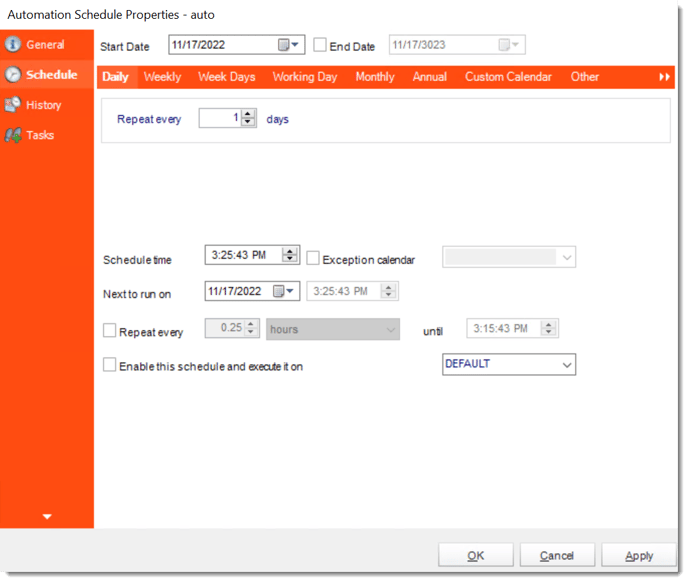
In this section, you will decide when the report will execute. There are a variety of options:
- Daily: Run a report every day or at a frequency of days.
- Sub options: Repeat every X Days.
Example: Run the schedule every 3 days.

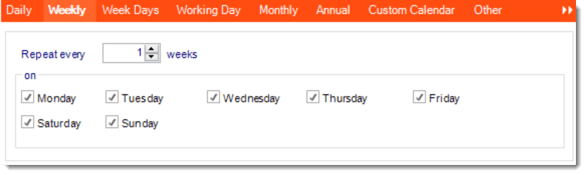
- Weekly: Run a report on a weekly time frame.
- Sub options: Repeat every X weeks.
Example: Run the schedule every 2 Weeks.
- On: Select the specific days of the week the schedule will run. If only once a week, select only the day of the week it will run.
Example: Run every Monday, Wednesday, and Friday.
- Week Days: Run the schedule Monday through Friday.

- Working Day: Run the schedule starting on a specific day of the month. Indicate which day of the month the schedule will run. E.G. run the schedule on the 4th working day of the month.

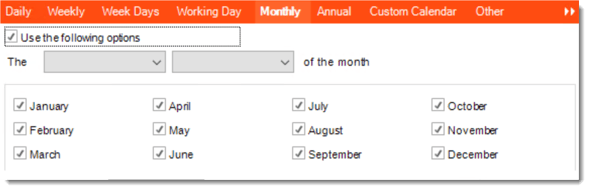
- Monthly: Run the schedule on a monthly time frame.
- Use the following options: Checking this box will enable you to select frequency options such as the “last Thursday of the month.” Also you can include or exclude specific months from the schedule.
- Annual: Run the schedule every year at a specified time.

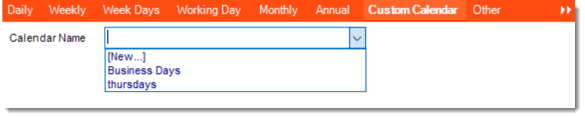
- Custom Calendar: Select the custom Calendar you wish to use. You can create a new custom calendar from the menu as well. Please see Custom Calendars for more information.
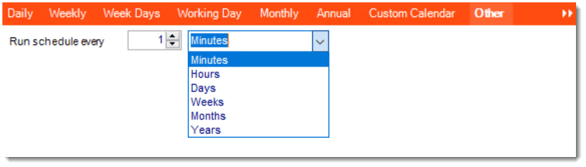
- Other: Other scheduling options.
- Run Schedule every X Minutes, hours, days, weeks, months, years.
- None: No scheduling is required for this item.

- Start Date: Enter the desired starting date for the schedule. This section can be the current date (providing the schedule time has not already passed) or a date in the future.
- End Date: If the schedule is due to end after a certain date enter that here. If the schedule is to run indefinitely, then leave it blank.
- Schedule time: On the Next Run date, the package will run at this time.
- Exception Calendar: Choose a calendar that will instruct the schedule to NOT run on those specified days. Please see Custom Calendars for more information.
- Next to run on: The package will next run on this date.
- Repeat Every: Rerun the package every x minutes from the scheduled time until your specified time.
For example, you can set up a daily package to run every day at 8 am, and to run every hour until 5 pm.
- Until: After this date, there will be no automated scheduling of this package.
- Enable this Schedule: Uncheck this option to Disable the package. Disabled packages are not deleted, but they do not execute automatically. You can re-start the automatic scheduling at a later date by checking this option again. Or right-clicking this schedule from the main screen and selecting Enable.
Click Next to continue to the next wizard section.
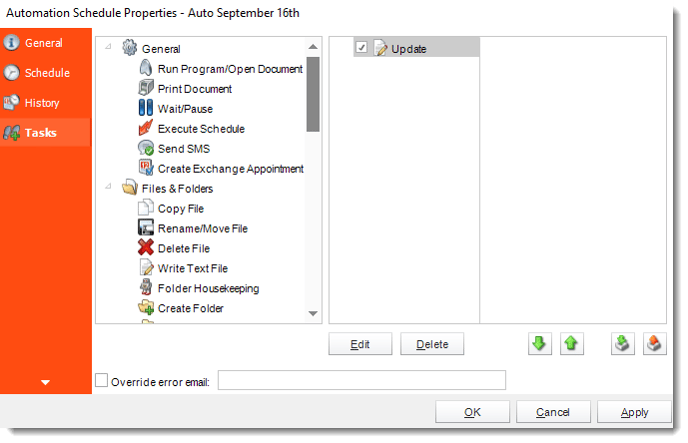
Custom Tasks Wizard
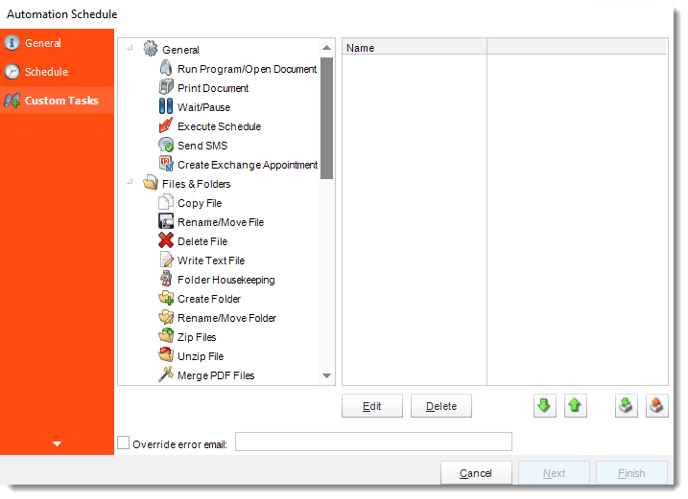
- In the section, you have the option of setting up custom tasks. Custom tasks are business process automation tools that can be auto-triggered before or after a report runs.
- For more information on Custom Tasks, click here.
- Override error email: Check this option if you want to specify an email address that receives the error alert when it fails. This overrides the default email specified in Options.
- If you have no desire to add a Custom Task, you can click finish to complete the schedule.
Automation Schedule Context Menu
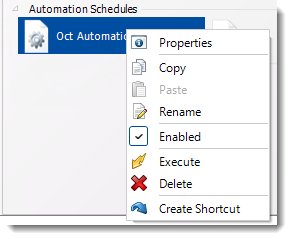
To access the schedule's context Menu right-click on the schedule
- Properties: Selecting this option will bring up the "Properties" module containing configuration information for that schedule.
- Copy: Use this to copy an existing schedule. You can then paste it into another folder or the same folder. Simply open the folder you wish to paste to, right-click in the "white" space and select "Paste". Follow the on-screen instructions to complete the process.
- Paste: Paste a previously copied schedule.
- Rename: Rename a schedule.
- Enabled: Schedules are enabled when there is a check beside this option. To stop a schedule from running, or to "pause" it for a while, select this option to remove the check. Disabled schedules will not run till they are enabled again.
- Execute Schedule: This will execute the schedule immediately. Note that the next run date and time is not moved on as a result of a manual execution. They only move on if the schedule is run automatically by one of the schedulers.
- Delete Schedule: Selecting this option will delete the schedule.
- Create Shortcut: Use this option to create a shortcut you can save in any location on your PC. Execute the shortcut to execute the schedule in CRD.
Automation Schedule Properties
- To access your schedule properties, right click on a schedule and select properties.
- Similar to the schedule wizard, you can adjust settings to your schedule such as timing or custom tasks.
- General
- Schedule
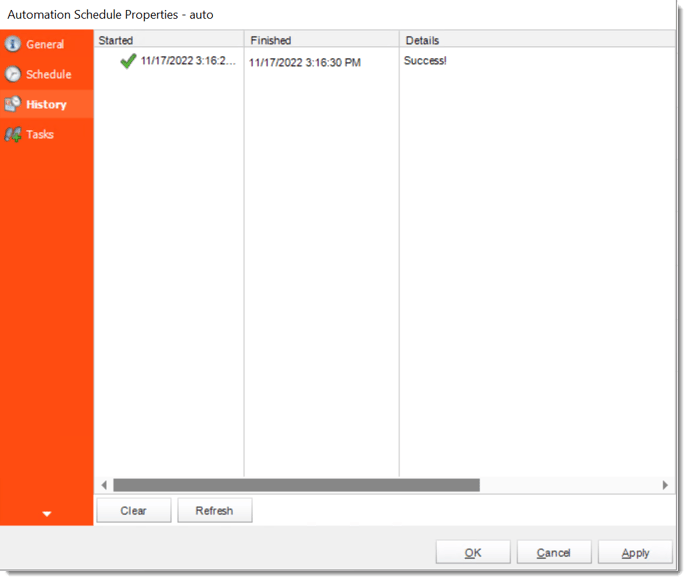
- History: Review the schedule's history. Successes, failures, and other data is located here.
- Tasks