Groups Manager - Users & Groups
The Groups Manager section allows you to create, modify, and remove user groups. You have the option to connect the group to an Active Directory (AD) Group. By linking one or more users to a group, you can assign specific permissions for accessing different areas within IntelliFront BI. Users with User/Group Management rights will be able to access the Groups Manager.
How do I create a new group?
Step 1 - Navigate to the Users & Groups section and select Groups Manager.

Step 2 - On the Groups page, click on the option to create a New Group.

- Step 3 - Enter the desired group name in the provided field and click on the pencil icon to save the name.
- Step 4 - You may add a description for the group in the designated field.
Assigning Group Permissions
Step 1 - If applicable you may Grant Administrator access to all members of the group by selecting the option to Assign Administrator rights to all members of this group streamlines the process, saving time by providing Administrator privileges to the entire group simultaneously.
Step 2 - Choose a user from the dropdown list by selecting the 'Select User' option, then click on 'Add User' to add them to the group.
Repeat this step to add multiple users.

If you would like to assign group control to a user, you can now do that under Can Manage Group.
Step 3 - If no Administrator rights are required, navigate to the Permissions Tab to select the specific permissions that will be assigned to all users linked to this group.

Step 4 - select a board this group can access and click Add Board. Repeat this step to add multiple boards.
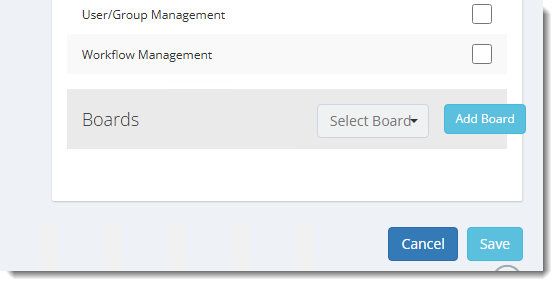
If no boards are selected, then the users in the group will have access to all boards.
Step 5 -In the BI Gallery Tab, administrators can select the content that will be visible to Group members upon logging into IntelliFront BI. Simply choose the items that you want to be displayed for the group members.

Link AD Groups to User Manager
You have the option to connect the Group with an Active Directory (AD) Group. By doing so, you can associate one or more users with the group and specify the permissions they have for accessing different areas of IntelliFront BI.
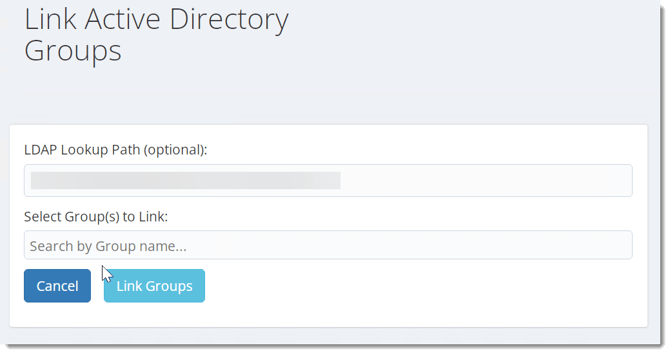
Step 1 - Add your Active Directory by clicking on the "Link AD Groups" button.

Step 2 - Provide a LDAP lookup Path (optional).

Step 3 -Enter the "Search by Group name" box to reveal a list of Active Directory (AD) Groups, then choose the specific group you wish to link.
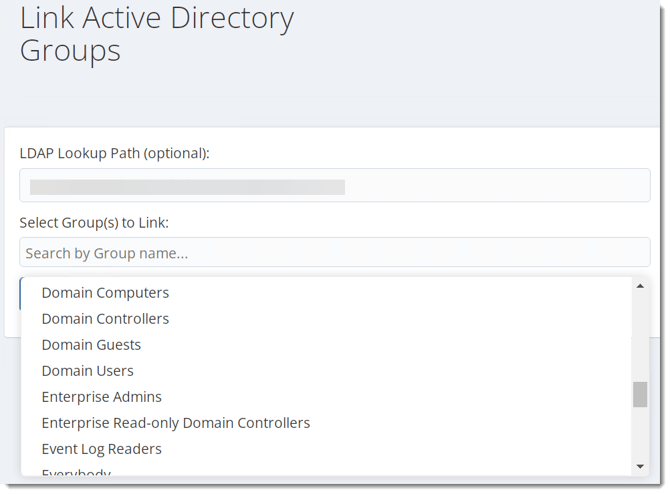
Step 4 - Continue selecting groups by repeating step 3 until you have chosen all the groups you want to link.
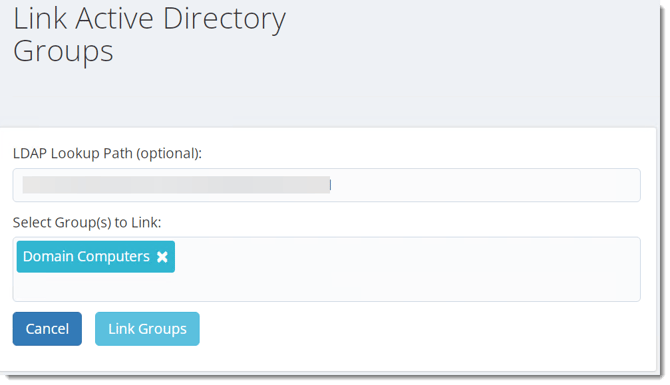
Step 5 -Click the "Link Groups" button to complete the linking process.

The Active Directory Group has been successfully linked to the IntelliFront BI Users Group.