How do I import a Dataset in IntelliFront BI?
This is a step-by-step article on how to import a created dataset into IntelliFront BI.
Datasets - Import Dataset
This is a step-by-step article on how to import a created dataset into IntelliFront BI.
You can only import Database Query Dataset type in IntelliFront BI.
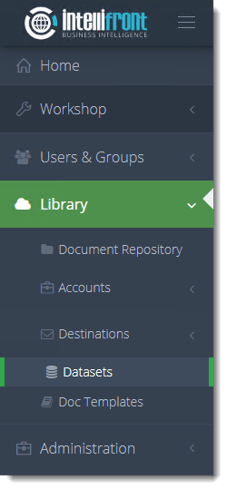
- Go to Library and select Datasets.
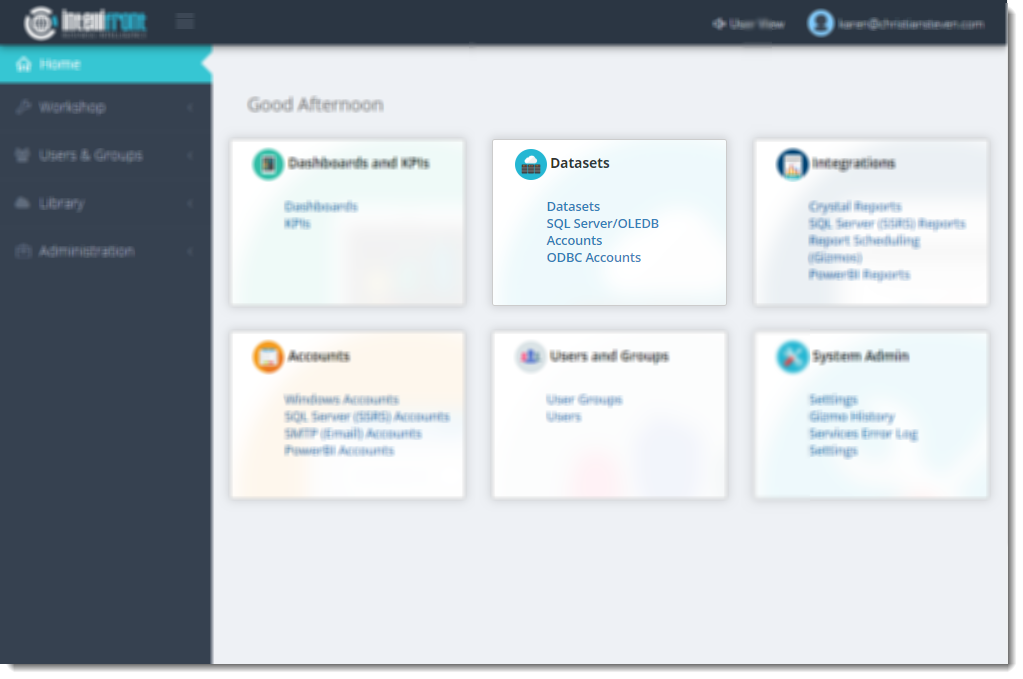
- Or select Create Dataset from the card on the home screen.
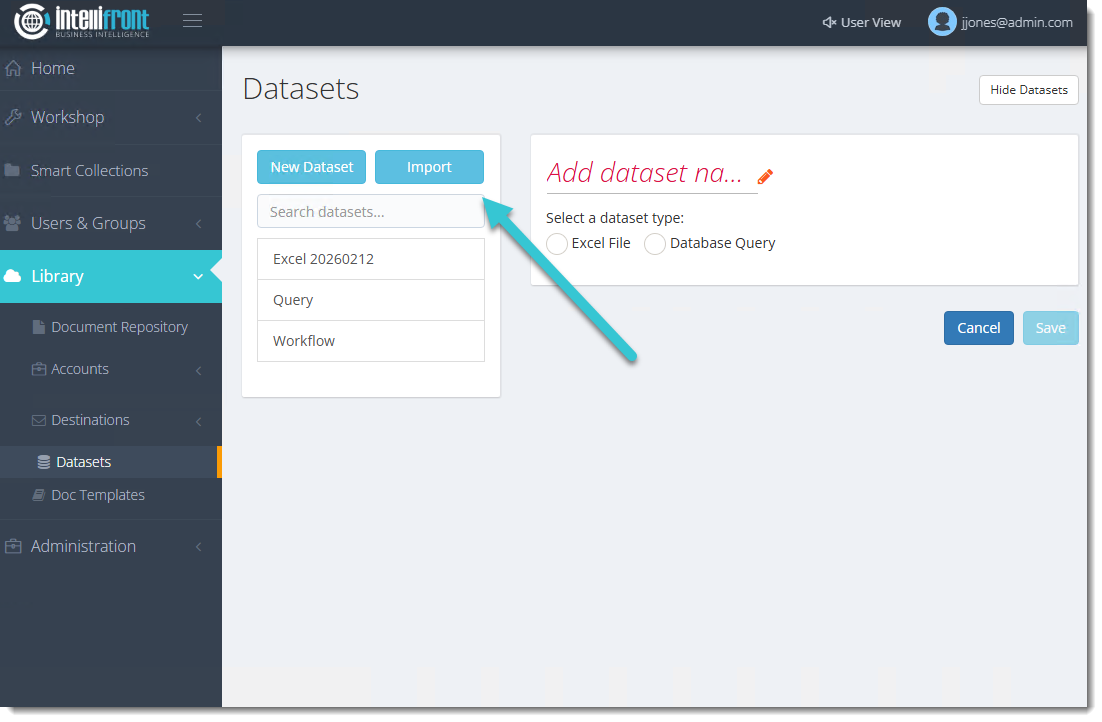
- Click Import Dataset.

- Click Choose File to browse for the dataset.
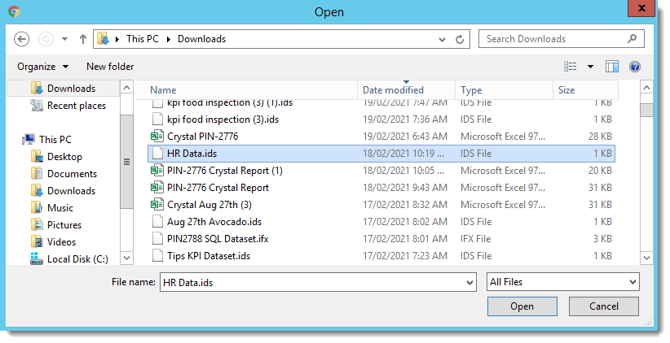
- Select the Dataset you would like to import.
- Click Open.

- Select an Account for the Imported Dataset using the drop-down menu.
The Accounts must have been set up from within Library Account first.
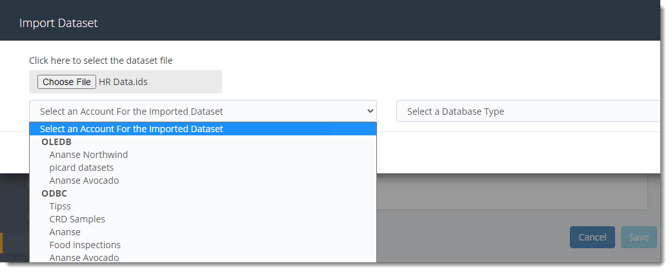
- Select a Database Type using the drop-down menu.


- Click Import. You have now imported a dataset.
Dataset Caching
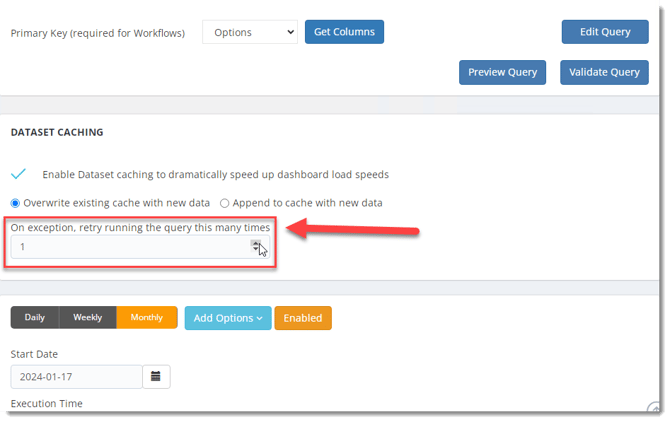
- Dataset Caching: This option will be checked by default since the imported Dataset was checked in a previous IntelliFront BI. This option allows IntelliFront BI to cache the dataset at regular intervals throughout the day to speed up Dashboard Load times.
- Overwrite Existing Data: select this option if new data is to overwrite the existing cached data each time it caches.
- Append to Existing Data: Upon cashing, select this option if new data is to be added to the existing data.
- Retry Running the Query: Dataset Caching now includes an option to set a maximum number of retries within a specified time frame. This allows you to configure how many times the caching process will attempt to run if there are any issues, and the maximum duration for these retries.
Set up the Dataset Caching Frequency
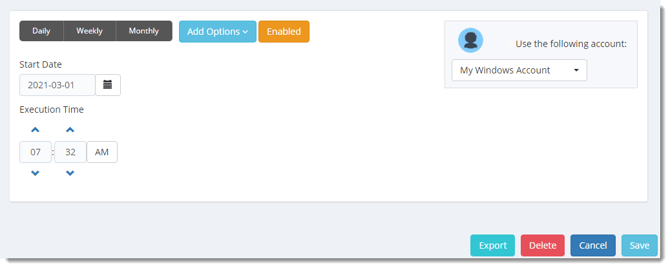
- Select a start date and time for the caching.
- Start Date: Enter the desired starting date for the schedule. This section can be the current date (providing schedule time has not already passed) or a date in the future.
- Execution time: The gizmo will run at this time.
- Use the following account: Select the windows account to send the report.
In this section, you will decide when the dataset will execute. There are a variety of options:
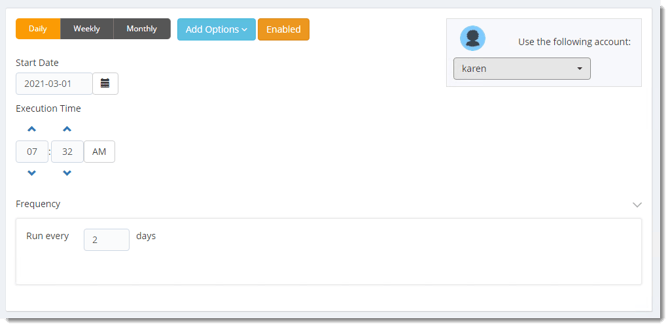
- Daily: Run a dataset every day or at a frequency of days.
- Sub options: Repeat every X Days.
Example: Run the dataset every 3 days.
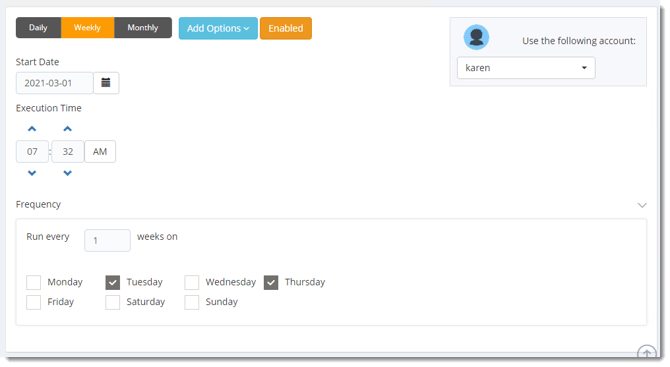
- Weekly: Run a dataset on a weekly time frame.
- Sub options: Repeat every X weeks.
Example: Run the dataset every 2 Weeks.
- On: Select the specific days of the week the dataset will run. If only once a week, select only the day of the week it will run.
Example: Run every Monday, Wednesday, and Friday.
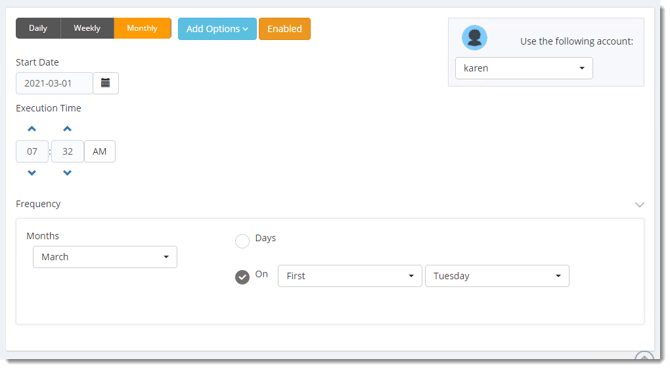
- Monthly: Run the dataset on a monthly time frame.
- Frequency: Select frequency options such as the “last Thursday of the month.” Also, you can include or exclude specific months from the dataset.
Add Options Menu
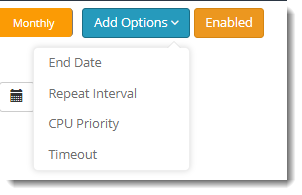
- End Date: If the dataset is due to end after a certain date enter that here. If the dataset is to run indefinitely, then leave it blank.

- Repeat Interval: Rerun the dataset every x minutes from the scheduled time until your specified time.
For example, you can set up a dataset to run every day at 8 am and to run every hour until 5 pm.

- CPU Priority: Set the priority level of the schedule. This will come into play when other datasets are running at the same time. If the priority is set to High then the dataset will take priority over other datasets in the queue.
- If the priority level is set to BelowNormal then it will be at the bottom of the queue and the other datasets will be running first.

- Timeout: Stop if the task is running for more than X minutes or hours.

- Once finished, click Save to save the imported Dataset.
