New Reports
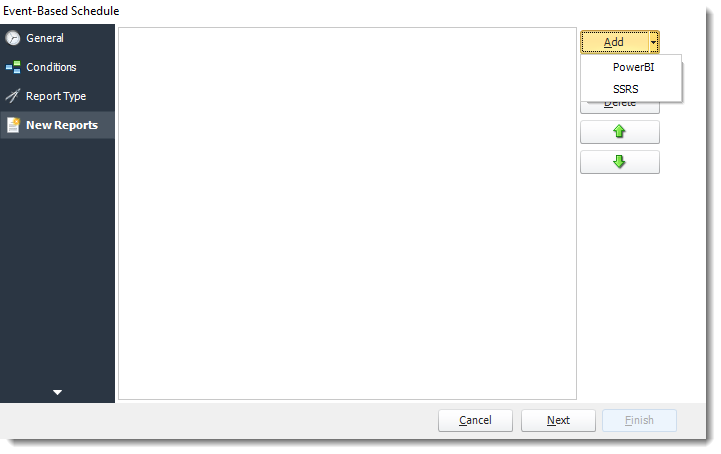
- Select New Reports and click Next.
- Click Add and select Power BI.
- Report Properties will appear.
Report Properties
Report
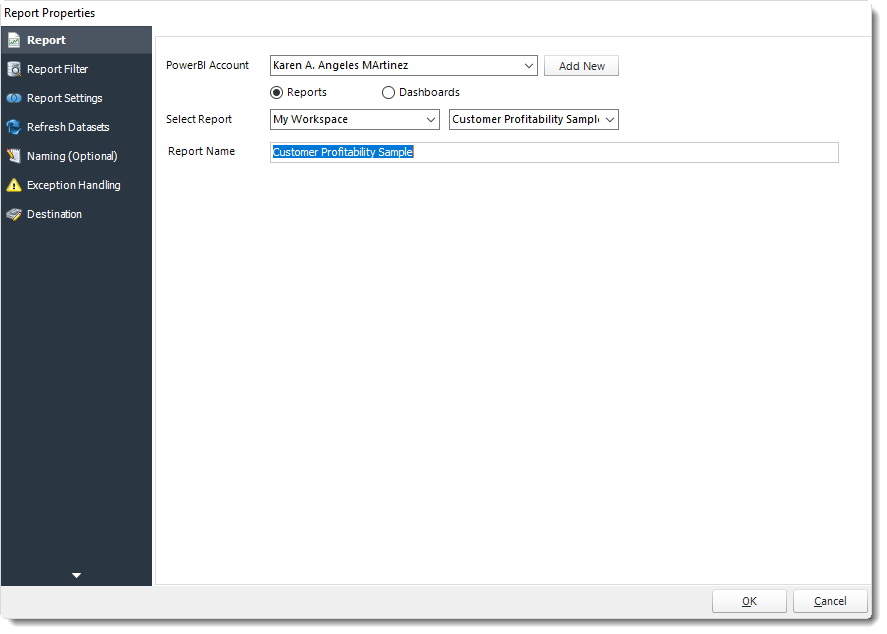
- Power BI Account: Add the account to send the report.
- Select Report: The path to the required report.
- Report Name: Enter a name for the report.
Report Filter
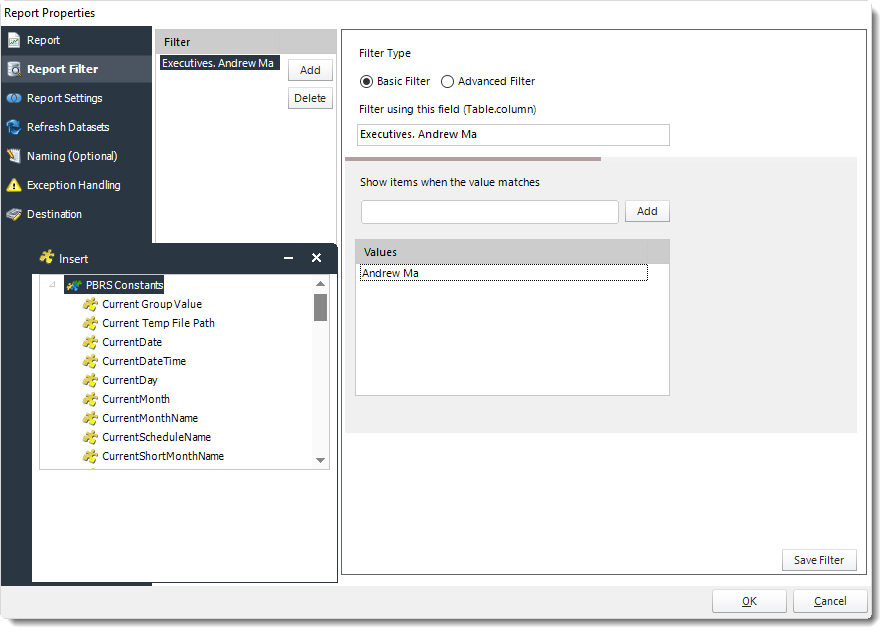
- In this section, you will determine the parameters for your report (if any). If your report has no parameters, you may skip this section by clicking next.
- Preview: View the dashboard/report output given the selected filters.
- Filter Type: You may choose between Basic Filter or Advanced Filter.
- Filter using this field (Table.column): Choose the table and column you would like to set up the filter.
- Show items when the value matches (Basic Filter): Insert the value you would like to add and then click Add.
- Show Items when the value (Advanced Filter):In this option, you have the option to show items and select the option from the drop-down menu.
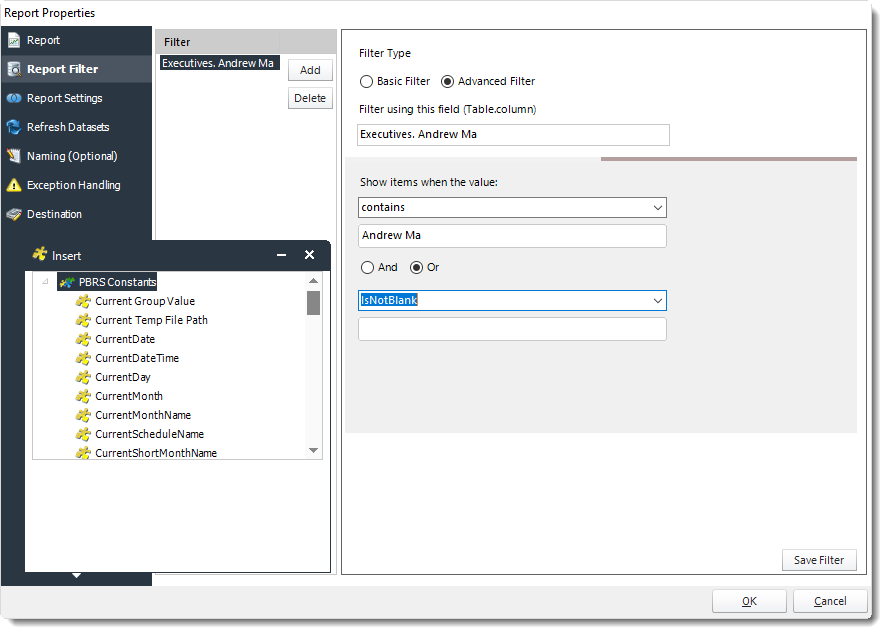
Click Save Filter to add the filter.
Report Settings

- In this section, you may set up the dashboard/report.
- Left margin (% of width): The size of the left margin as a percentage of the page width.
- Page Height(pixels): The height of the rendered file.
- Page width (pixels): The width of the rendered file.
- Right margin (% of width): The size of the right margin as a percentage of the page width.
- Maximum Loading Time(secs): The maximum amount of time that the renderer will wait before timing out.
- Minimum Loading Time(secs): The amount of time that PBRS will wait for the dashboard/report to load before rendering it to file.
- Page Number (Optional): The Power BI page(s) to render. Only applicable to Power BI reports. You can specify a page range e.g 1-5 or specific e.g. 1,3,5.
- View Style: How the report fits on the page: Fit to Page, Fit to Width, or Actual Size.
- Enable snapshots and keep snapshots for "X" Days.
- Preview: By clicking here you may see the preview dashboard/report.
Refresh Datasets
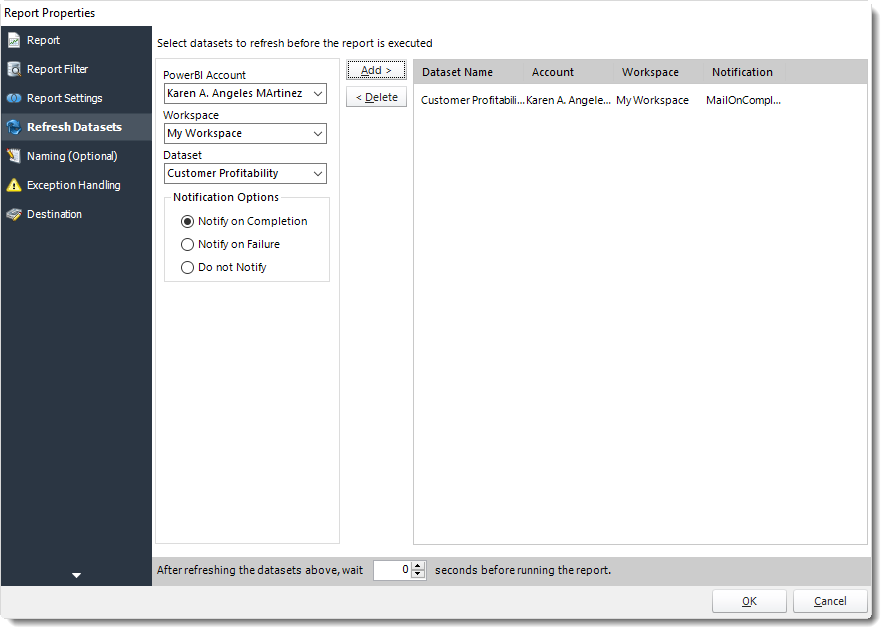
In this section select the datasets to refresh before the report is executed.
- Power BI Account: Select the account to refresh datasets.
- Workspace: The path to the required report.
- Dataset: Select the dataset.
- Notification Options: Receive a notification after the report is executed, the report failed to execute, or do not receive a notification.
- After refreshing the datasets above, wait 'X' seconds before running the report.
Naming (Optional)
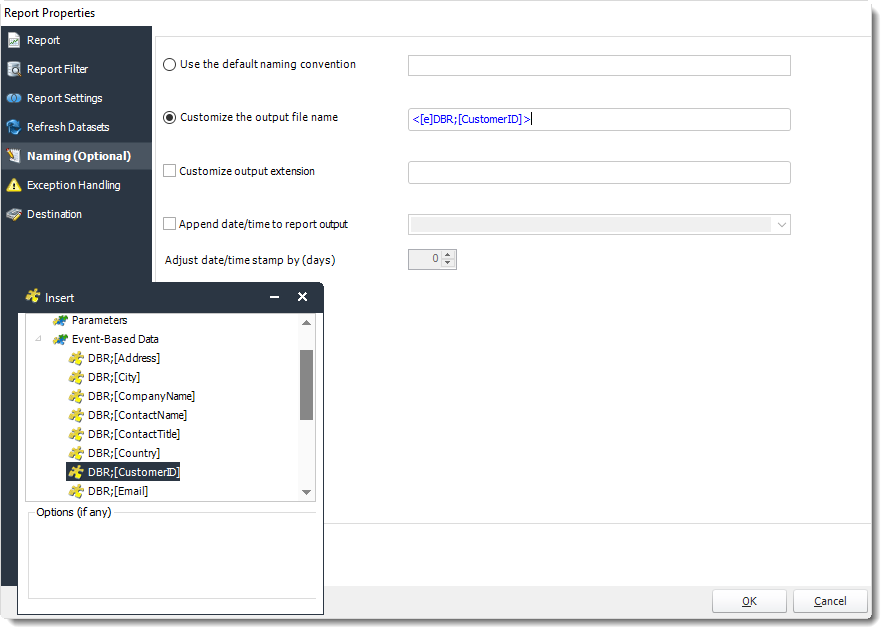
- With PBRS, you can use Event Based Data inserts to customize the output file name of the report.
- Default Naming Convention: PBRS will name the output file in the following format: reportname.format extension, e.g. Catalog Report.pdf.
- Customize the output file name: Choose your own filename or right-click and use the Insert Function to insert a value.
- Customize output extension: Choose your own extension. This is useful for system integration. For example, the default extension for a character separated file is "CSV," but you can give your export an extension of "txt" so that the file can be read by another already existing system you may have. You may also right-click and use the Insert Function to insert a value.
- Append date/time: This is useful for the following reasons:
- If the filename is the same each time, and it is being exported to the same folder each time, then it will be overwritten by the latest one each time. By appending date and time to the filename, each file remains unique, and no files are overwritten.
- You can track which reports ran and when they ran by looking at what the report is named.
Exception Handling
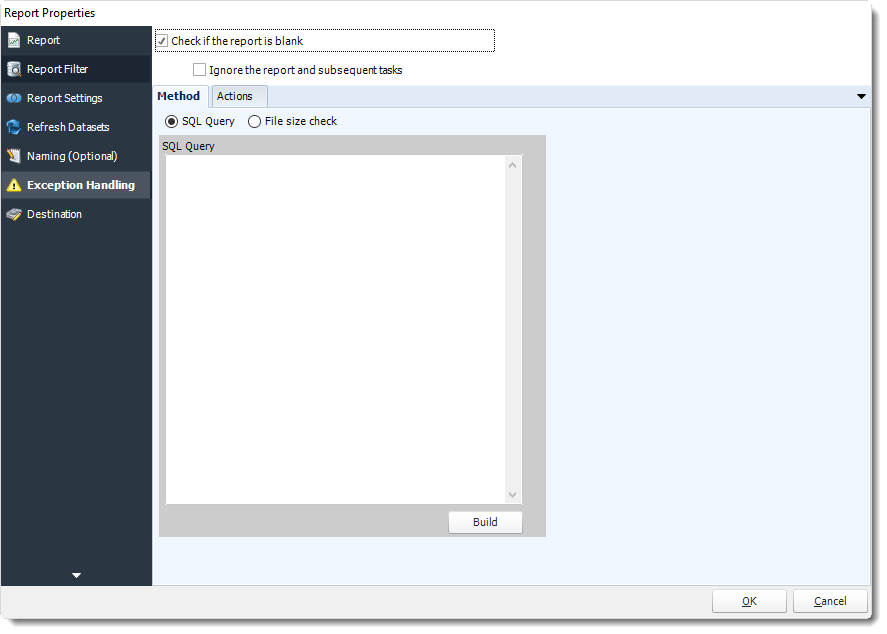
- Check if the Report is Blank: If a report is blank because it genuinely returned no data, recipients can misconstrue this as an error with the scheduler. This option allows you to identify genuine empty reports and instruct PBRS on what to do with them.
- Ignore the report and subsequent tasks: If the report is blank, do not send the report. The report will not be delivered to the destination. No custom tasks will be run.
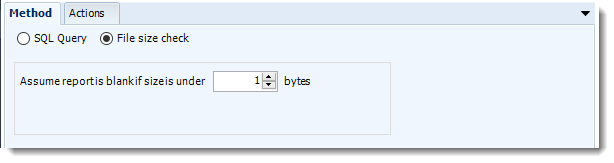
Method
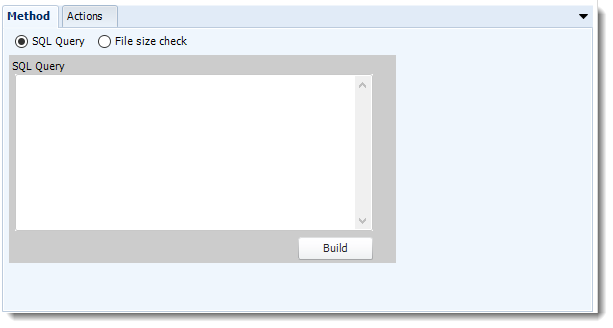
- Select the Method that will determine whether a report is blank.
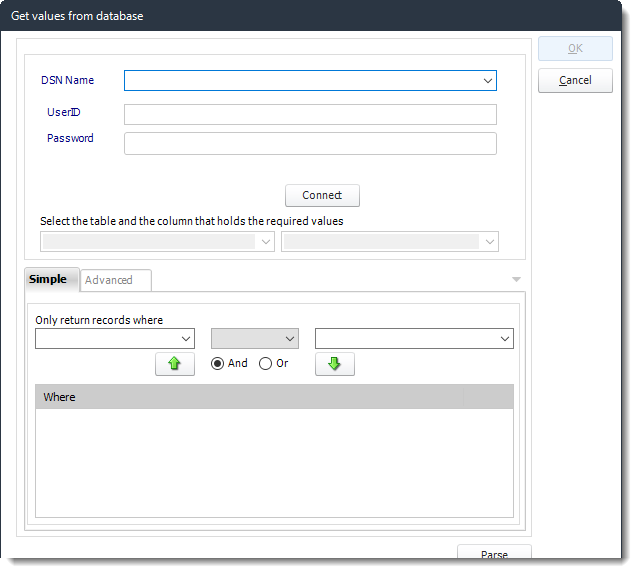
- SQL Query: Select this option to use a user made query that will determine if the report is blank. If the query returns no results, the report is blank.
- Click Build.
- Get values from a database window will appear. For more information about Get values from database, click here.
- File size check: Assume reports is blank if size is under "X" bytes.
Actions
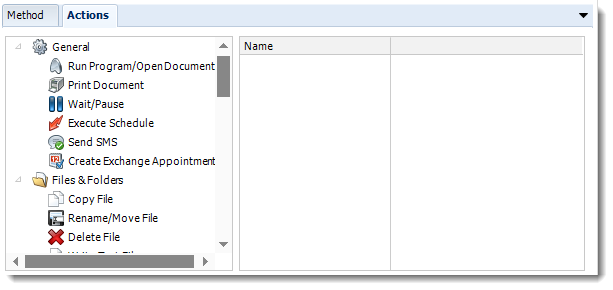
- Select an action from the task list. This task will be executed in the event that a schedule is blank.
- For more information about tasks, click here.
Tip: You can send a notification if a report is considered blank instead of sending the report. Simply select “check if a report is blank” then select “Ignore the report.” In the actions tab, select “Send Email” from the list. Compose your email and save.
Destination
In this section, you will decide where your schedule will be delivered. The list in the center will display the list of destinations you have added to the schedule. You can organize the various destinations’ order by clicking on the green up and down arrows.
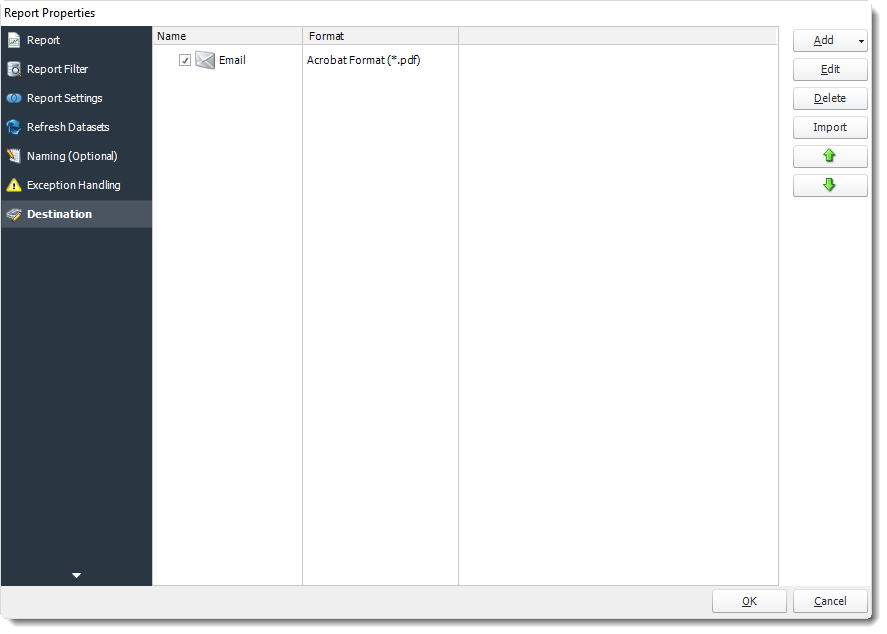
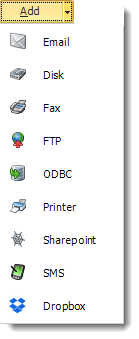
- Add: Click here to add a destination. You have several options which are: Email, Disk, Fax, FTP, ODBC, Printer, Sharepoint, SMS, and Dropbox.
- Edit: Select a destination and click to edit it's properties. Or simply double-click on the destination.
- Delete: Select a destination and click this button to delete it.
- Import: Click here to import from the list of default destinations.
- For more information about Type of Destinations, click here.
- For more information about Output Formats, click here.
Click OK.
Customize Recipient Messaging
- You can also customize the messaging the recipient receives. Using Event Based Data Inserts, PBRS will automatically pull data from the record that triggered the schedule and use it to customize the subject, body or report format.
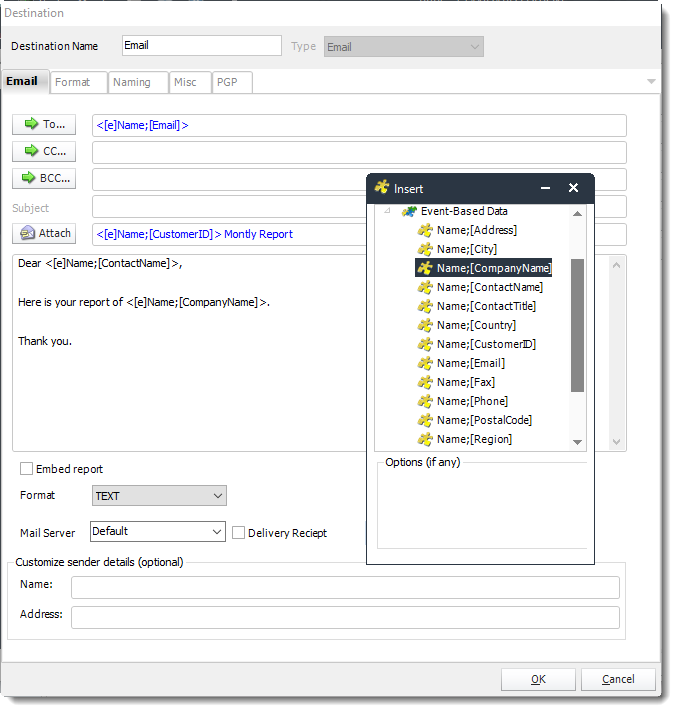
- Simply drag and drop fields from your table to the desired position.
For example, to customize an email greeting, type the greeting, and add the recipients name as shown above.