How do I add Printers to PBRS?
This is how you would associate your Printer with PBRS. Associating your printer gives PBRS access to reports you wish to schedule. PBRS will use stored credentials to access and export reports & dashboards.
Integrations - Print Queues
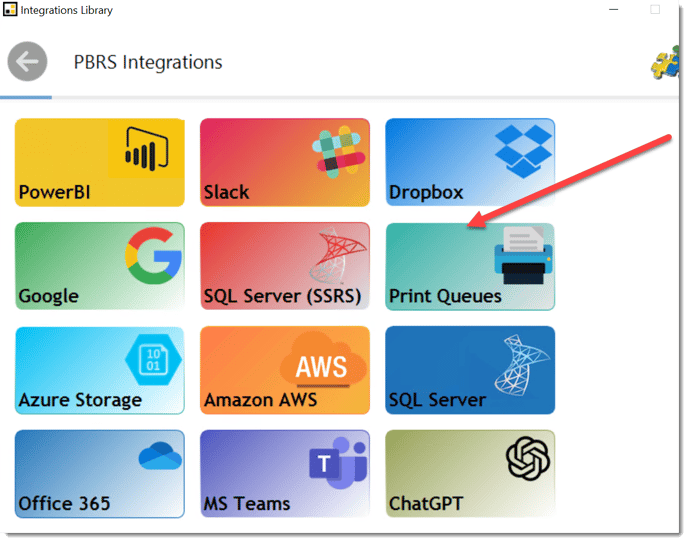
Step 1: Navigate to Integrations.


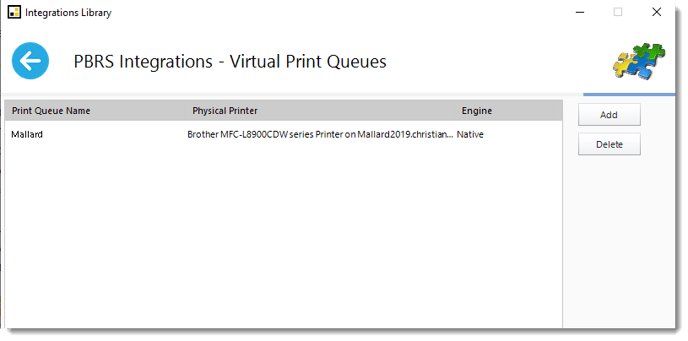
Step 2: Select Print Queue.


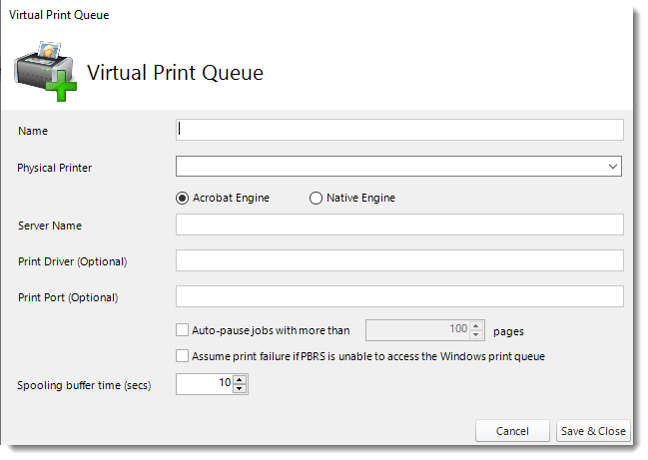
- Name: Enter the virtual print name.
- Physical Printer: Select the type of printer engine. Use the drop-down menu to select the printer.
- Server Name: Enter the Server where the printer is going to run.
- Printer Driver (Optional): Enter the print driver.
- Print Port (Optional): Enter the print port.
- Auto-pause jobs with more than X pages: Check this option if you want to auto-pause reports more than x amount of pages.
- Assume print failure if PBRS is unable to access the Windows print queue: Check this option if you want to assume print failure if PBRS is unable to access the Windows print queue.
- Spooling buffer time (secs): Enter the number of seconds for the spooling time.
Step 4: Click Save & Close.
The printer is added to PBRS.