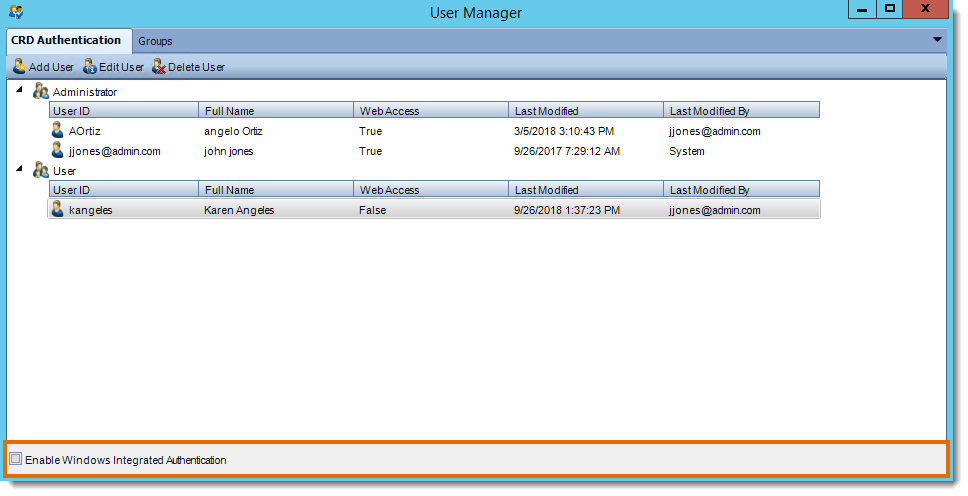
System - User Manager
What is user management?
The principle behind the user management is simple:
- Administrators are able to view and manipulate all schedules
- Users can only see and access what they have been given permission to.
- Create Group policies to determine what user can/cannot access in CRD.
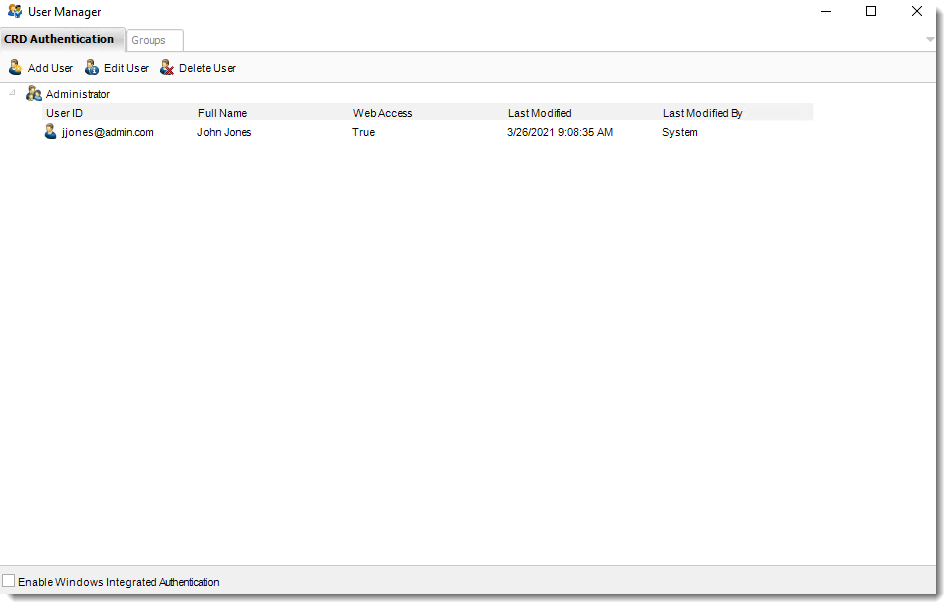
Step 1 - Access the User Manager, by navigating to the System tab.
Step 2 - Select User Manager.

How to set up a user
Step 1- Click Add User.

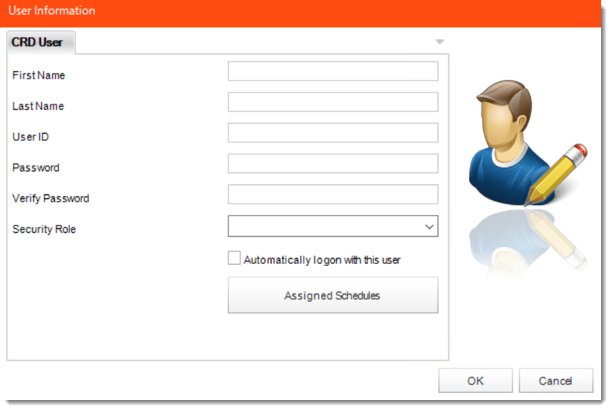
Step 2 - Complete the User information by entering the First and Last Name.
Step 3 - Create a User ID, this must be unique.
Step 4 - Create a Password for the User and then verify the password.
Step 5 - Assign a Security Role, choose either a User or an Administrator.

Step 6 (optional) - Check the option to Automatically Logon with this user for Automatic Logon if you want PBRS to log in using this user's credentials by default. When PBRS launches, the splash screen will display this user, and the system will automatically log in after a 10-second countdown. If you wish to log in as a different user, you can interrupt this automatic process by entering an alternate username and password.
Step 7 (optional) - Only Administrators can view all schedules by default. To enable users to access schedules created by Administrators or other users, these schedules must be specifically assigned to them. To assign schedules, click on the Assigned Schedules option.
Then Select the schedule or folder from the left hand pane and assign it to this user by clicking the green arrow button. Conversely to remove an assigned Schedule from a user, highlight the schedule in the right hand pane and click on the red arrow.
Assigned Schedules
- Select the schedule or folder from the left hand pane and assign it to this user by clicking the green button.
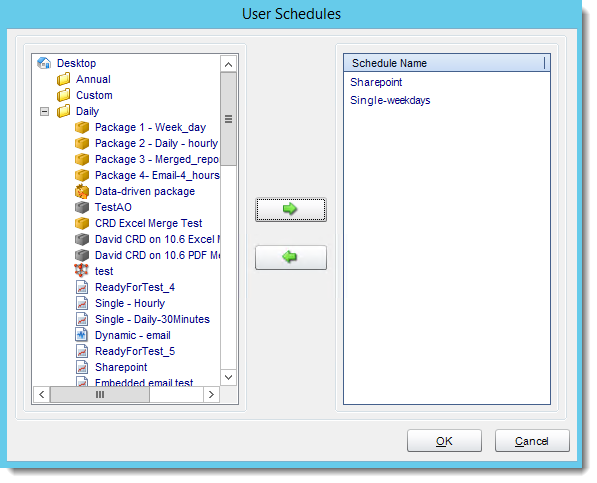
Step 8 - Click OK to save the schedule Assignments.
Apply: Click Apply to create the new user.
Amending a user's details
Step 1 - Click on the user you wish to edit and Select Edit User, alternatively doble click on the User.Step 2- Overwrite the existing details with the new details.
Step 3- Click OK to save the changes.
Deleting a user
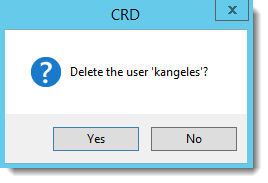
Step 1 - Click on the user you wish to delete and Select Delete User.
Step 2 - Click Yes to confirm that you want to delete the user.
Security Roles
PBRS includes two primary security roles: Administrator and User. These roles facilitate effective management of user functionalities, ensuring that each individual has appropriate access to the features they need while maintaining system security.
In order to create new roles you have to create a Group.
Step 1 - Navigate to the Groups Tab
Step 2 - Click Add to create a new group.
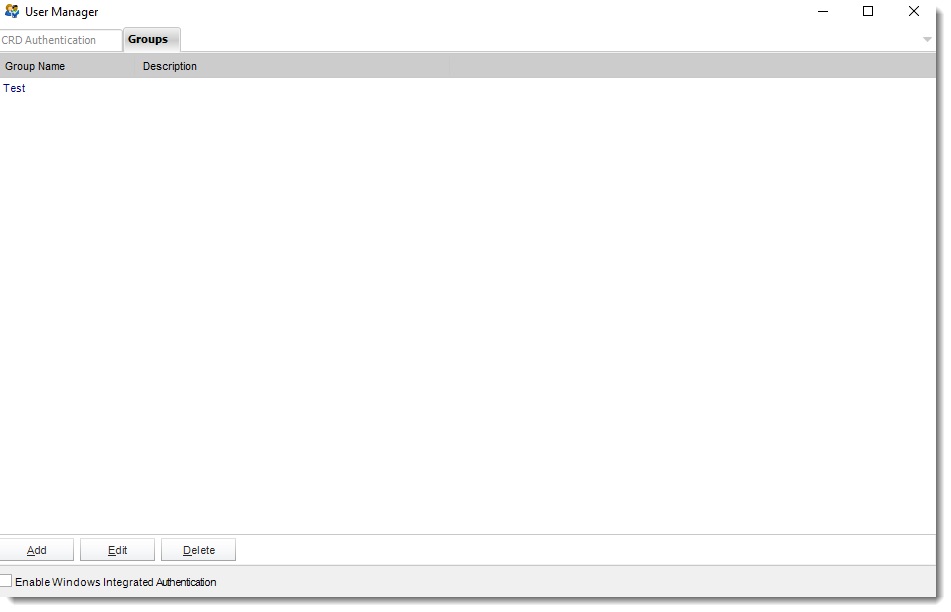
Step 3 - Enter a Name and a description (optional) for the Group.

Step 4 - Navigate to the Permissions Tab.
In the Permissions Tab, you can then specify access to system features such as operational hours, or the options menu. Check the boxes to indicate whether the group has access to these features.
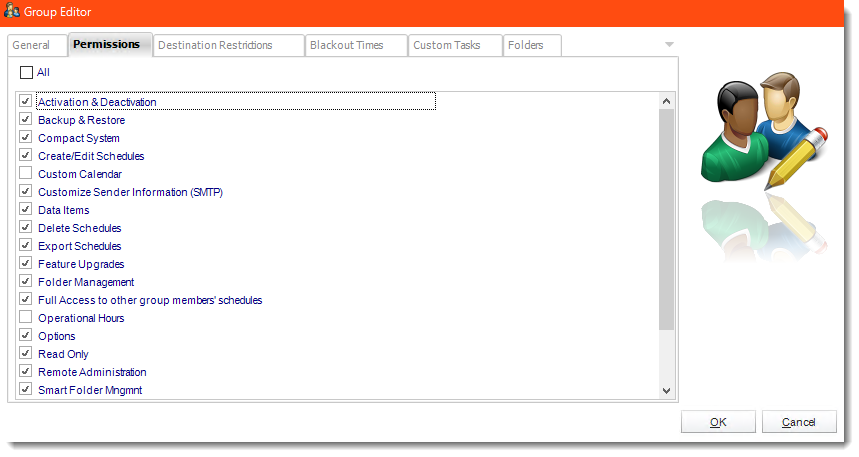
For example; To set up a user so that they only has access to Create / Edit Schedules, Custom Calendar, Data Items, Delete Schedules and Export Schedules simply check these options and click OK to save the settings.
Step 5 - Navigate to the Destinations Restrictions Tab. From here you may restrict what destinations the group has access to.
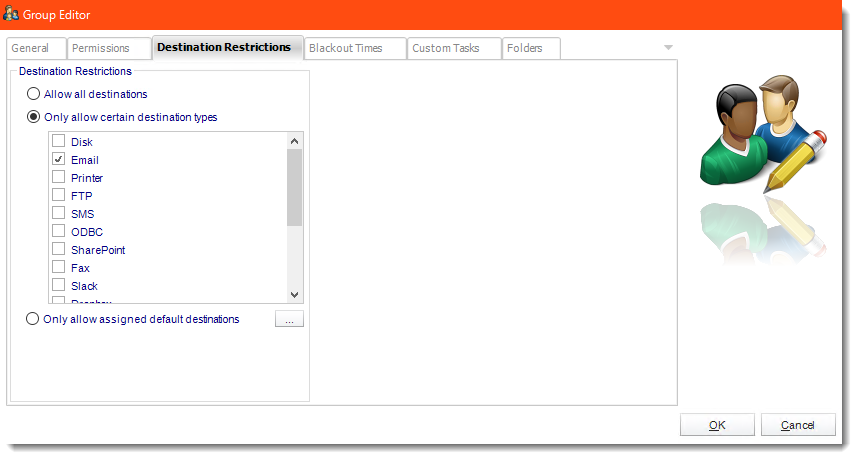
You can also restrict what destinations the group has access to.
- Allow all destinations: This group can access all destinations.
- Only allow certain destination types: Check the boxes to indicate which destinations the group has access to.
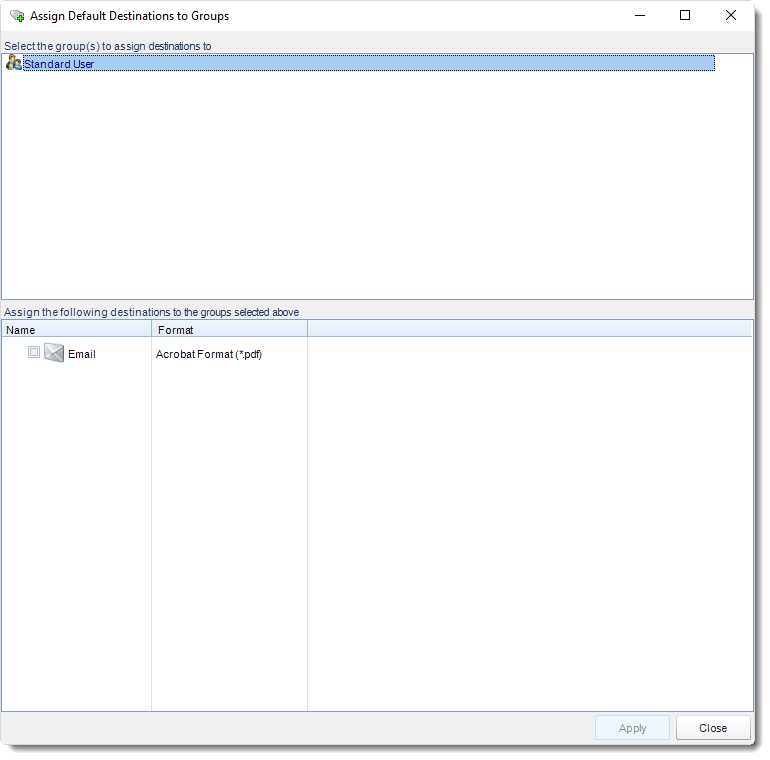
- Only allow assigned default destinations: Use only the default destinations (created in the Options menu) and assign them to a specified group as shown below. See: Default Destinations
Pre-create destinations in this manner and assign these destinations to the specific group. Perfect for avoiding giving out sensitive logon information such as FTP or SharePoint site info.
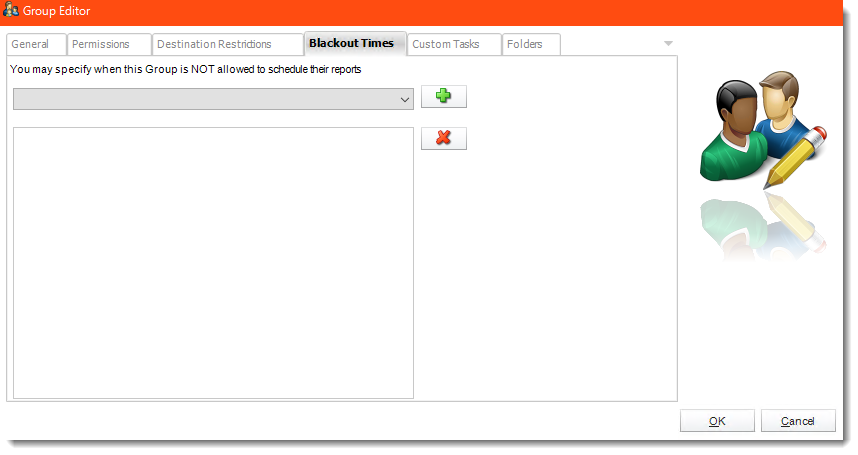
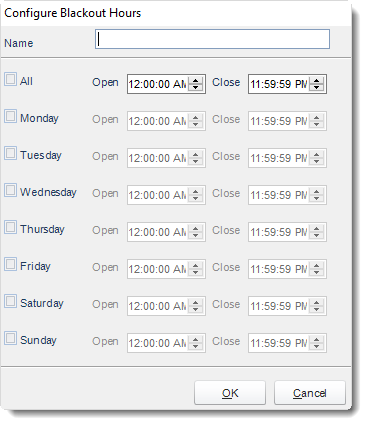
Step 6 - Navigate to the Blackout Times Tab
Set Blackout Times to prevent users from scheduling reports during a certain time frame. Use Operational Hours to build time frames.
Step 7 - Navigate to the Custom Tasks Tab. From here you may Allow Access to All or some Custom Tasks.
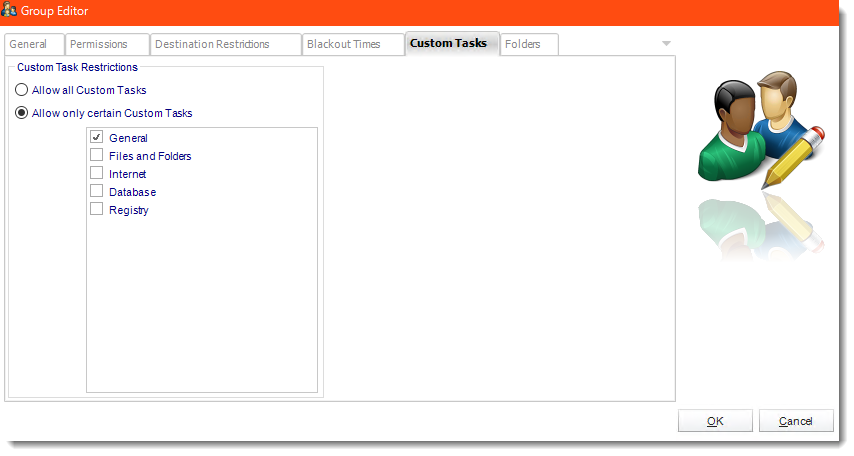
Checking the option to Allow all Custom Tasks will allow all users in this group can use custom tasks.
Checking the option to Allow Certain Custom Tasks, will activate the Task Subfolder Window from here you may specify which Task Types this group will have access to.: Specify which task types this group has access to.
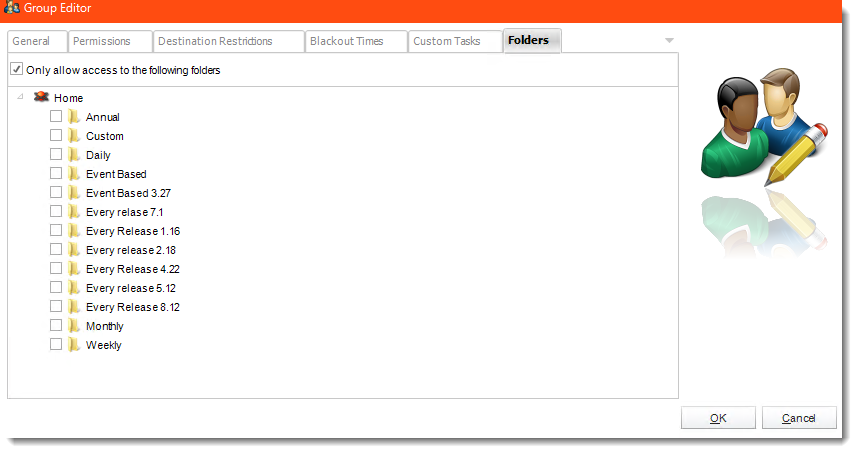
Step 8 - Navigate to the Folders Tab. Here you can decided which Folders to give this group access to. Simply check the option Only allow access to the Following Folders and then select the required Folders.
Step 9 - Click OK to save the Group.
To assign a user to a newly created Group, simply navigate to the CRD Authentication Tab and click on the user you want to Assign a Security Role to and click Edit.
In the Security Role section use the dropdown arrow to select the required role from the list.
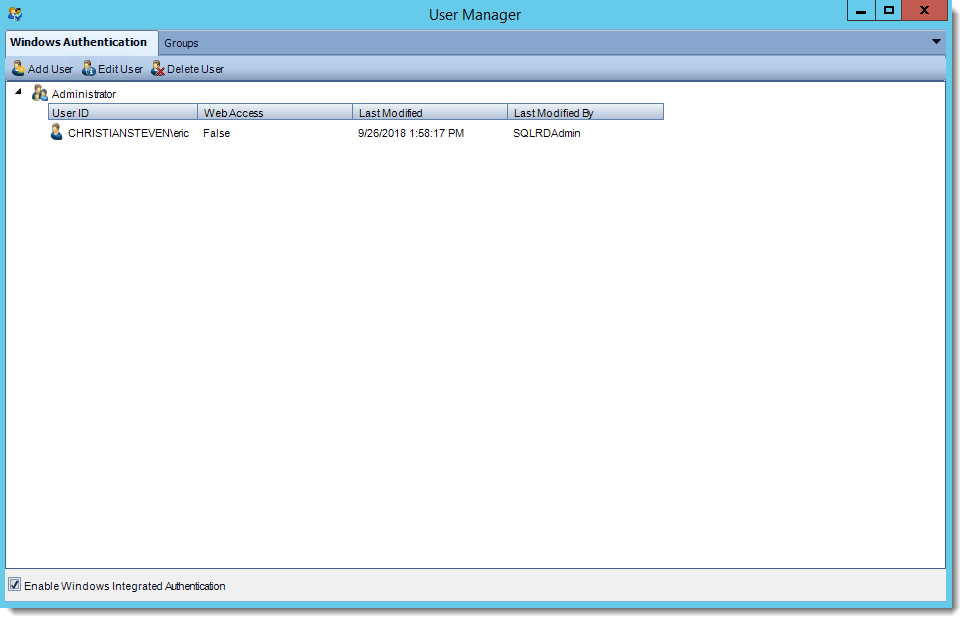
Enable Windows Integrated Authentication
Windows Authentication allows you to use Windows Authentication to log in to CRD. This can help save time in creating new users for CRD. Security roles created in CRD can also be applied to users under Windows authentication.
Step 1 - Navigate to the CRD Authentication Tab
Step 2 - Check the box next to Enable Windows Integrated Authentication.
Once enabled the CRD Authentication Tab will now read Windows Authentication.
How to Add Active Directory Users as CRD users
Step 1 - Select Add User
Step 2 - Complete the Windows User information
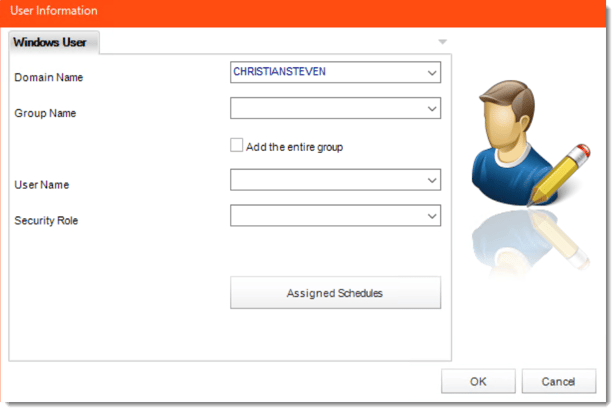
Use the dropdown lists to select a Domain Name, Group Name (where the user(s) are located), User Name, and Security Role.
Checking the option to Add the entire group means that all Users in that Group will be added to CRD.
Please Note: Users added in this manner WILL NOT be displayed as individual users in the Users list in the User Manager.
You may also enter an email address and assign schedules using the Assigned Schedules button.