How do I add new Tableau reports to Event based schedules in ATRS?
You can create a new report based on specific events. These new reports enable you to incorporate data "inserts" from the triggering event, enhancing the overall functionality of your scheduling process.
Step 1: Select New Report


Report Wizard

Step 4: Choose the Tableau Account from the dropdown or Add New .This is the Tableau Account that is required to access the desired Tableau Report.
Item Path: Select the Tableau report that needs to be scheduled. A tableau report can only be added if the ATRS server can reach the report path.
Report Name: Once you have selected the report from the drop-down list, this field will automatically populate with the chosen report.
Parameters
Step 5: In this section, you will determine the parameters for your report (if any). If your report has no parameters, you may skip this section by clicking next.

For each Parameter Name, enter a value and select a Parameter Type from the drop down list.
In a single schedule, only one parameter value can be run at a time per parameter.
- Set as Null: Set no value for this parameter.
- Ignore: Do not run this parameter, ignore it at runtime.
- [Insert Menu]: You can insert constants, formulas and database field values instead of a static "typed in" value. Right-click in the parameters field to expose the Insert menu.
To enable a report parameter to run for a date constant (Current Date, Yesterday etc.), select ATRS Constants from the insert window, then drag and drop your desired constant to the parameter field.
Selecting Date Parameters via Calendar: If your report contains a date parameter, you can either manually enter dates as described earlier in this topic, or select the desired date from the built in calendar. Simply click in the date parameter field to open the calendar. Select the desired date.
Step 6: Click OK to proceed to the Exception Handling Section of the Wizard
Exception Handling

- Check if the Report is Blank: If a report is blank because it genuinely returned no data, recipients can misconstrue this as an error with the scheduler. This option allows you to identify genuine empty reports and instruct CRD on what to do with them.
- Ignore the report and subsequent tasks: If the report is blank, do not send the report. The report will not be delivered to the destination. No custom tasks will run.
Method
/Blank%20report%20check%20method%20_%20file%20size%20check.png?width=609&height=351&name=Blank%20report%20check%20method%20_%20file%20size%20check.png)
- Select the Method that will determine whether a report is blank.
/Blank%20report%20check%20method%20_%20sql%20query.png?width=609&height=348&name=Blank%20report%20check%20method%20_%20sql%20query.png)
- SQL Query: Select this option to use a user made query that will determine if the report is blank. If the query returns no results, the report is blank.
- Click Build.
- Get values from a database window will appear. For more information about getting values from a database, click here.
/Get%20values%20from%20databaes%201.png?width=659&height=651&name=Get%20values%20from%20databaes%201.png)
Actions
- Select an action from the task list. This task will be executed in the event that a schedule is blank.
- For more information about tasks, click here.
Tip: You can send a notification if a report is considered blank instead of sending the report. Simply select “check if a report is blank” then select “Ignore the report.” In the actions tab, select “Send Email” from the list. Compose your email and save.
Step 7: Once you have set the Exception Handling settings click OK to proceed to the Destination section of the Wizard.
In this section, you will decide where your schedule will be delivered. The destinations you have added to the schedule will be displayed in the center of the screen. . You can organize the various destinations’ order by clicking on the green up and down arrows.
Destination

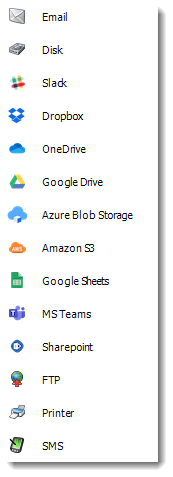
Step 8: Click Add to display a list of available destinations. You may add more than one destination.

- Edit: Select a destination and click to edit it's properties. Or simply double-click on the destination.
- Delete: Select a destination and click this button to delete it.
- Import: Click here to import from the list of default destinations.
- For more information about Type of Destinations, click here.
- For more information about Output Formats, click here.
Step 9: Click OK to save the destination, this will also return you to the Even Based Scheduling Wizard as this is the last step in the adding New Reports to an Event based schedule.
Customize Recipient Messaging
- You can also customize the messaging the recipient receives. Using Event Based Data Inserts, ATRS will automatically pull data from the record that triggered the schedule and use it to customize the subject, body or report format.

- Simply drag and drop fields from your table to the desired position.
For example, to customize an email greeting, type the greeting, and add the recipients name as shown above.