Step 1 - To create a new schedule for a Single Power BI on Premise Report in the Web Application, begin by selecting the "New schedule" drop-down menu. From there, choose the option for "PBIRS Report Schedule".

You will then see the Scheduling Screen where you can configure the schedule settings.

Step 2 - General Tab: In the "Provide Report Details" section, click on the (...) option and select your Parent Folder from the list provided and give the Schedule a Name to easily identify it.

Step 3 - In the "Power BI Report" Section
- Choose the required the Power BI Account needed to access the Power BI report that you want to Schedule.
- Enter "reports" in the Virtual Directory.
- Choose the Report from clicking the (...) for the Report Path.
Step 4 - Proceed to the Scheduling Tab by clicking the "Next Step" button.
Scheduling Tab

Step 5 - In the "Setup when the schedule should run" section, you can select the start date for your schedule by clicking on the calendar icon. Choose the specific date when you want the schedule to begin running. Set the Frequency for the schedule, whether it's daily, weekly, or monthly. This frequency setting determines how often the schedule will run.
Step 6 - Select a Schedule Time for when the schedule should execute. If you need this schedule to repeat multiple times throughout the day, you can select the "Repeat Every" option.
Step 7 - Check Enable this Schedule, to ensuring that the schedule will run when it is supposed to in the future.
Step 8 - Proceed to the Report Settings Tab by clicking the "Next Step" button.
Report Settings Tab

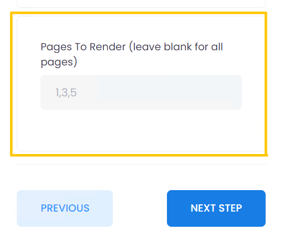
Step 9 - In the Report Rendering Settings section, you have the flexibility to customize and apply specific settings to the report according to your preferences.
If you prefer not to export all pages of the report, you have the option to specify which pages you want to export in this section.
Step 10 - Proceed to the Filters Tab by clicking the "Next Step" button.
Filters Tab

Step 11 - To add a Report Filter, go to the Report Filters section and in the Target box enter your table or column. In the Value box enter your value.
Step 12 - Select whether or not you would like your Type to be String, Numeric, or Date/Time.
Step 13 - Click on the Add button to save the Report Filters.
Step 14 - Proceed to the Destinations by clicking the "Next Step" button.
Destinations Tab

Step 15 - In the Destinations Section, click Add Destination to add a destination for the report. The following Screen will be displayed.

Step 16 - Provide a Destination Name, choose between Email or Disk Destination, and select the desired Output Format.
Step 17 - Enter your required information based on what destination you choose. For Example, you have the option to embed a report into an email destination. See below.

Save your destination by clicking on the "Save" button.
Step 18 - Proceed to the Completed Tab by clicking the "Next Step" button.
Completed Tab

Step 19 - After reviewing the schedule setup and confirming that no changes are needed, simply click on the Submit button to save the schedule.
Once the Schedule has been created the following screen will be displayed.

You have now successfully created a Power BI on Premise Single schedule.