Event-Based Schedules give you the ability to run an already existing schedule (enabled or disabled) when an event occurs. The purpose of the wizard will be to guide you through the process of setting up an Event-Based Schedule. Use this schedule on its own, or in addition to a regular time-based schedule for the same report.
With Event-Based Schedules, you can unlock the power of ATRS's process scheduling engine. Combine Event-Based schedules with Custom tasks to automate processes such as updating databases, server management, or system alerts.
How to Create an Event-Based Schedule in ATRS?
Step 1: Navigate to Event-Based Schedule.

Step 2: Complete the information on the General Setting Tab.
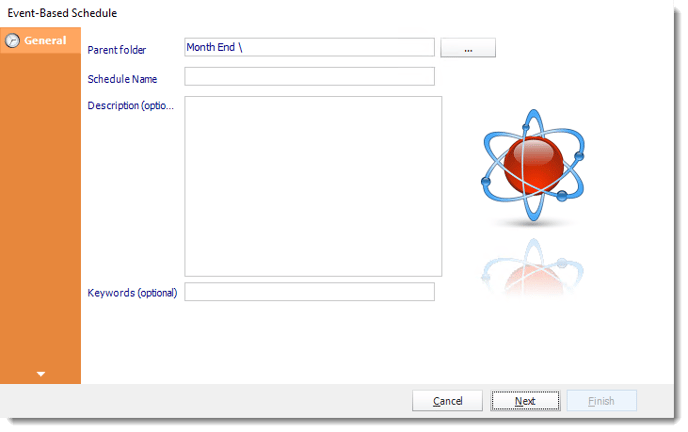
Parent Folder: The ATRS folder where the schedule is stored.
Schedule Name: The name of the schedule
Description: A short description to help other users identify exactly what this schedule is and what it is expected to do.
Keyword: Enter some keywords which can be used later by Smart Folders to identify this schedule.
Step 3: Click Next to continue to the Conditions section of the Wizard

Step 4: Here you decide whether the Event will need to fulfill Any or All of the conditions.
-
- ANY: The schedule will work if ANY of the conditions are met.
- ALL: The schedule will only work if ALL of the specified conditions are met.
Enabled: Check this option to enable or disable the schedule.
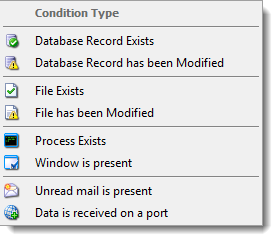
Step 5: Click Add to see all the Conditions type and select the one that is required to begin creating the conditions for the schedule.
How do I create the Database Record Exists condition?
This condition will cause the schedule to be executed if a database record exists. If it is set to True, the schedule will be executed if the record exists e.g. when it is created. Conversely, if set to False, the condition will be executed if the record does not exist.
Step 1: Give the condition a Name
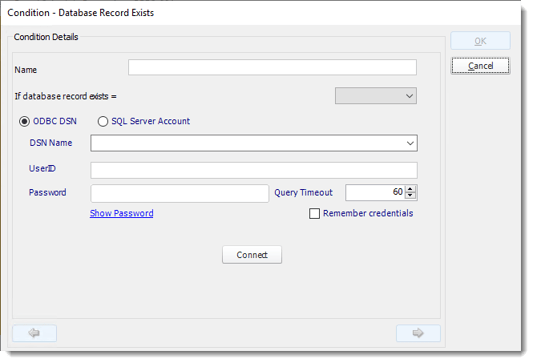
Step 2: Check the ODBC DSN Name option to use the ODBC Account. Use the drop-down and select a DSN or select SQL Server Account.
You must add the SQL Server Account in Integrations.
Step 3: Enter the UserID and Password ATRS should use to log on to the database.
Step 4: Click Connect to connect to the Database.
Step 5: Once connected select the table from the database that holds the required data. You can refine your selection query by using the simple or advanced tabs.
We strongly recommend System DSNs so that the DSN is visible to PBRS even when the user associated with the DSN is logged off.
All communication to databases (including Access databases) is done through ODBC, so you must set up a system DSN to the database before you can use this facility.
When setting up DSNs we recommend (if possible) that you use Windows Authentication (Trusted Connection). This ensures that your username and password are not required to be stored in PBRS (more secure) and overcomes a large number of security restrictions which Windows places on DSNs. When using Windows Authentication, make sure that the PBRS NT service user (or background application service user) has full rights to the database otherwise, though you will connect when you are logged in, automated scheduling will fail if the Service user has not got rights to the database.
When setting up a DSN to a SQL server, you must ensure that the "Default Database" setting is set to the database you are connecting to (Windows defaults this to "Master").
Step 6: Once Connected Successfully the Arrows at the bottom will become enabled Click the green arrow pointing to the right to continue.
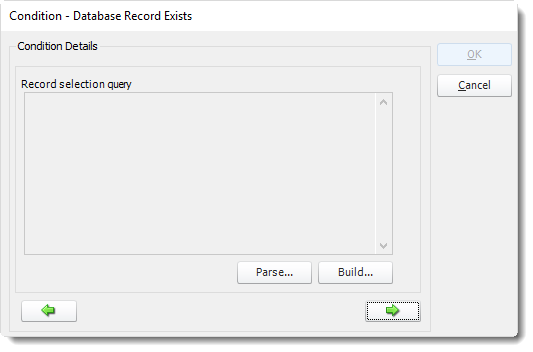
Step 7: Begin building the query, do this by choosing a ODBC DSN Name or SQL Server Account from the Dropdown list.

- ODBC Datasource Name: Drop down and select a DSN.
- UserID: Enter the User ID PBRS should use to log on to the database.
- Password: Enter the password associated with the above user.
- SQL Server Account: Select your SQL Server Account.
- Connect: Click Connect to connect to the Database.
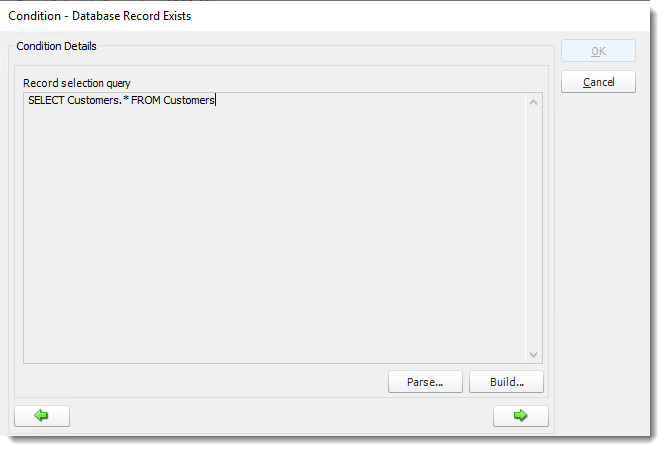
- Select the table from the database that holds the required data. You can refine your selection query by using simple or advanced tabs.
Step 8: Once you have created the query click Parse to view the results.
For more information of the "Get Values From Database" interface, click here.
Step 9: Once parsed Successfully click the green arrow pointing to the right to continue.
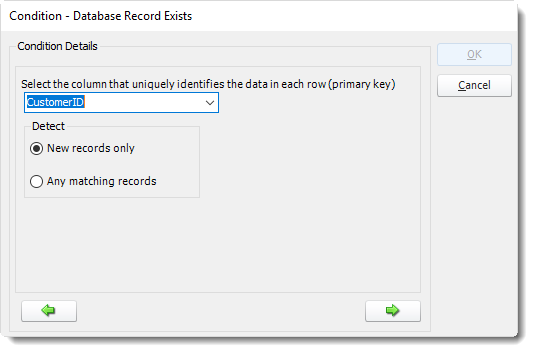
Step 10: Select the Column that identifies the data in each row. This must be unique. It is typically referred to as the Primary key.
Step 11: select either:
- Detect - New Records Only: The schedule will only act on records that were created after you wrote the schedule and the schedule will only be fired once for each record. After the first run, it is deemed not to be new anymore and the schedule will not fire.
- Detect - Any Matching Records: If this option is selected you should ensure that your query limits the returned values to just the record you are after. You must also write a custom action to update the database so that this record no longer fulfills the condition once the schedule has been executed, otherwise the schedule will continue to run each time it finds the same record.
For example:
The schedule should execute when a new sale over $1000 is entered: Select order id from sale stable where amount >= 1000Now limit the query further by adding a second condition: Select order id from sale stable where amount >= 1000 and schedule sent <> 'T'.
The schedule will only execute if it finds a sale over $1000 and the schedule sent field is not "t".
Now write a custom Task to update the database record and set schedule sent to 'T'. Update sale stable set schedule sent = 'T' where amount >= 1000 and schedule sent <> 'T'.
- When the schedule has executed, it will mark the record and thus ensure that the schedule does not repeat itself each time ATRS polls the database.
Step 12: Click the OK to save the condition.
How do I create the Database Record has been Modified condition?
This condition will cause the schedule to be executed if a database record has been modified.
If set to True, the schedule will be executed if the record exists e.g. when it is created. If set to False, the condition will be executed if the record does not exist.
Step 1: Give the condition a Name
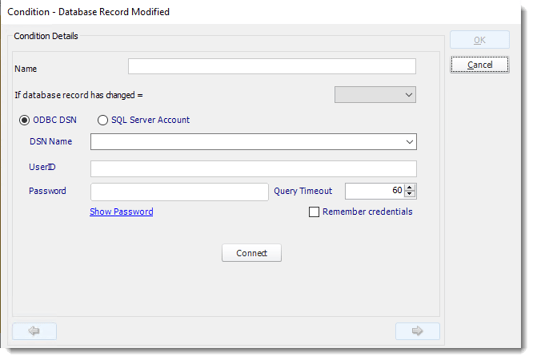
Step 2: Check the ODBC DSN Name option to use the ODBC Account. Use the drop-down and select a DSN or check the option to use a SQL Server Account.
Step 3: Enter the UserID and Password ATRS should use to log on to the database.
Step 4: Click Connect to connect to the Database.
Step 5: Once connected successfully the Arrows at the bottom will become enabled Click the green arrow pointing to the right to continue.
Step 6: Click Build to begin build the query. Then select ether ODBC DSN Name or SQL Server Account.
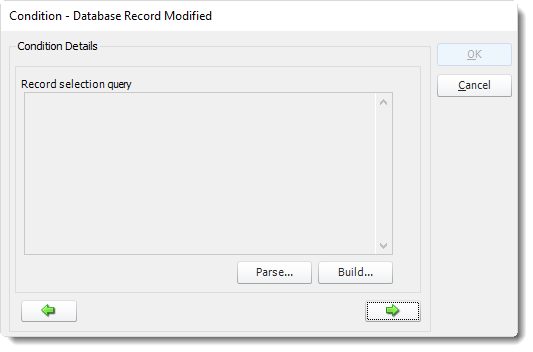
Step 7: Click connect
Select the table from the database that holds the required data. You can refine your selection query by using simple or advanced tabs.
Step 8: Once you have created the query click Parse to view the results.
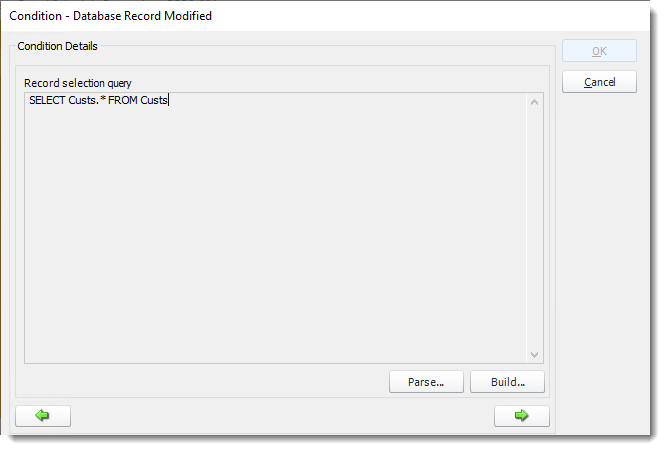
Step 9: Once parsed Successfully click the green arrow pointing to the right to continue.
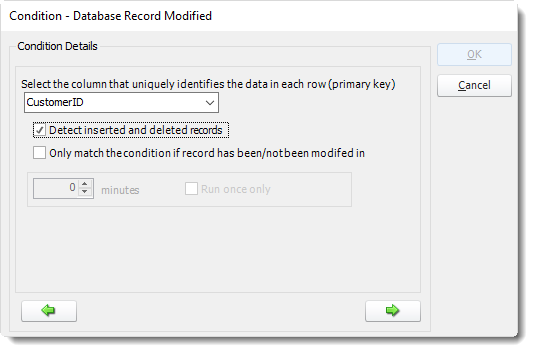
Step 10: Select the Column that identifies the data in each row. This must be unique. It is typically referred to as the Primary key.
Step 11: Select either
- Detect Inserted and deleted Rows: PBRS will monitor for inserted and deleted rows as well as data that has been modified.
- If Database Record has been/has not been modified: Check for records that have been/have not been changed within a set time frame.

How do I create File Exists Event Based Schedule?
This condition will cause the schedule to be executed if a file exists.
If set to True, the schedule will be executed if the file exists e.g. when it is created.
If set to False, the condition will be executed if the file does not exist e.g. if it is deleted.
Step 1: Give the condition a Name
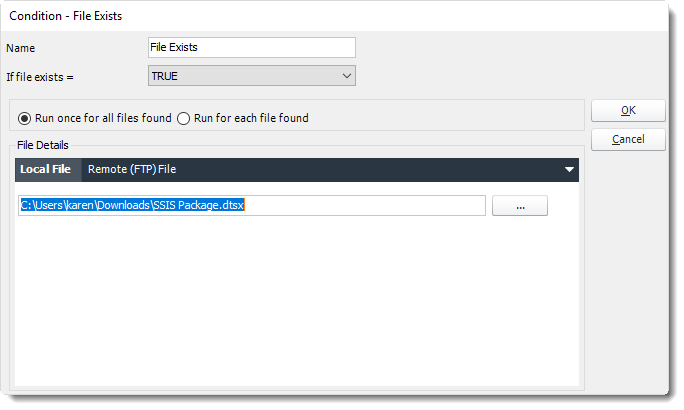
Step 2: Select whether to Run once for all files found, if this option is selected the schedule will perform the specified actions once for each file found that matches the criteria. or Run for each file found, if this option is selected then the schedule will perform the specified actions ONCE only irrespective of how many files are found.
Step 3: Enter the File Details, this may ne a Local file or a remote (FTP) file.
-
Local File: Monitor for files on Local File.
Hint: You can use the insert menu to create an ever-changing file name.

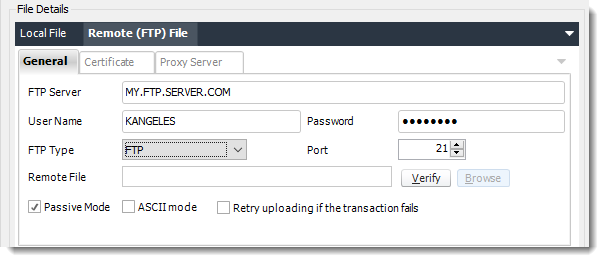
- Remote (FTP) File: Event-Based Schedule can also monitor for files on an FTP server.
-
Enter the FTP Server Information.
-
Verify: Authenticate to the server and enter the path where the file should be located.
Hint: Combine this feature with Custom Actions FTP and FTP Folder Housekeeping to set up automatic FTP maintenance.
Step 4: Click the OK to save the condition.
How do I create File has been modified Event Based condition?
This condition will cause the schedule to be executed if a file has been modified.
If set to True, the schedule will be executed if the file exists e.g. when it is created.
If set to False, the condition will be executed if the file does not exist e.g. if it is deleted.
Step 1: Give the condition a Name
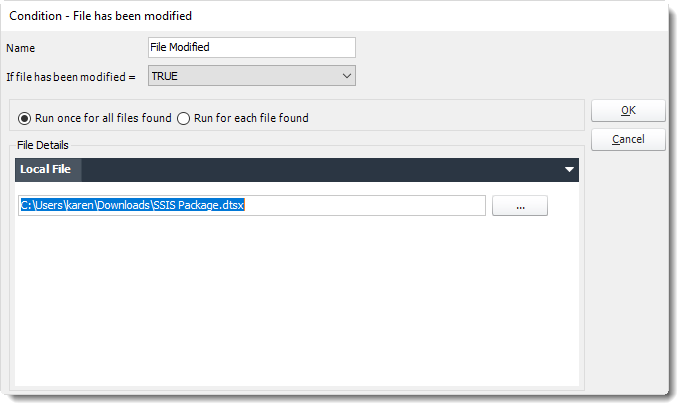
Step 2: Select whether to Run once for all files found, if this option is selected the schedule will perform the specified actions once for each file found that matches the criteria. or Run for each file found, if this option is selected then the schedule will perform the specified actions ONCE only irrespective of how many files are found.
Hint: You can use the insert menu to create an ever-changing file name.
Step 3: Enter the File Details, this may ne a Local file or a remote (FTP) file.
-
Local File: Monitor for files on Local File.
Hint: You can use the insert menu to create an ever-changing file name.
Step 4: Click the OK to save the condition.
How do I create a Process Exists Event Based condition?
This condition will cause the schedule to be executed if a process exists.
If set to True, the schedule will be executed if the process exists.
If set to False, the condition will be executed if the process does not exist.
Step 1: Give the condition a Name

Step 2: Type the name of the process in the drop-down box or use the drop-down arrow to select from a list of currently running processes.
Tip: Try setting up the schedule that will monitor for certain key processes on your machine. If those process are not running then PBRS can automatically restart them.
Step 3: Click the OK to save the condition.
How do I create Window is Present Event Based condition?
This condition will cause the schedule to be executed if a window is present.
If set to True, the schedule will be executed if the window is present.
If set to False, the condition will be executed if the window is not present.
Step 1: Give the condition a Name
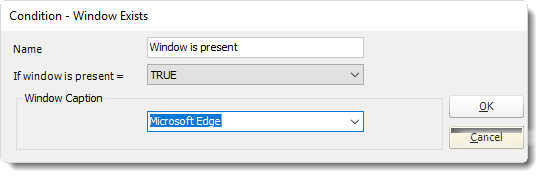
Step 2: Type in the window name, or use the drop-down to pick from a list of currently open windows.
Tip: Try setting up the schedule that will monitor for certain open Windows on your machine. If those process are running then PBRS can automatically stop them.
Step 3: Click the OK to save the condition.
How do I create unread email exists Event Based condition?
Users can send report requests to a specified email address. CRD will read the email, and, if the conditions are met, fire off the specified report.
If set to True, the schedule will be executed if the unread email is present.
If set to False, the condition will be executed if the unread email is not present.
Step 1: Give the condition a Name
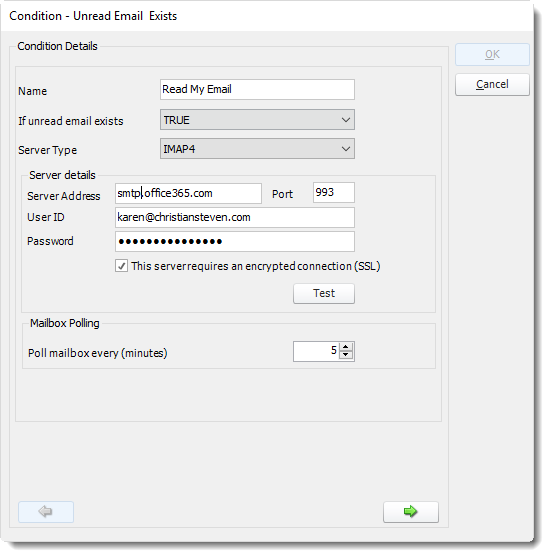
Step 2: Complete the email Server details.
Step 3: Test the email settings
Step 4: If the details have been entered correctly the green arrow will become available, click the green arrow pointing to the right to continue.
Step 5: Select the folder that will be monitored.
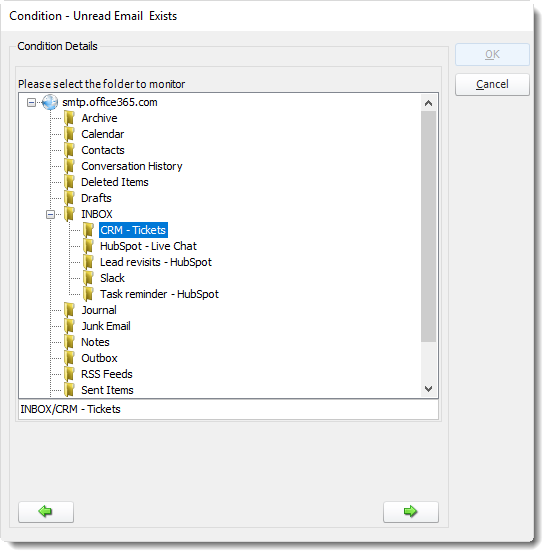
Step 6: Click the green arrow pointing to the right to continue.
Step 7: Specify the condition. Select the email fields to determine what would meet your requirements.
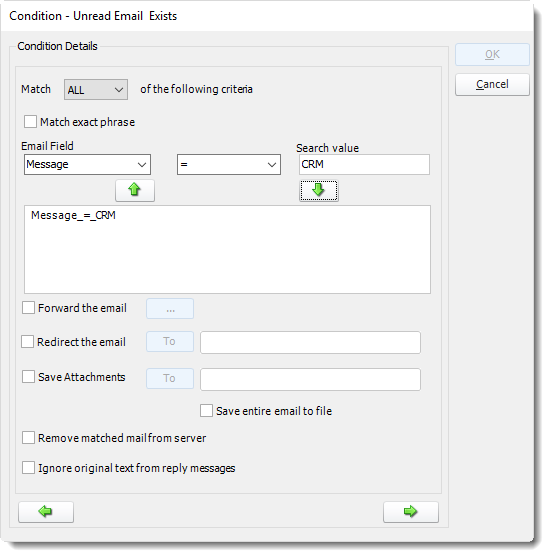
- Forward the Email: Forward the email to another address.
- Redirect the Email: Send the incoming mail directly to another address instead of keeping it in the inbox.
- Save Attachments: Pull attachments from the email and save them directly to a folder.
- Remove Matched mail from Server: Choose to clear the email from the inbox once ATRS has processed it.
If you do use the Remove Matched mail from Server setting function with the condition set to false, then be sure to remove the found email from the mailbox so that the report doesn't get fired off again (each time read emails are found).
How to parse the values in the body of an email and insert them into ATRS fields?
- For an "Unread Email" event, ATRS can read the body text of the email and place selected values into Event-based constants.
- You can also use the "Exact Match" option which will match the Case of the email text. In addition, when this option is used, spaces before and after the phrase are NOT removed and form part of the matching string.
Here is an example:
- Mary has an email that will contain values, and she wants the values to update a database. Here's how she would set it up in ATRS.
- Firstly, ATRS will expect the email text to be in the format [Constant]:[Value]. Here is how Mary will set up her email:
EmployeeID: xxxxx
EmployeeName:yyyyy
EmployeeStartDate:zzzzzzzz
- As you can see, the required constant is on the left of the colon (:) and the required data is on the right.
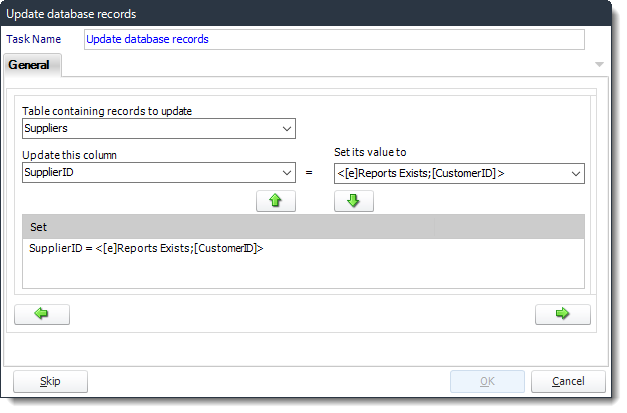
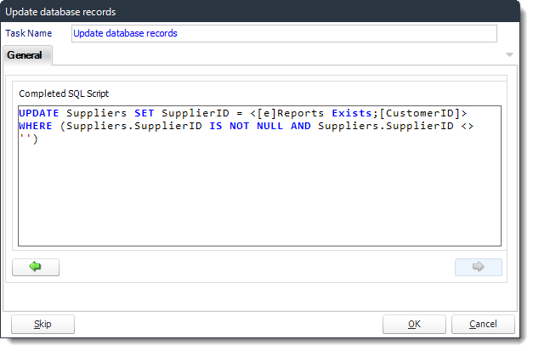
- To insert the data into her database, Mary uses an "Update a database" custom task as shown below:
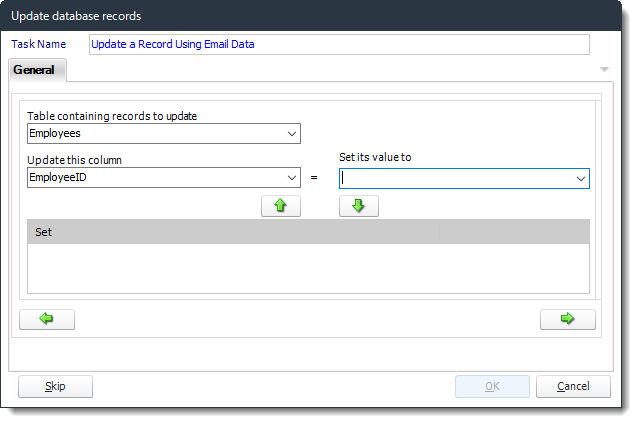
- She inserts Event-Based Constants, selecting a Custom Constant:
- She types in the Custom Field Descriptor:
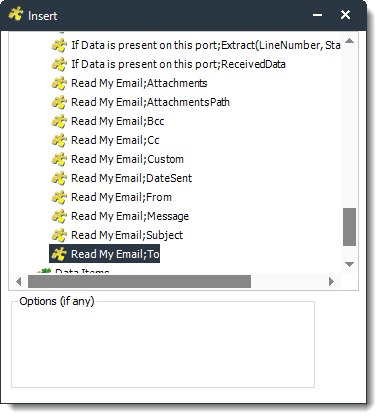
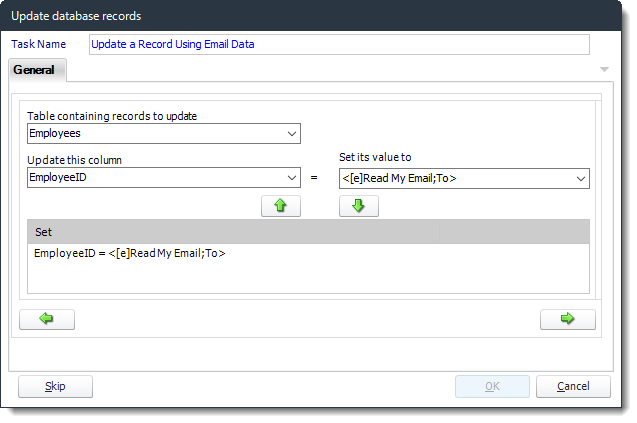
- When she drags the Insert, "<[e]Read my Email;To>" is placed in the field:
-
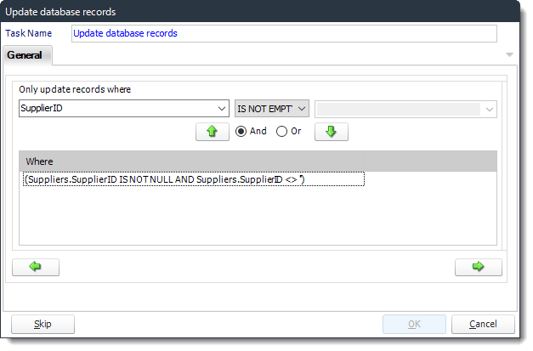
She clicks the down arrow to add the statement to the list. And repeats the process for all the custom constants she will need to parse the email.
-
The above instruction tells ATRS to read the email body text and to place the value to the right of "EmployeeID:" in the database.
The colon (:) is only required in the email body. It is not used as part of the definition process above, but ATRS will automatically read the value to the left of the colon and apply the data to the right of the colon.
Tip: Use email body parsing to customize other tasks! Pull information from one email and send an email using the data. Use it to create new database records, and much more!
How do I create Data Received on a Port Event Based condition?
ATRS can monitor specified ports for data and then execute tasks such as reports or database updates.
If data has been received: Select true if you wish to monitor for data in the given port, or false if you wish to monitor for the absence of data in the given port.
Step 1: Give the condition a Name
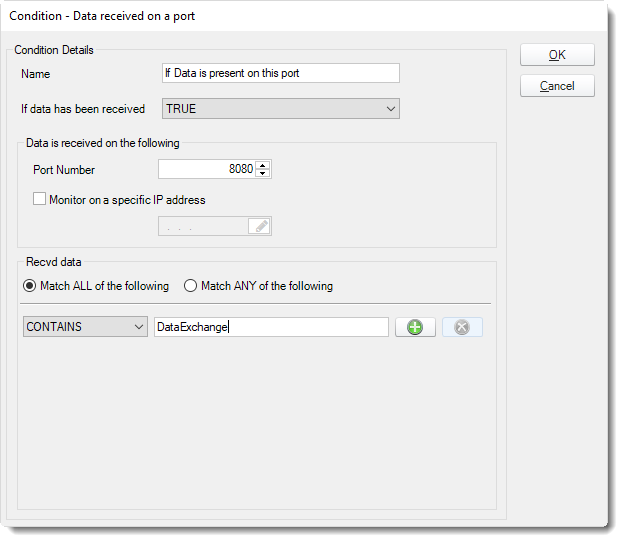
Step 2: Complete the Port information.
-
-
Port Number: Enter the port number that will be monitored.
-
Monitor on a Specific IP address: Enter the IP address that will be monitored.
-
Received Data:
-
Select the data criteria using the lower menu. ATRS will monitor this data for any data matching your criteria.
-
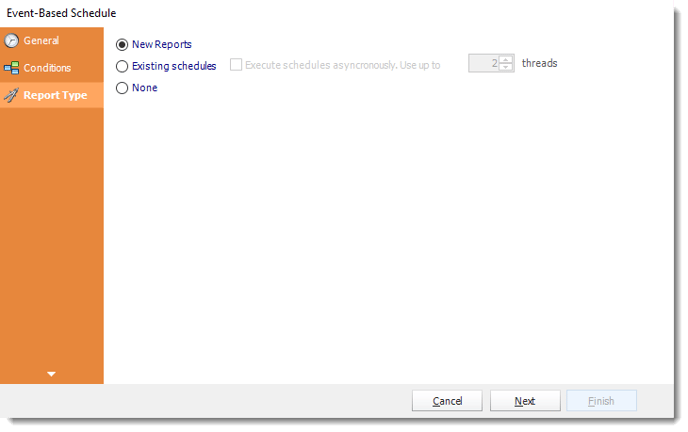
Report Type
Step 6 Report Type: Once you have created the required Event Trigger the next step is to determine what should happen once the event has been triggered.
Choose from:
New Reports, this will Display a screen where you can create a new reports schedule.- this will display a list of existing schedules in ATRS for you to choose from.
- Select this option if no schedules are to be ran if the conditions are met and only Customs Actions will be used.
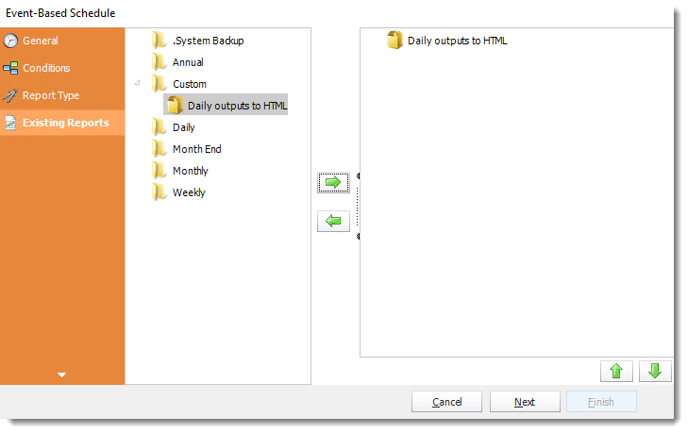
Selecting Existing Schedules will present the following screen
Step 7: Click on the schedule that needs to run if the conditions are met and use the green arrow to select it.
Schedules that are going to run if the conditions are met are shown in the right-hand pane.
Step 8: Click Next to continue.
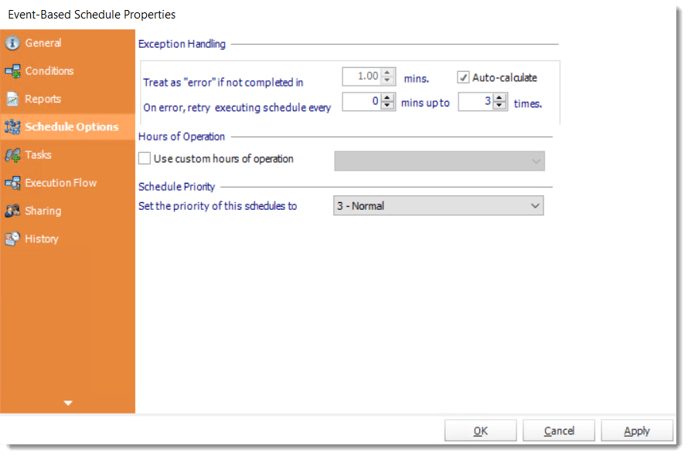
Step 9: Configure Exception Handling for the Schedule.
Reports fail for any number of reasons - database connectivity issues, database busy, network issues, and more. This screen gives you the ability to tell ATRS what to do if it encounters an error.

Treat as “error” if not completed in X minutes: If a report takes longer than the specified amount of time to run, this option will treat the schedule as an error and follow the appropriate action. The “Auto-calculate” option instructs PBRS to automatically determine how long a schedule should take to run the report. If it takes longer than the calculated amount of time, then it is an error.
If manually determining the error timing, please double-check the run time of the report in order to get the correct time estimate.
- On error, retry executing schedule every: If set to 0, PBRS will deem the schedule as "Failed" the first time it encounters an error. The schedule will not run again until its next scheduled time. Change the value to tell PBRS how many times you want it to retry running the report before declaring it as "Failed."
- Hours of Operation: Event-based schedules can poll 24 hours a day if required. Checking this option will allow you to set a specific time frame for when the event-based schedule should run.
- Schedule Priority: Set the priority level of the schedule. This will come into play when other schedules are running at the same time. If the priority is set to High then the event-based schedule will take priority over other schedules in the queue.
- If the priority level is set to low then it will be at the bottom of the queue and the other schedules will be ran first.
Step 11: Select Custom Tasks for the schedule. In the section, you have the option of setting up custom tasks. Custom tasks are business process automation tools that can be auto-triggered before or after a report runs.
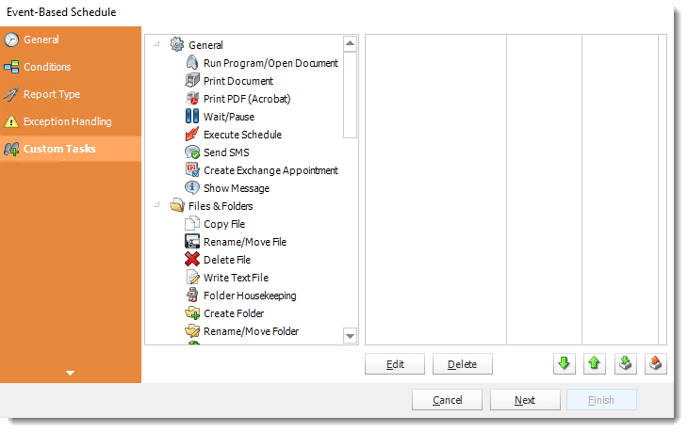
- For more information on Custom Tasks, click here.
-
In the Event-Based Schedule, you can select a custom task to run as a result of any of the conditions being met.
For Example:
-
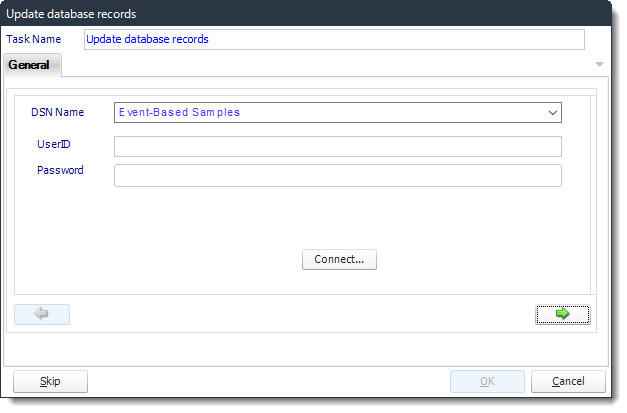
Select the DSN name you want to update.
Hint: In Event-Based, you can select another DSN to run tasks.

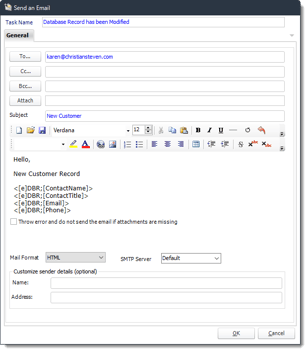
Hint: When sending an email you can use Event-Based inserts to reference the condition that triggered the email.
- For Example:
Step 12: After adding all the required Custom Actions, click Next to continue to the Execution Flow.
If you have schedules AND tasks being executed as part of the event-based schedule you can determine the order.
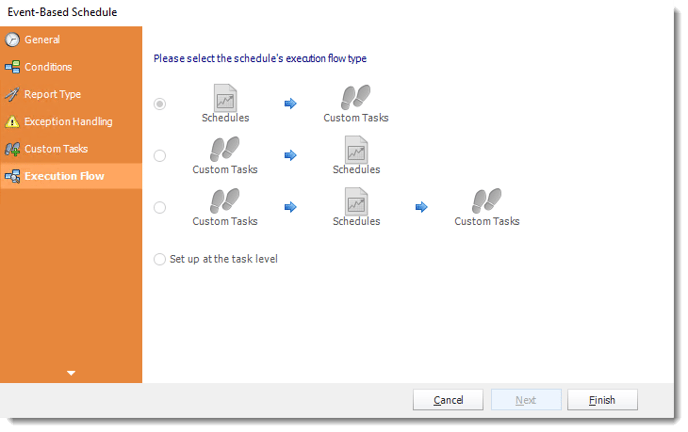
For Example:
Run Schedules then the Custom Actions
OR
Run the Custom Actions first, then the schedules, the run the Custom Actions again.
Step 13: If you have no desire to add a Custom Task, you can click Next.
Step 14: Click Finish, to save the schedule.
Event Based Schedule Context Menu
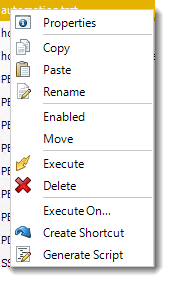
Right-Click on a schedule to see the following actions.
- Properties: Access the schedule set up for editing. Or you can just double click on the schedule.
- Copy: Use this to copy an existing schedule. You can then paste it into another folder or the same folder. Simply open the folder you wish to paste to, right-click in the "white" space and select "Paste". Follow the on-screen instructions to complete the process.
- Paste: Paste a previously copied schedule.
- Rename: Rename a schedule.
- Enabled: Schedules are enabled when there is a check beside this option. To stop a schedule from running, or to "pause" it for a while, select this option to remove the check. Disabled schedules will not run till they are enabled again.
- Move: This will enable you to move the Package to a different Folder in ATRS.
- Execute: This will execute the schedule immediately. Note that the next run date and time is not moved on as a result of a manual execution. This only moves on if the schedule is run automatically by one of the schedulers.
- Delete: Selecting this option will delete the schedule.
- Execute On: Use to option to execute the schedule to another collaboration server.
- Create Shortcut: Use this option to create a shortcut you can save in any location on your PC. Execute the shortcut to execute the schedule in PBRS.
- Generate Script: This feature generates a SQL script, allowing you to copy a schedule from one instance of the software to another for seamless replication.
Event-Based Schedules Properties
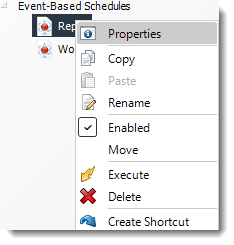
To access the properties of your schedule, simply right-click on the schedule and choose the "Properties" option. From the properties menu, you can make edits to the schedule settings, view the Schedule History, and even share schedules with other users.