How do I use PBRS to export Power BI Reports & Dashboards, Paginated Reports or SSRS reports to Excel?
Export Power BI Reports, Paginated Reports or SSRS reports to Excel & automatically deliver them to an FTP site, send them in emails, or deliver them to any number of other destinations. PBRS lets you customize them before delivery.
This article applies to:
- Power BI Reports & Dashboards (Cloud - Power BI Service)
- Power BI Paginated Reports (Cloud - Power BI Service)
- Power BI Reports & Dashboards (On Premise - Power BI Report Server)
- Power BI Paginated Reports (On Premise - Power BI Report Server)
- Microsoft SSRS Reports (On Premise - SQL Server Reporting Services)
- This video shows how to schedule Power BI Service Reports & Dashboards to MS Excel (Data-Only).
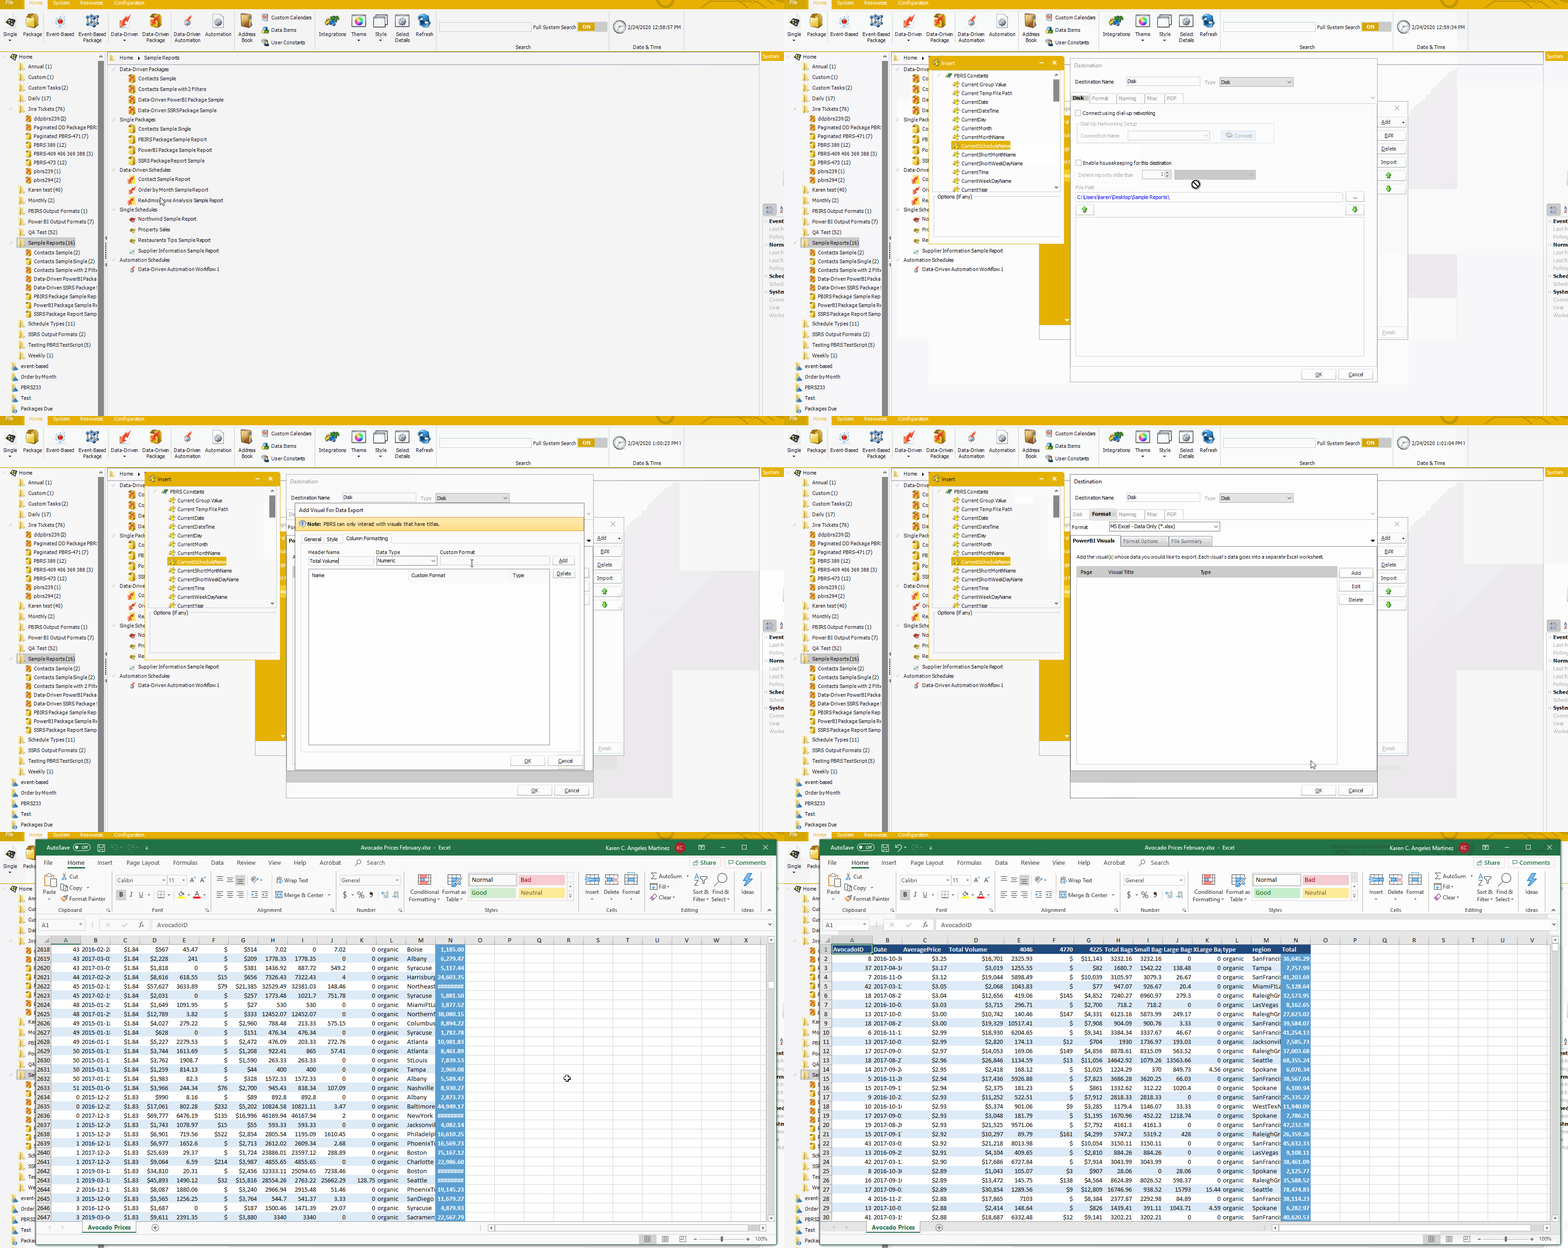
MS Excel - Data Only (*.xlsx) outputs for Power BI Service Reports & Dashboards
- To export Power BI Service Reports & Dashboards to MS Excel - Data Only, follow these steps:

Format
The output format is selected as part of the Destinations setup for each destination type. The tab above can be found in the Destinations section of a schedule.
- MS Excel - Data Only export data from specified visuals to Excel.
- To add visual data click Add.
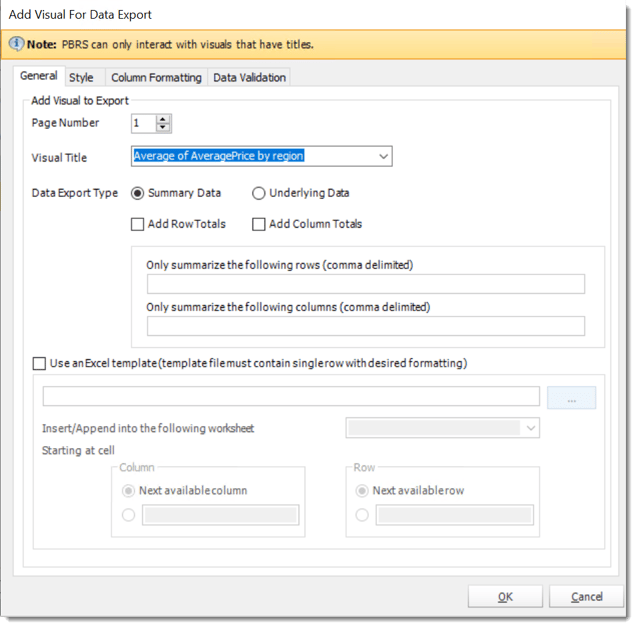
General
- Page Number: Enter the page number where the visual title is located.
- Visual Title: Select the Visual data's titles you want to export.
In order for PBRS to see a Visual (for exporting to CSV or Excel), the Visual MUST have a title already set in Power BI.
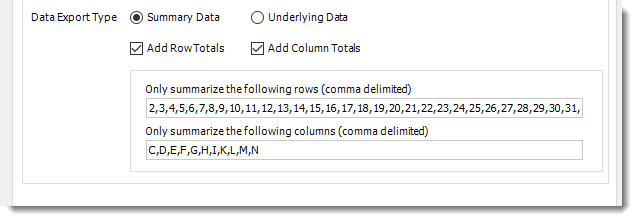
Data Export Type
- Summarized data: Select this option if you want to export data for what you see in that visual.
- Underlying data: Select this option if you want to see the data in the visual and additional data from the model.
- Add Row Totals: Select this option if you want to add row totals in that visual worksheet. This option will add row totals in all rows of the visual.
- Only summarize the following rows (comma delimited): If you don't want to add all rows total in the visual worksheet, enter the number of the row where you want the total of the row in the visual worksheet.
You must have checked Add Row Totals to use this option.
- Add Column Totals: Select this option if you want to add column totals in that visual. You must specify the columns in the Only summarize the following columns textbox.
- Only summarize the following columns (comma delimited): If you don't want to add all column totals in the visual worksheet, enter the letter of the column where you want the total of the column.
You must have checked Add Column Totals to use this option.
Excel Template
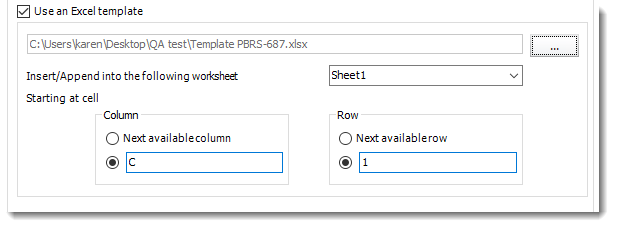
- Use this option if you want to export the Power BI Visual to an excel template already created.
- Once you check Use an Excel template, use the (...) button to browse the excel template.
- Once the excel template is selected, select the worksheet you want to export the Power BI Visual.
- You have the option to select the specific column and row for the Power BI Visual or select the next available column and row.
Style
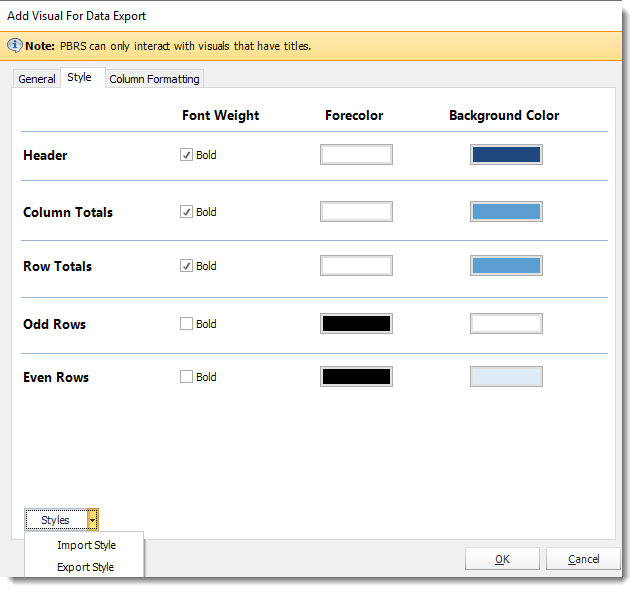
- In this section, you may modify the font-weight and colors of that visual.
- Styles: You can import and/or export styles to be used in other destinations and schedules.
This option can only be used in MS Excel - Data Only (*.xlsx) for Power BI Service Reports & Dashboards.
Column Formatting
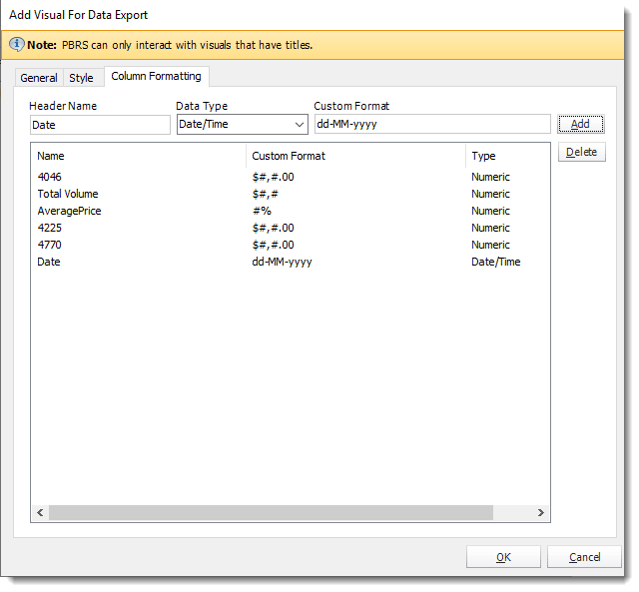
- In this section, you can specify the type of format string to the data type of your column.
| Format String | Value | Output |
| ### | 123 | 123 |
| 000 | 10 | 010 |
| #,# | 1000 | 1,000 |
| 00.00 | 10.1 | 10.10 |
| #,##0.00 | 1000 | 1,000.00 |
| #0.##% | 0.011 | 11% |
| 0.00% | 0.0123 | 1.23% |
| 0.00E+00 | 120000 | 1.20E+05 |
| #?/? | 1.25 | 1 1/4 |
| #\?/100 | 1.25 | 1 25/100 |
| 0.00_);[Red]\(0.00\) | -1,123 | (1.12) |
| 0.00_);\(0.00\) | -1,123 | (1.12) |
| $#,##0.00 | 5,46 | $5.46 |
| #,##0.00\[$€-1]_);\(#,##0.00\[$€-1]\) | 123 | 123.00€ |
| [$€-2]\#,##0.00_);\([$€-2]\#,##0.00\) | 123 |
€123.000 |
| [$-F800]dddd\, \mmmm\ dd\, \yyyy | 24.2.2020. 0:00:00 |
Monday, February 24, 2020 |
| [$-409]mmmm\d\, \yyyy;@ | 24.2.2020. 0:00:00 |
February 24, 2020 |
| [$-409]d\-mmm;@ | 24.2.2020. 0:00:00 |
24-Feb |
| [$-409]m/d/yy\h:mm\ AM/PM;@ | 24.2.2020. 0:13:00 |
2/24/20 12:13 AM |
| [$409]h:mm\ AM/PM:@ | 24.2.2020 21:10:00 |
9:10 PM |
| @ | abc |
abc |
- Header Name: Enter the column header name.
- Data Type: Select the data type.
- Custom Format: Enter the format string.
- Click Add.
Data Validation
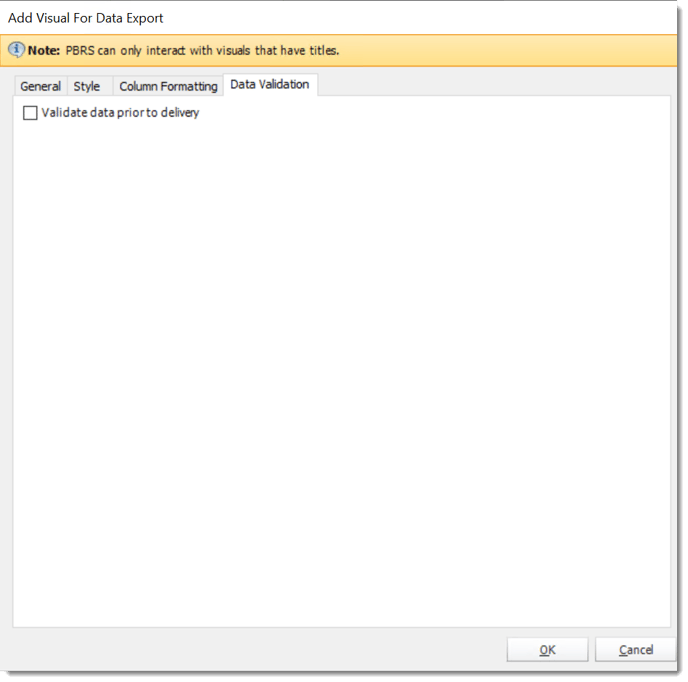
- In this section, you can validate your data before the report is sent by checking this box.
- Click OK.
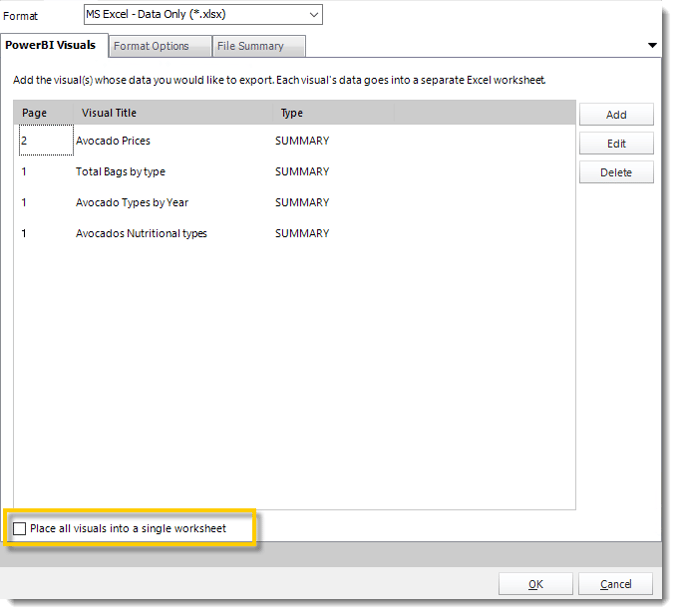
- Place all visuals into a single worksheet: Select this option to place all Power BI Visual's data into a single worksheet.
Leaving this option unchecked, each Power BI Visual's data will be exported to its own tab (worksheet) in the Excel file (workbook).
Format Options
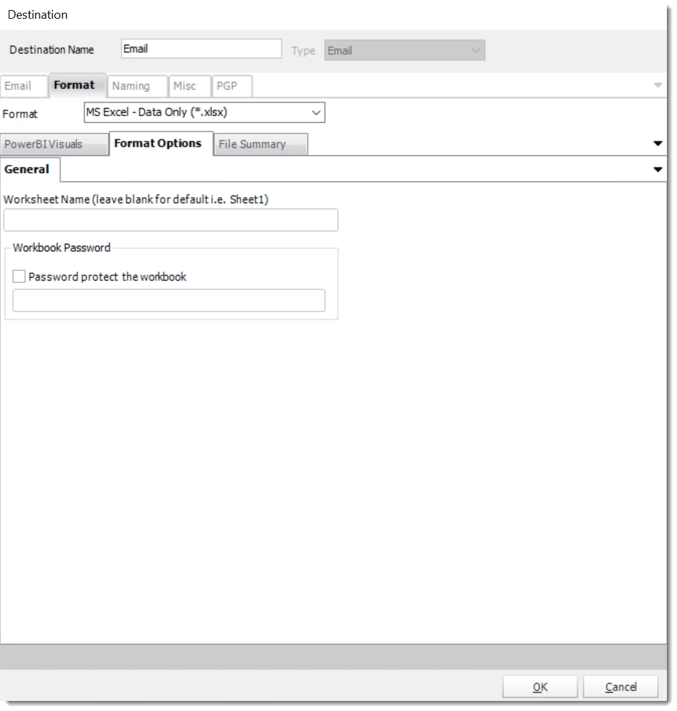
- Use this option to give your worksheet a name or password protect your worksheet.
File Summary
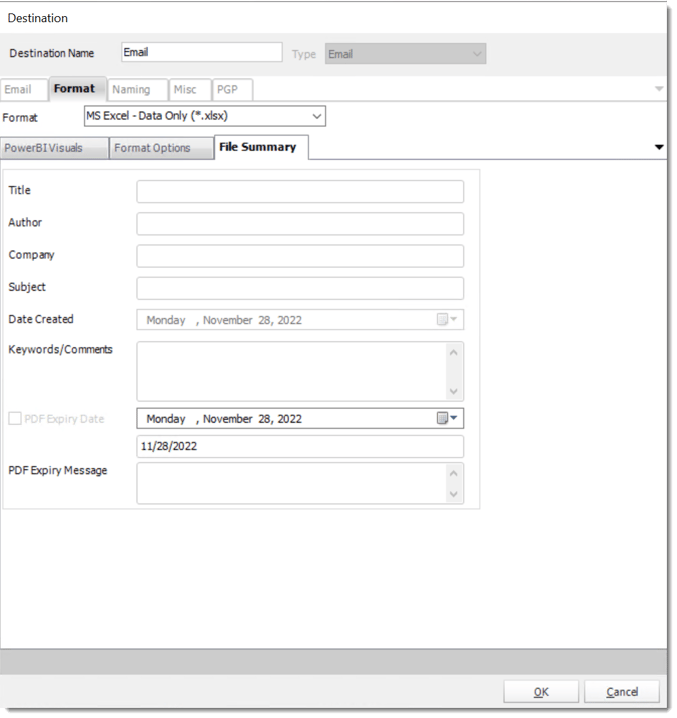
- Determine file summary by filling in the required properties as illustrated above.
- If properties are not filled in or are left blank, the original properties which exist in the exported report will be preserved. To overwrite these with a blank, enter a space in the field you wish to overwrite.
Naming
These options determine how the exported file will be named:
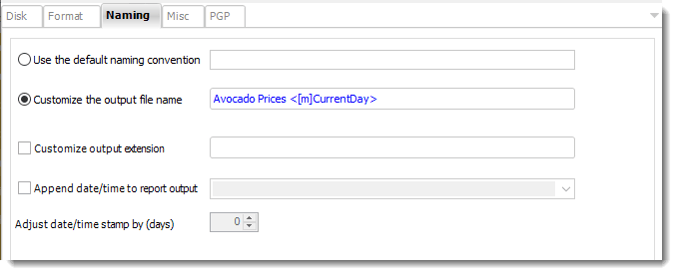
- This is the option where you name the output file.
- Default Naming Convention: PBRS will name the output file in the following format: reportname.format extension, e.g. Catalog Report.pdf.
- Customize the output file name: Choose your own filename or right-click and use the Insert Function to insert a value.
- Customize output extension: Choose your own extension. This is useful for system integration. For example, the default extension for a character separated file is "CSV," but you can give your export an extension of "txt" so that the file can be read by another already existing system you may have. You may also right-click and use the Insert Function to insert a value.
- Append date/time: This is useful for the following reasons:
- If the filename is the same each time, and it is being exported to the same folder each time, then it will be overwritten by the latest one each time. By appending date and time to the filename, each file remains unique, and no files are overwritten.
- You can track which reports ran and when they ran by looking at what the report is named.
Misc
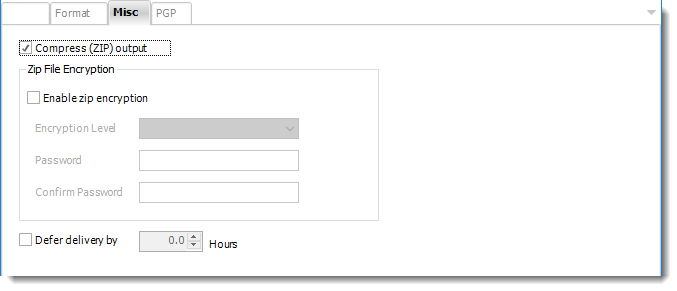
- Compress (ZIP) Output: Zips the output. Ability to use .zip encryption as well.
- Zip File Encryption: Check the option to encrypt and password protect the zip file.
- Defer Delivery: The report will be generated at the scheduled time, but will not be delivered to the specified destination until later.
- For more information, go to Deferred Delivery
MS Excel (*.xlsx) outputs for Power BI Service Reports & Dashboards
- To export MS Excel in Power BI Service Reports & Dashboards follow the following steps:
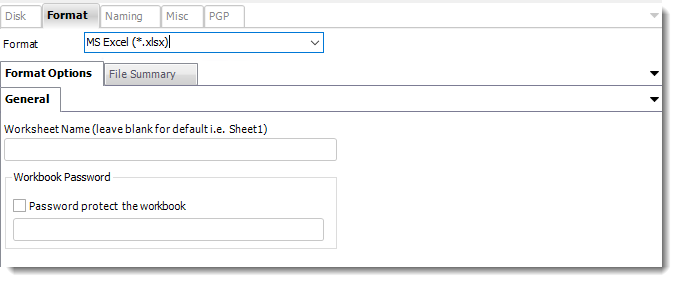
Format
The output format is selected as part of the Destinations setup for each destination type. The tab above can be found in the Destinations section of a schedule.
Format Option
- Worksheet Name: Write the name of the worksheet if not it will go by default as Sheet1.
- Workbook Password: Here you may have the option to create a password for the format.
Options
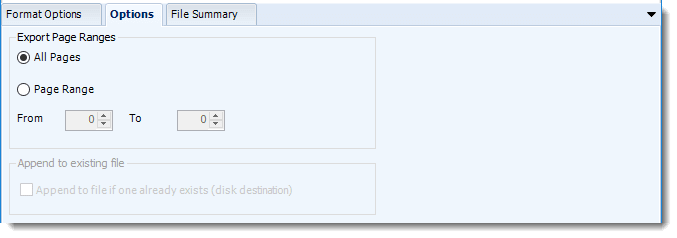
- Use this option to select to export all pages or just a selection.
File Summary
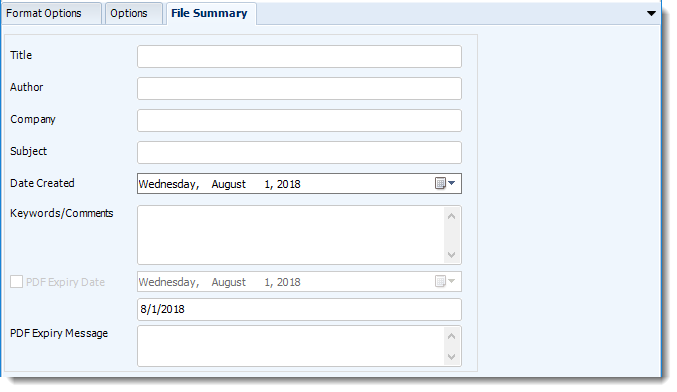
- Determine file summary by filling in the required properties as illustrated above.
- If properties are not filled in or are left blank, the original properties which exist in the exported report will be preserved. To overwrite these with a blank, enter a space in the field you wish to overwrite.
Naming
These options determine how the exported file will be named:
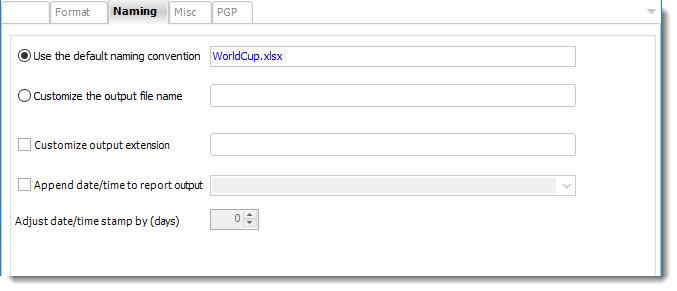
- This is the option where you name the output file.
- Default Naming Convention: PBRS will name the output file in the following format: reportname.format extension, e.g. Catalog Report.pdf.
- Customize the output file name: Choose your own filename or right-click and use the Insert Function to insert a value.
- Customize output extension: Choose your own extension. This is useful for system integration. For example, the default extension for a character separated file is "CSV," but you can give your export an extension of "txt" so that the file can be read by another already existing system you may have. You may also right-click and use the Insert Function to insert a value.
- Append date/time: This is useful for the following reasons:
- If the filename is the same each time, and it is being exported to the same folder each time, then it will be overwritten by the latest one each time. By appending date and time to the filename, each file remains unique, and no files are overwritten.
- You can track which reports ran and when they ran by looking at what the report is named.
Misc

- Compress (ZIP) Output: Zips the output. Ability to use .zip encryption as well.
- Zip File Encryption: Check the option to encrypt and password protect the zip file.
- Defer Delivery: The report will be generated at the scheduled time, but will not be delivered to the specified destination until later.
- For more information, go to Deferred Delivery
MS Excel 2007 (*.xlsx) outputs for Paginated Reports or SSRS
- To export MS Excel in Power BI Service Paginated Reports, Power BI Paginated Reports on Premise and SSRS Reports follow the following steps:
Format
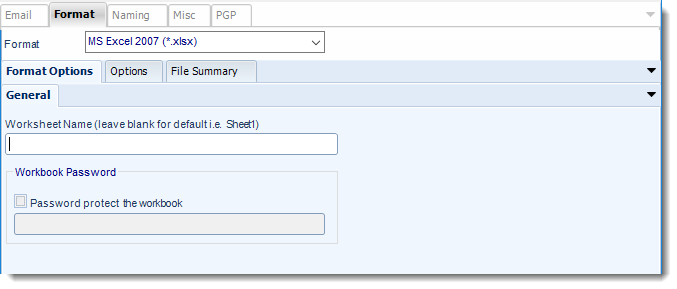
The output format is selected as part of the Destinations setup for each destination type. The tab above can be found in the Destinations section of a schedule.
Format Option
- Worksheet Name: Write the name of the worksheet if not it will go by default as Sheet1.
- Workbook Password: Here you may have the option to create a password for the format.
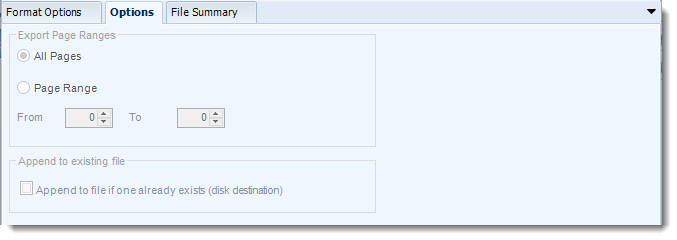
Options
File Summary

- Determine file summary by filling in the required properties as illustrated above.
- If properties are not filled in or are left blank, the original properties which exist in the exported report will be preserved. To overwrite these with a blank, enter a space in the field you wish to overwrite.
Naming
These options determine how the exported file will be named:
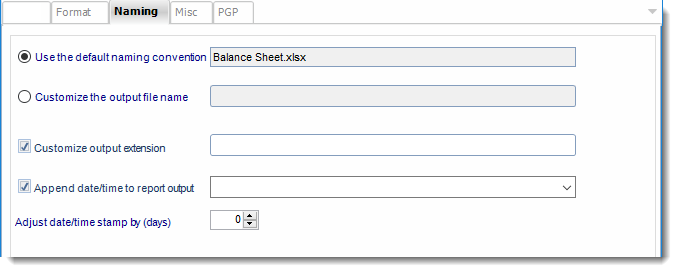
- This is the option where you name the output file.
- Default Naming Convention: PBRS will name the output file in the following format: reportname.format extension, e.g. Catalog Report.pdf.
- Customize the output file name: Choose your own filename or right-click and use the Insert Function to insert a value.
- Customize output extension: Choose your own extension. This is useful for system integration. For example, the default extension for a character separated file is "CSV," but you can give your export an extension of "txt" so that the file can be read by another already existing system you may have. You may also right-click and use the Insert Function to insert a value.
- Append date/time: This is useful for the following reasons:
- If the filename is the same each time, and it is being exported to the same folder each time, then it will be overwritten by the latest one each time. By appending date and time to the filename, each file remains unique, and no files are overwritten.
- You can track which reports ran and when they ran by looking at what the report is named.
Misc

- Compress (ZIP) Output: Zips the output. Ability to use .zip encryption as well.
- Zip File Encryption: Check the option to encrypt and password protect the zip file.
- Defer Delivery: The report will be generated at the scheduled time, but will not be delivered to the specified destination until later.
- For more information, go to Deferred Delivery
MS Excel 97-2000 (*.xls) for Paginated Reports on Premise or SSRS
- To export MS Excel 97-2000 in Power BI Paginated Reports on Premise and SSRS Reports follow the following steps:
Format
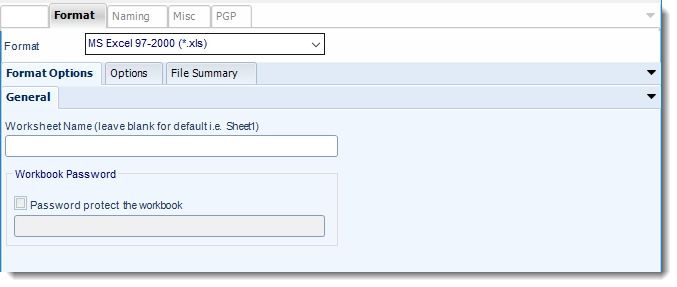
The output format is selected as part of the Destinations setup for each destination type. The tab above can be found in the Destinations section of a schedule.
Format Option
- Worksheet Name: Write the name of the worksheet if not it will go by default as Sheet1.
- Workbook Password: Here you may have the option to create a password for the format.
Options

File Summary

- Determine file summary by filling in the required properties as illustrated above.
- If properties are not filled in or are left blank, the original properties which exist in the exported report will be preserved. To overwrite these with a blank, enter a space in the field you wish to overwrite.
Naming
These options determine how the exported file will be named:
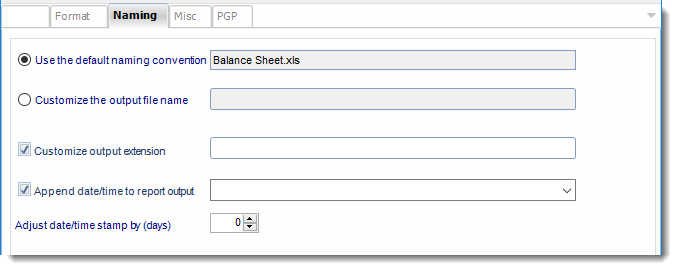
- This is the option where you name the output file.
- Default Naming Convention: PBRS will name the output file in the following format: reportname.format extension, e.g. Catalog Report.pdf.
- Customize the output file name: Choose your own filename or right-click and use the Insert Function to insert a value.
- Customize output extension: Choose your own extension. This is useful for system integration. For example, the default extension for a character separated file is "CSV," but you can give your export an extension of "txt" so that the file can be read by another already existing system you may have. You may also right-click and use the Insert Function to insert a value.
- Append date/time: This is useful for the following reasons:
- If the filename is the same each time, and it is being exported to the same folder each time, then it will be overwritten by the latest one each time. By appending date and time to the filename, each file remains unique, and no files are overwritten.
- You can track which reports ran and when they ran by looking at what the report is named.
Misc

- Compress (ZIP) Output: Zips the output. Ability to use .zip encryption as well.
- Zip File Encryption: Check the option to encrypt and password protect the zip file.
- Defer Delivery: The report will be generated at the scheduled time, but will not be delivered to the specified destination until later.
- For more information, go to Deferred Delivery
