Data-Driven Automation Schedules
A Data-Driven Automation Schedule gives you the ability to write automated processes using CRD' standard Custom Actions from database tables and queries at run time. You can use Data-Driven Automation schedules for a number of scenarios.
Data-Driven Automation Schedules make up the Business automation arm of CRD. Beyond reporting, you can automatically update databases, set registry keys, move files, and even create reports directly from database data.
How to Create a Data-Driven Automation Schedule
- Go to Data-Driven Automation.

Building a Data Driver Wizard
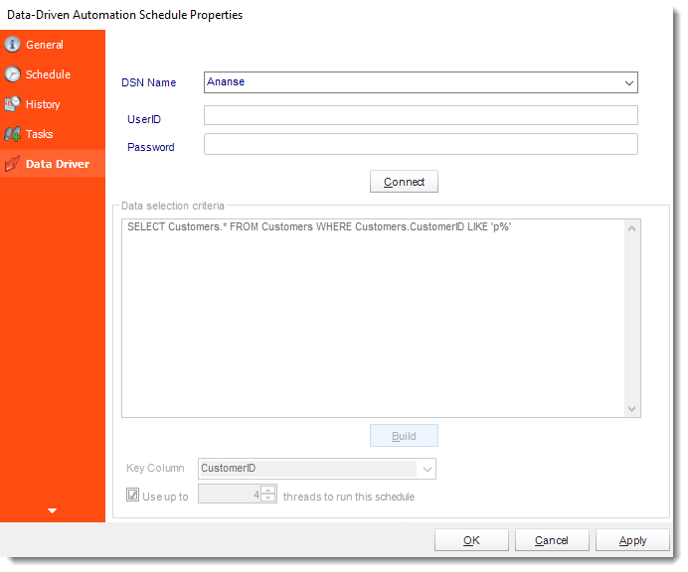
- The Data Driver is where you set up the source for data for your data-driven reports. If your data source or data selection criteria changes this is where you will need to make any required changes.
- ODBC Datasource Name: Drop down and select a DSN.
We strongly recommend System DSNs so that the DSN is visible to CRD even when the user associated with the DSN is logged off.
All communication to databases (including Access databases) is done through ODBC, so you must setup a system DSN to the database before you can use this facility.
When setting up DSNs we recommend (if possible) that you use Windows Authentication (Trusted Connection). This ensures that your username and password are not required to be stored in CRD (more secure) and overcomes a large number of security restrictions which Windows places on DSNs. When using Windows Authentication, make sure that the CRD NT service user (or background application service user) has full rights to the database otherwise, though you will connect when you are logged in, automated scheduling will fail if the Service user has not got rights to the database.
When setting up a DSN to a SQL server, you must ensure that the "Default Database" setting is set to the database you are connecting to (Windows defaults this to "Master").
- UserID: Enter the User ID CRD should use to log on to the database.
- Password: Enter the password associated with the above user.
- Connect: Click Connect to connect to the Database.
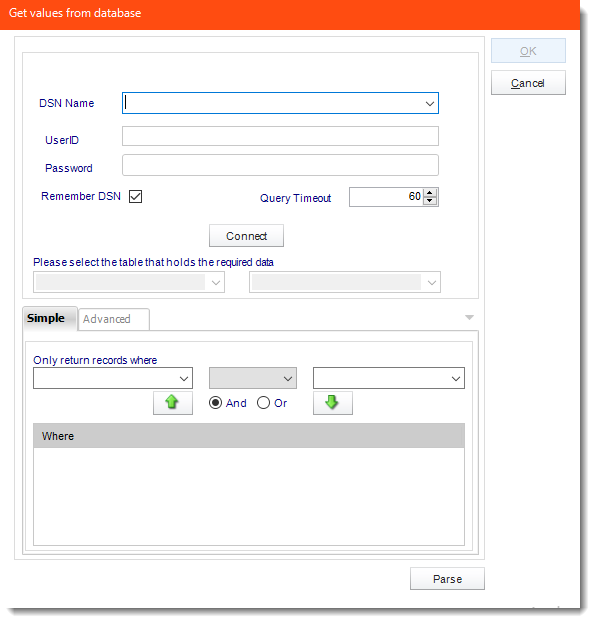
- Select the table from the database that holds the required data. You can refine your selection query by using the simple or advanced tabs.
- Click Parse.
- For more information of "Get Values From Database" interface, click here.
- Click OK.
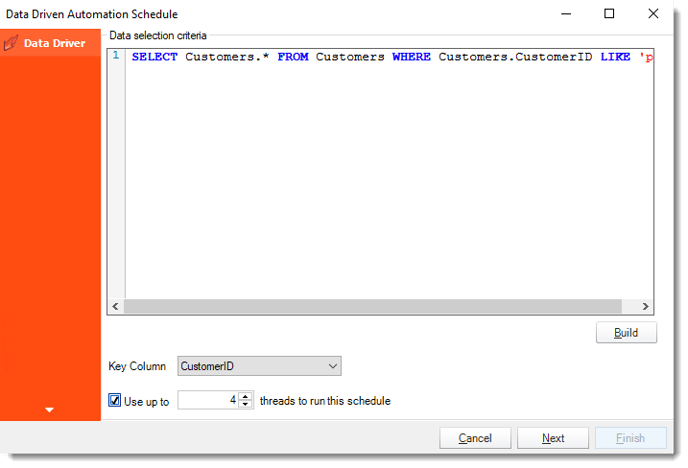
- Click Build to specify the data selection criteria. This will return you to the Build Data Driver tool.
- Key Column: Select the key column for the data that is returned for the reports. The information that drives the schedule is required to have a key column so that each row in the table is uniquely identified by the value in this column. The key column is there as an identifier which is used to troubleshoot in cases where there is a problem with one of the records.
- Use up to 'x' threads to run this schedule: Check this option to allow x amount of threads to be exported simultaneously.
Click Next to continue to the next wizard section.
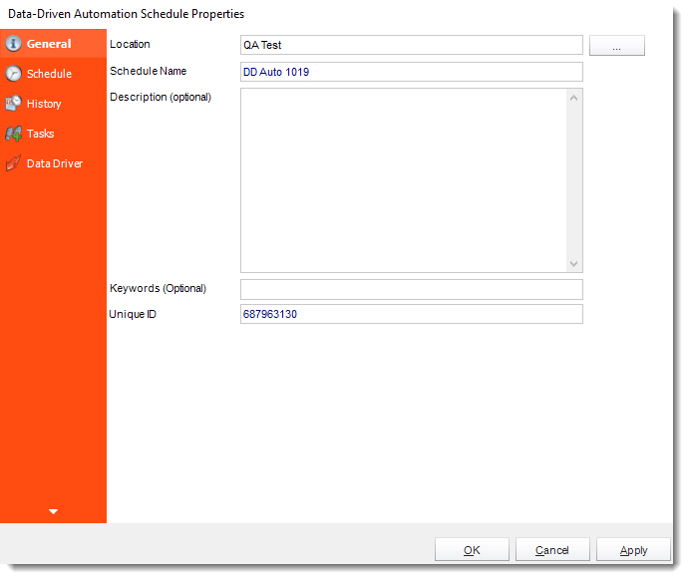
General Wizard
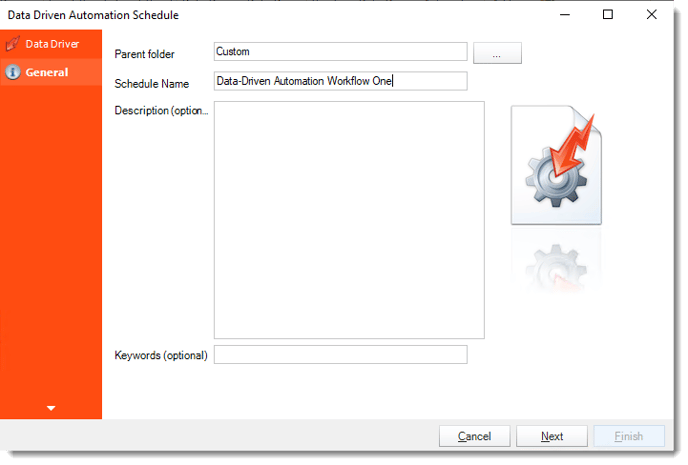
Enter your schedule Details. This section determines the most basic properties of a schedule.
- Parent Folder: Select the CRD folder where your schedule will be stored.
- Schedule Name: Name your automation schedule.
- Description: Add a description to your schedule
- Keywords: Add keywords to make the schedule searchable, they can also be used by Smart Folders.
Click Next to continue to the next wizard section.
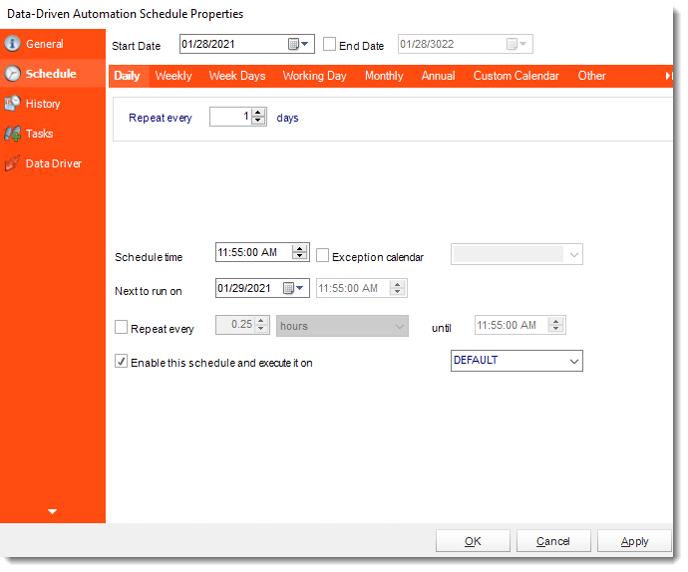
Schedule Wizard
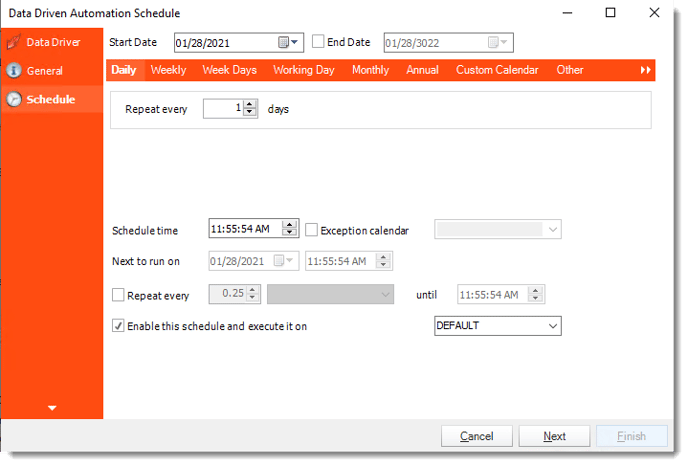
In this section, you will decide when the report will execute. There are a variety of options:
- Daily: Run a report every day or at a frequency of days.
- Sub options: Repeat every X Days.
Example: Run the schedule every 3 days.

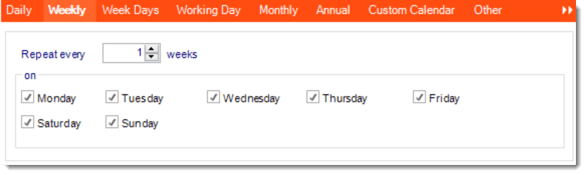
- Weekly: Run a report on a weekly time frame.
- Sub options: Repeat every X weeks.
Example: Run the schedule every 2 Weeks.
- On: Select the specific days of the week the schedule will run. If only once a week, select only the day of the week it will run.
Example: Run every Monday, Wednesday, and Friday.
- Week Days: Run the schedule Monday through Friday.

- Working Day: Run the schedule starting on a specific day of the month. Indicate which day of the month the schedule will run. E.G. run the schedule on the 4th working day of the month.

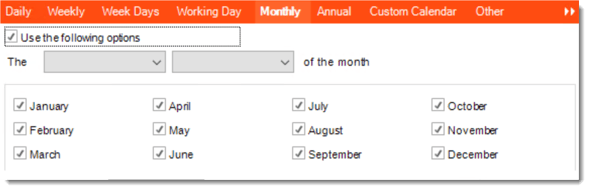
- Monthly: Run the schedule on a monthly time frame.
- Use the following options: Checking this box will enable you to select frequency options such as the “last Thursday of the month.” Also you can include or exclude specific months from the schedule.
- Annual: Run the schedule every year at a specified time.

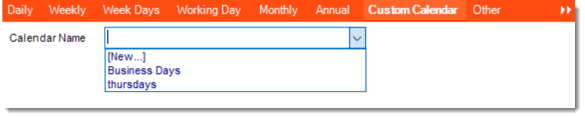
- Custom Calendar: Select the custom Calendar you wish to use. You can create a new custom calendar from the menu as well. Please see Custom Calendars for more information.
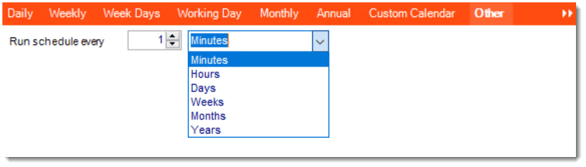
- Other: Other scheduling options.
- Run Schedule every X Minutes, hours, days, weeks, months, years.
- None: No scheduling is required for this item.

- Start Date: Enter the desired starting date for the schedule. This section can be the current date (providing the schedule time has not already passed) or a date in the future.
- End Date: If the schedule is due to end after a certain date enter that here. If the schedule is to run indefinitely, then leave it blank.
- Schedule time: On the Next Run date, the package will run at this time.
- Exception Calendar: Choose a calendar that will instruct the schedule to NOT run on those specified days. Please see Custom Calendars for more information.
- Next to run on: The package will next run on this date.
- Repeat Every: Rerun the package every x minutes from the scheduled time until your specified time.
For example, you can set up a daily package to run every day at 8 am, and to run every hour until 5 pm.
- Until: After this date, there will be no automated scheduling of this package.
- Enable this Schedule: Uncheck this option to Disable the package. Disabled packages are not deleted, but they do not execute automatically. You can re-start the automatic scheduling at a later date by checking this option again. Or right-clicking this schedule from the main screen and selecting Enable.
Click Next to continue to the next wizard section.
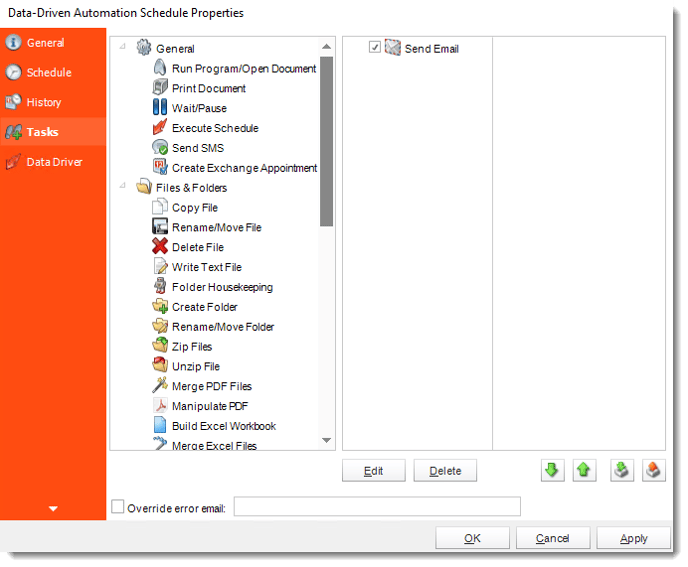
Custom Tasks Wizard
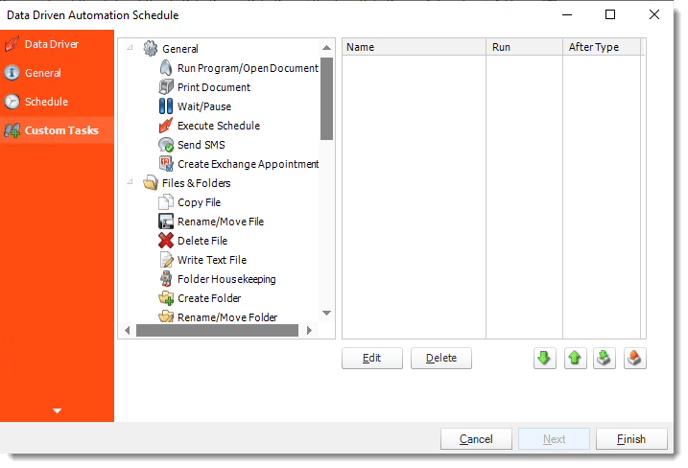
- In the section, you have the option of setting up custom tasks. Custom tasks are business process automation tools that can be auto-triggered before or after a report runs.
- For more information on Custom Tasks, click here.
- If you have no desire to add a Custom Task, you can click finish to complete the schedule.
Data-Driven the tasks
- Using Data-Driven Inserts, CRD will automatically pull data from your table and use it to customize the subject, body or report format.
- With the Data-Driven Automation Schedule, you can determine the delivery method of your report based on your data.
- Data driving the Report's Distribution.
- As mentioned above, CRD will pull delivery data from your database.
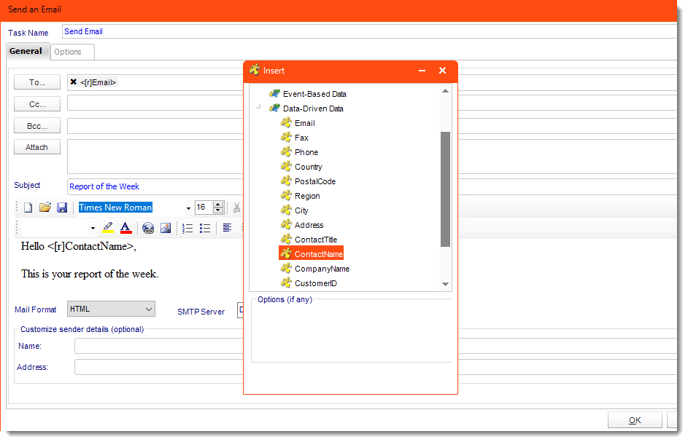
Using Send an Email Custom Tasks with Data-Driven Automation
For this example, this is just one of the tasks that can be done this way.
- With Data-Driven inserts, simply drag and drop the field that indicates your desired destination (email in this case).
Data-Driven Automation Schedule Context Menu
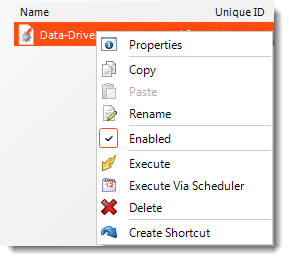
To access the schedule's context Menu right-click on the schedule
- Properties: Selecting this option will bring up the "Properties" module containing configuration information for that schedule.
- Copy: Use this to copy an existing schedule. You can then paste it into another folder or the same folder. Simply open the folder you wish to paste to, right-click in the "white" space and select "Paste". Follow the on-screen instructions to complete the process.
- Paste: Paste a previously copied schedule.
- Rename: Rename a schedule.
- Enabled: Schedules are enabled when there is a check beside this option. To stop a schedule from running, or to "pause" it for a while, select this option to remove the check. Disabled schedules will not run till they are enabled again.
- Execute Schedule: This will execute the schedule immediately. Note that the next run date and time is not moved on as a result of manual execution. They only move on if the schedule is run automatically by one of the schedulers.
- Execute Via Scheduler: This will execute the schedule via scheduler time. Note that the next run date and time will be moved on as a result of manual execution.
- Delete Schedule: Selecting this option will delete the schedule.
- Create Shortcut: Use this option to create a shortcut you can save in any location on your PC. Execute the shortcut to execute the schedule in CRD.
Data-Driven Automation Properties
To access your schedule properties, right-click on a schedule and select properties.
Similar to the schedule wizard, you adjust settings to your schedules such as timing or custom tasks.
- General
- Schedule
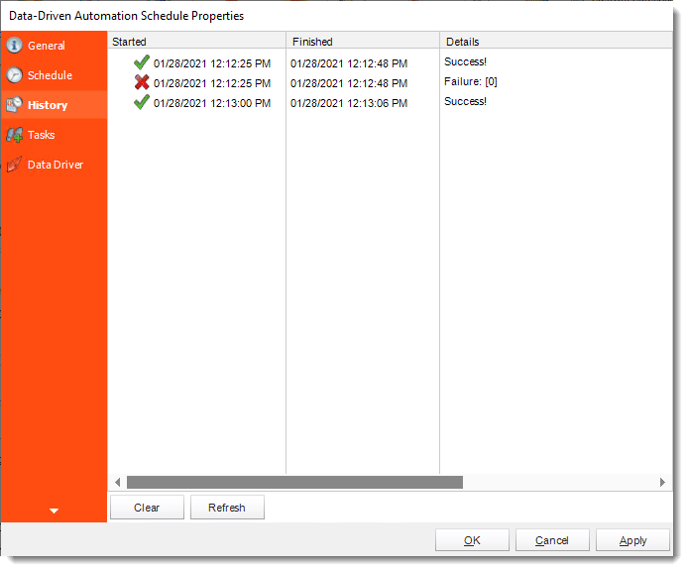
- History: Review the schedule's history. Successes, failures, and other data is located here.
- Tasks
- Data-Driver