How do I setup Gizmos in IntelliFront BI?
A Gizmo is an object that is used to group one or more Crystal Reports or SQL Server Reporting Services (SSRS) Reports together for scheduling and distribution.
Workshop - Gizmos
A Gizmo is an object that is used to group one or more Crystal Reports or SQL Server Reporting Services (SSRS) Reports. This group of reports will be automatically run together and delivered to one or more destinations such as email, FTP or a file system location.
IntelliFront BI allows you to create the most basic Gizmo, with just a name, to the most advanced Gizmo with a combination of Crystal and SSRS Reports, multiple triggers, multiple destinations and even a Data-Driver.
How do I setup a Gizmos for Crystal and/or SSRS Reports in IntelliFront BI?
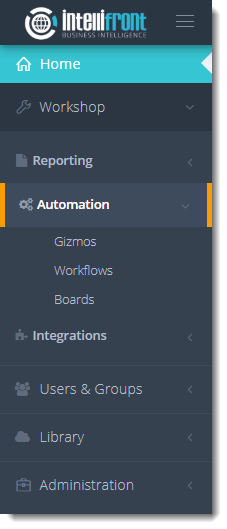
- Go to Workshop and select Automation. In Automation, select Gizmos
- Or select Report Scheduling (Gizmos) from the card on the home screen.

- Click New Gizmo.

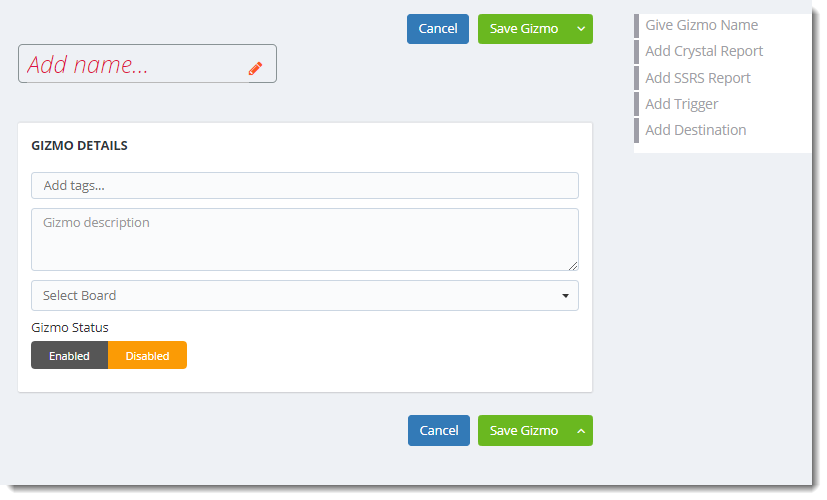
Give Gizmo Name
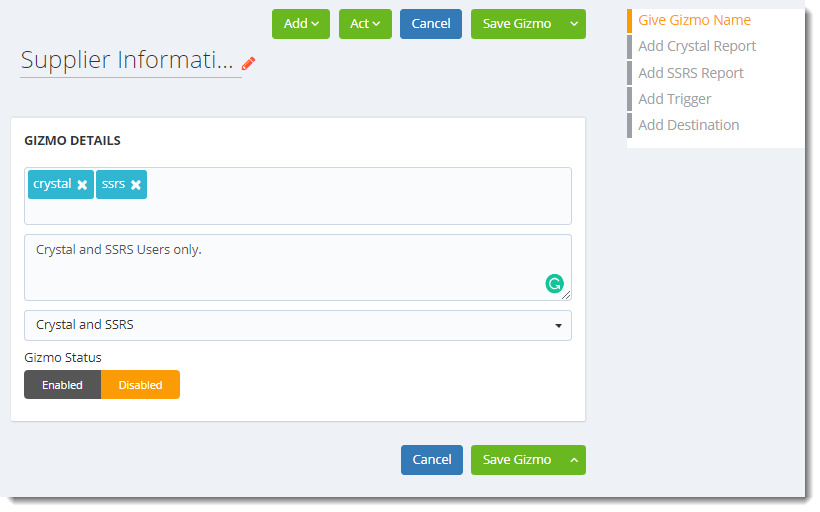
- Give the Gizmo a name.
The name must be unique.
- Click the checkmark to save the name.
- Add a Tag: Give the Gizmo a Tag. This is optional, it can be useful if you have a lot of Gizmos as you will be able to search for Gizmos using Tags.
- Gizmo Description: Enter the description of the Gizmo here. This is optional, you may want to write the name of the report running and the department and the frequency.
- Select Board: If the Gizmo is to be assigned to a board select the board from the drop-down list.
Tip: You must have already created a board before you can use this option.
- Gizmo Status: Click Enabled to enable the Gizmo.
Add Crystal Report
- To add Crystal Report in a Gizmo, click here.
Add SSRS Report
- To add SSRS Report in a Gizmo, click here.
Add Trigger
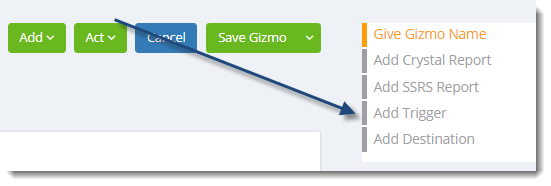
- Select Add Trigger.
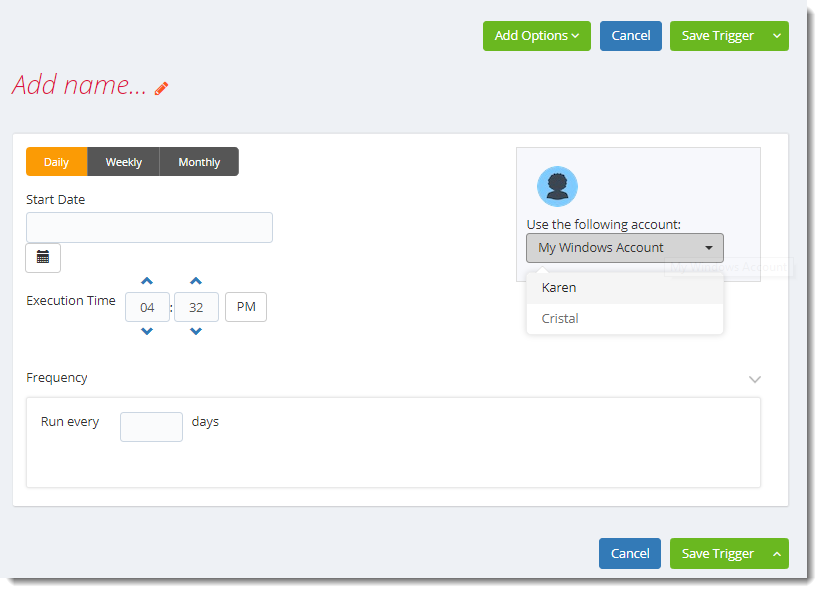
- Give the Trigger a name and click the check mark to save it.
- Start Date: Enter the desired starting date for the schedule. This section can be the current date (providing schedule time has not already passed) or a date in the future.
- Execution time: The gizmo will run at this time.
- Use the following account: Select the windows account to send the report.
In this section, you will decide when the report will execute. There are a variety of options:
- Daily: Run a report every day or at a frequency of days.
- Sub options: Repeat every X Days.
Example: Run the schedule every 3 days.
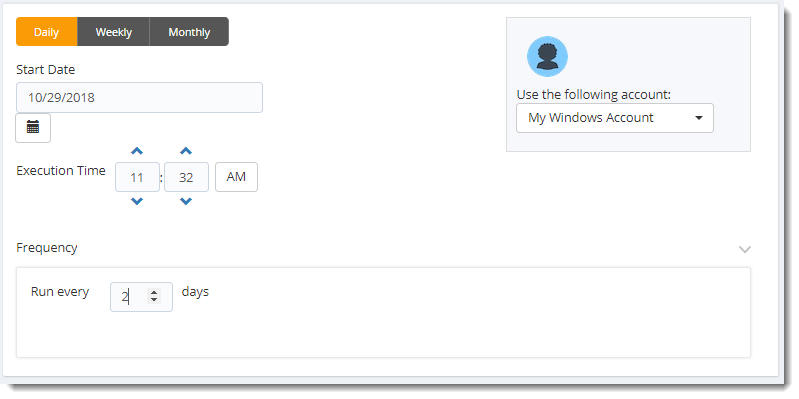
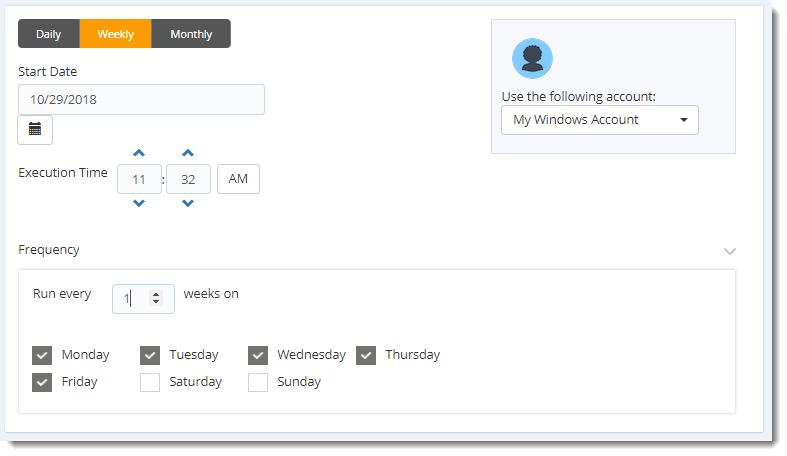
- Weekly: Run a report on a weekly time frame.
- Sub options: Repeat every X weeks.
Example: Run the schedule every 2 Weeks.
- On: Select the specific days of the week the schedule will run. If only once a week,select only the day of the week it will run.
Example: Run every Monday, Wednesday, and Friday.
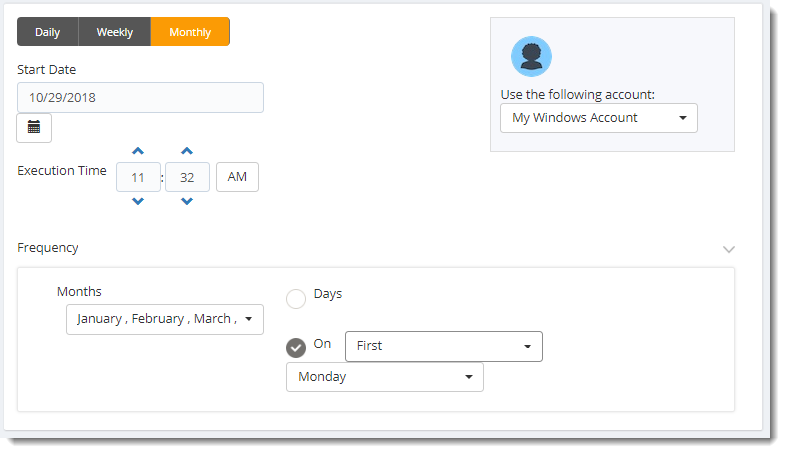
- Monthly: Run the schedule on a monthly time frame.
- Frequency: Select frequency options such as the “last Thursday of the month.” Also you can include or exclude specific months from the schedule.
Add Options Menu
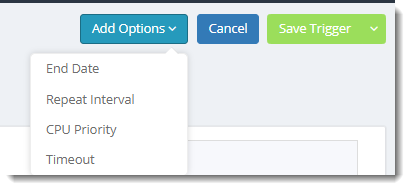
- End Date: If the schedule is due to end after a certain date enter that here. If the schedule is to run indefinitely, then leave it blank.

- Repeat Every: Rerun the package every x minutes from the scheduled time until your specified time.
For example, you can set up a daily package to run every day at 8 am, and to run every hour until 5 pm.

- CPU Priority: Set the priority level of the schedule. This will come into play when other schedules are running at the same time. If the priority is set to High then the event based schedule will take priority over other schedules in the queue.
- If the priority level is set to BelowNormal then it will be at the bottom of the queue and the other schedules will be ran first.

Timeout: Stop if task is running for more than X minutes or hours.

Save Trigger Menu
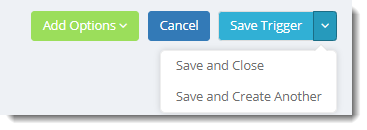
- Save and Close: Save the Trigger and returns you to the Gizmo Set up.
- Save and Create Another: Save the Trigger and create another Trigger.
Add Destination
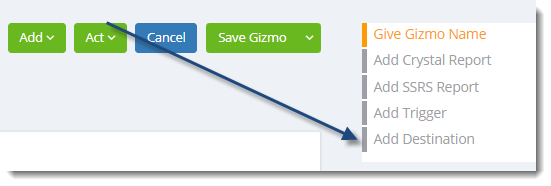
- Select Add Destination.
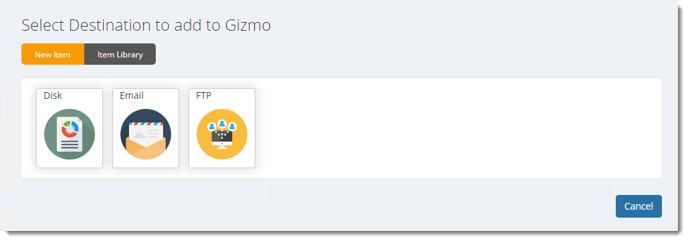
- Select the destination type, in this example, an email destination has been chosen.
- To learn more about Disk, click here.
- To learn more about FTP, click here.
Compose an Email Destination
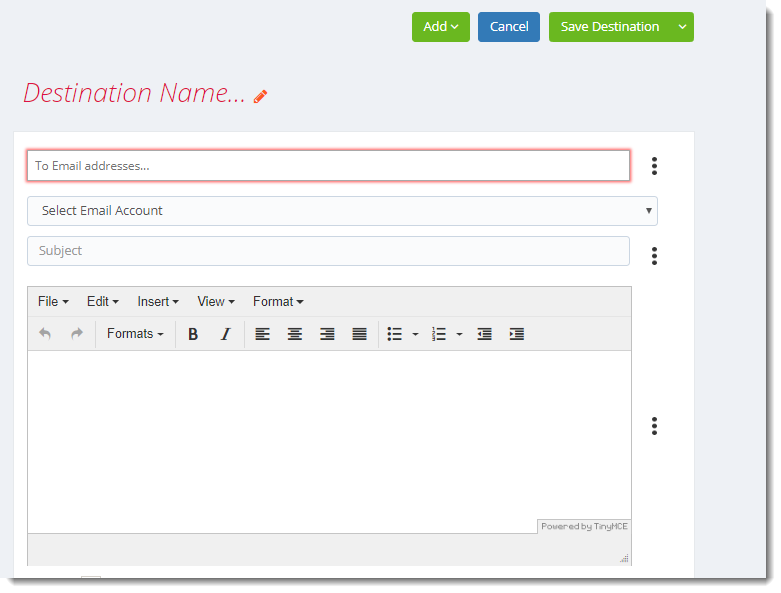
- Give the destination a name and then click the checkmark to save it.
- To Email Address: Enter the recipient email address.
Tip: To add a CC or a bcc click Add.

- Select Email Account: Choose the email account to use when sending reports from the dropdown list.
Tip: The email account must have been set up in Accounts first. To learn more about email accounts click here.

- Subject: Enter a subject or use the menu on the left to insert constants such as current date, current time etc.
- Format the email as required.
Tip: Use the menu on the left to insert constants such as current date, current time etc.
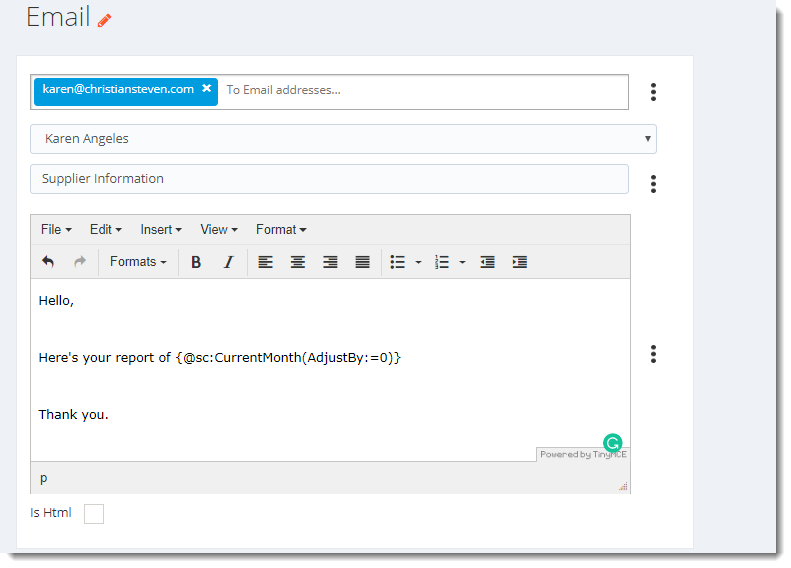
- Once the destination has been created save the destination.
Save Destination Menu
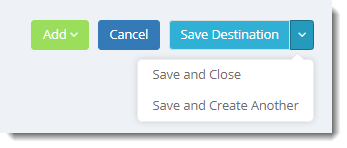
- Save and Close: Saves the destination and return to the Gizmo set up.
- Save and Add Another: Saves the current destination and allows you to set up another destination. This is very useful if you need the same report to go to one or more destinations at the same time.
Gizmos Tab Menus
Add Menu
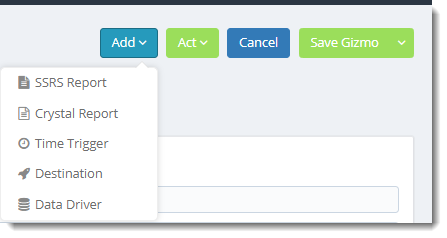
- You may add the following options:
- SSRS Reports
- Crystal Reports
- Time Trigger
- Destination
- Data Driver
Act Menu
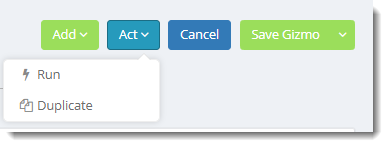
- Run: Use this option to test the report.
- Duplicate: Use this option to duplicate the schedule. This will copy the schedule and allow you to make changes. This is very useful if you want to create more than one Gizmo and a majority of the Gizmo is the same but you just need to change the recipient or the destination.
Save Gizmo
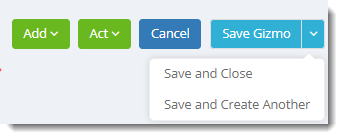
- Save and Close: Saves the Gizmo and return to the Gizmo main page.
- Save and Add Another: Saves the current Gizmo and allows you to set up another Gizmo.
- When you have finished setting up the Gizmo click Save Gizmo.
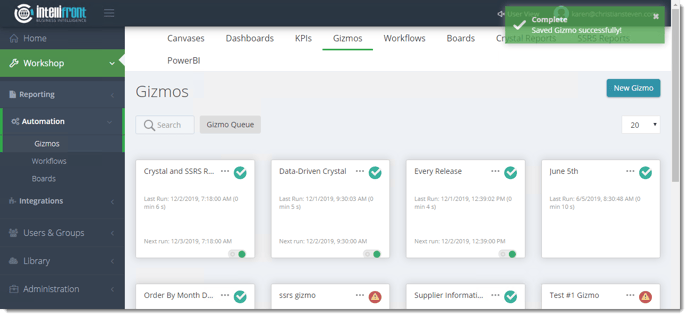
- A confirmation message will be displayed when the Gizmo has been saved successfully.
- Gizmo Queue: This option will show all gizmos on the queue.
Gizmo Context Menu
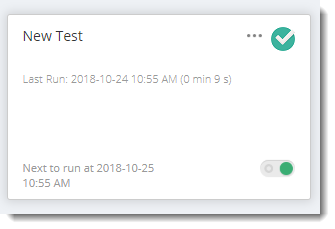
- On the Gizmo tab, you will see a card for each Gizmo that is not mapped to a Board. You can search for a gizmo by name and can adjust the number of cards displayed on a page.
Information on the Gizmo card
- Gizmo Name
- Action menu with options like Edit and Move to Board
- Status from last run (Success and Failure)
- Last run time and duration
- Next time to run at (either be a scheduled time or trigger definition)
- Enabled/Disabled control (green is enabled, red is disabled)
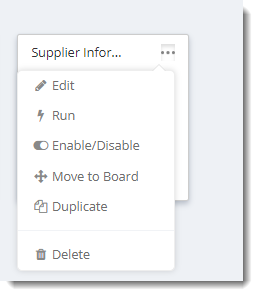
- To edit a Gizmo click on the (...) menu to the right of the Gizmo name. From here you can Edit a Gizmo, Run the Gizmo, Enable or Disable the Gizmo, Move the Gizmo to a Board, Duplicate the Gizmo.