This article applies to:
- Power BI Reports & Dashboards (On Premise - Power BI Report Server)
Single Reports Schedule for Power BI Reports & Dashboards on Premise.
The Single Schedule is the simplest and easiest way to schedule a report for delivery. It involves defining the report you wish to schedule, determine its timing, selecting parameters (if any), and setting the destination (s) of the report.
Example: Jamie is a reports developer that must send a daily report to management detailing the number of support tickets currently open. She requires a report to be sent in PDF format at 8:30AM to three individuals.
How to Create a Single Schedule Report for Power BI Reports & Dashboards on Premise?
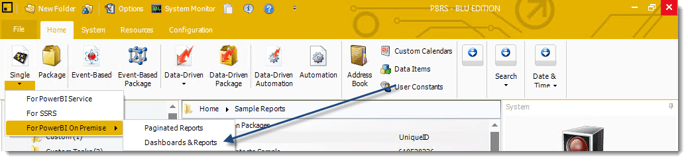
Step 1 - Navigate to Single and select PowerBI on Premise and then select Dashboards & Reports.

General Wizard
Step 2 - Complete the fields in the General Wizard Tab and then click Next to save the information and to continue to the Schedule section of the Wizard.
- Create In: This section is for selecting the folder where you want to create the single report in.
- Use SSRS Account: Select the SSRS Account where your report server is located, and then click on the (...) button next in Report Location.

- Service URL: Uncheck 'Use SSRS Account' checkbox, to enter the address of your reporting services server.
- Report Location: Browse through the report server browser to select the desired report. Authenticate to the reports server if necessary.
- Schedule Name: Write in the name of the package.
- Description (optional): You may write a short description to help other users identify exactly what this schedule is and what it is expected to do.
- Keyword (optional): Enter some keywords which can be used later by Smart Folders to identify this schedule.
Schedule Wizard
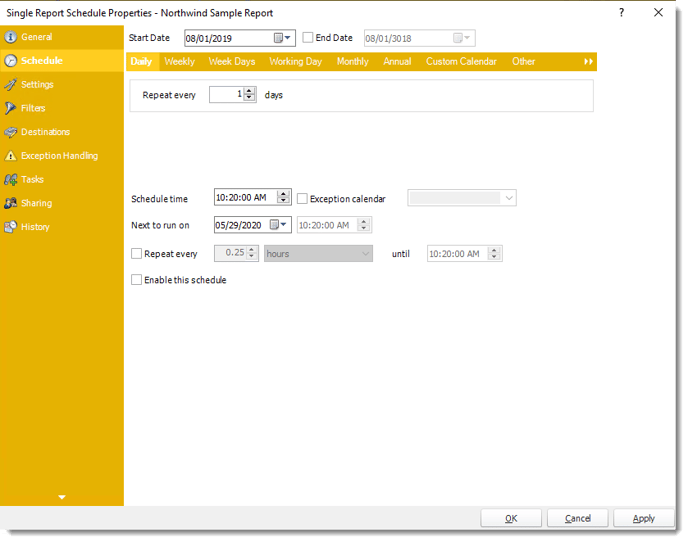
Step 3 - In this section, you will decide when the report will execute. There are a variety of options.
- Daily: Run a report every day or at a frequency of days.
- Sub options: Repeat every X Days.
Example: Run the schedule every 3 days.

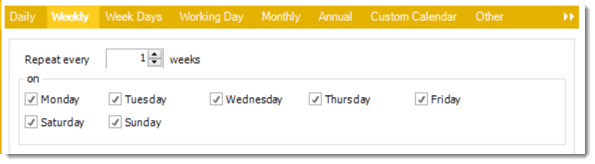
- Weekly: Run a report on a weekly time frame.
- Sub options: Repeat every X weeks.
Example: Run the schedule every 2 Weeks.
- On: Select the specific days of the week the schedule will run. If only once a week, select only the day of the week it will run.
Example: Run every Monday, Wednesday, and Friday.
- Week Days: Run the schedule Monday through Friday.

- Working Day: Run the schedule starting on a specific day of the month. Indicate which day of the month the schedule will run. E.G. run the schedule on the 4th working day of the month.

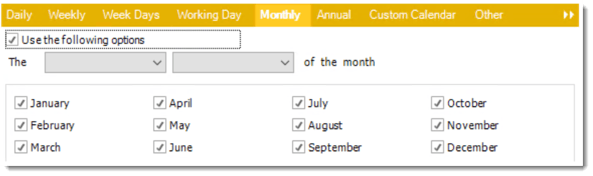
- Monthly: Run the schedule on a monthly time frame.
- Use the following options: Checking this box will enable you to select frequency options such as the “last Thursday of the month.” Also you can include or exclude specific months from the schedule.
- Annual: Run the schedule every year at a specified time.

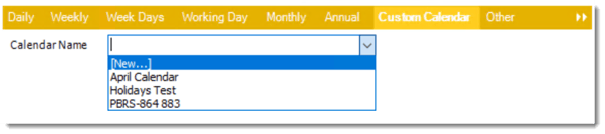
- Custom Calendar: Select the custom Calendar you wish to use. You can create a new custom calendar from the menu as well. Please see Custom Calendars for more information.
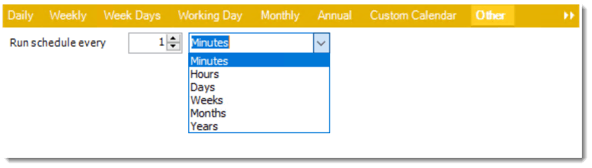
- Other: Other scheduling options.
- Run Schedule every X Minutes, hours, days, weeks, months, years.
- None: No scheduling is required for this item.

Step 4 -To specify an End Date for the schedule, check the End Date Box and input the desired date. If you do not select this option, the schedule will automatically be configured to continue until many years in the future.

Step 5 - Finish the set up of the scheduling frequency by determining a Start tine and a Next Run date and Repeating Interval of the schedule.

- Start Date: Enter the desired starting date for the schedule. This may be the current date (providing schedule time has not already passed) or a date in the future.
- Schedule time: On the Next Run date, the package will run at this time.
- Exception Calendar: Choose a calendar that will instruct the schedule to NOT run on those specified days. Please see Custom Calendars for more information.
- Next to run on: The package will next run on this date.
- Repeat Every: Rerun the package every x minutes from the scheduled time until your specified time.
For example, you can set up a daily package to run every day at 8 am, and to run every hour until 5 pm.
- Until: After this date, there will be no automated scheduling of this package.
- Enable this Schedule: Uncheck this option to Disable the package. Disabled packages are not deleted, but they do not execute automatically. You can re-start the automatic scheduling at a later date by checking this option again. Or right-clicking this schedule from the main screen and selecting Enable.
Step 6 - Click Next to save the information continue to the Settings Section of the Wizard.
Settings Wizard
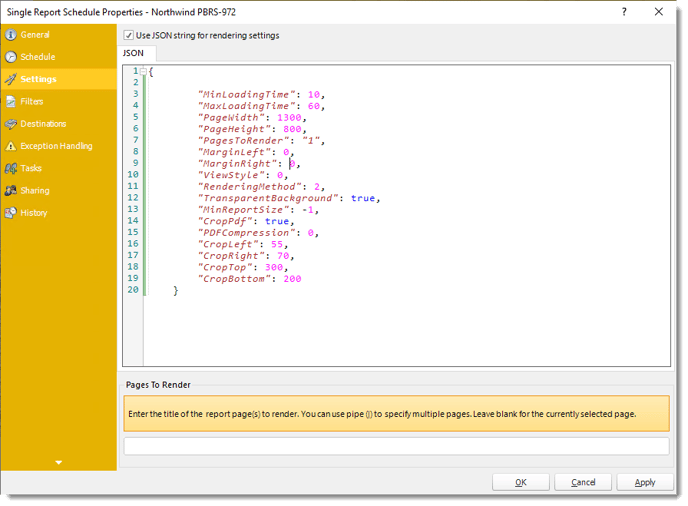
Step 7 - In this section, you can customize the export settings for your dashboard or report. For instance, you can adjust the height and width of the page to suit your needs. Additionally, if you wish to apply specific cropping to the PDF, you can set those parameters here as well.
Please Note: Settings and JSON Rendering settings may overwrite each other so it is best to only set one or the other.
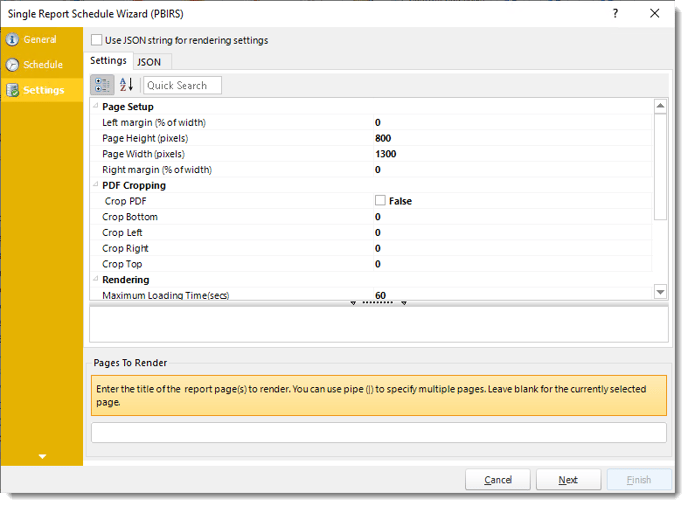
Settings
- Left margin (% of width): The size of the left margin as a percentage of the page width.
- Page Height(pixels): The height of the rendered file.
- Page width (pixels): The width of the rendered file.
- Right margin (% of width): The size of the right margin as a percentage of the page width.
- PDF Cropping: You may crop your reports by page height (pixels) and page width (pixels).
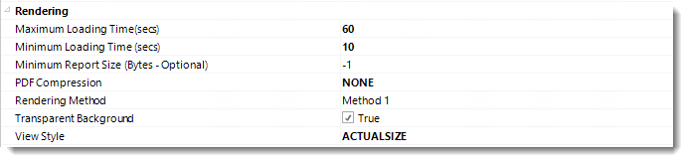
- Maximum Loading Time(secs): The maximum amount of time that the renderer will wait before timing out.
- Minimum Loading Time(secs): The amount of time that PBRS will wait for the dashboard/report to load before rendering it to file.
- PDF Compression: Select PDF compression levels.
- Rendering Method: Select the rendering method type for your Power BI report.
- Transparent Background: You have the option to have your Power BI report in a transparent background.
- View Style: How the report fits on the page: Fit to Page, Fit to Width, or Actual Size.
- Pages To Render: Enter the title of the report page(s) to render. You can use pipe (|) to specify multiple pages. Leave blank for the currently selected page.
JSON
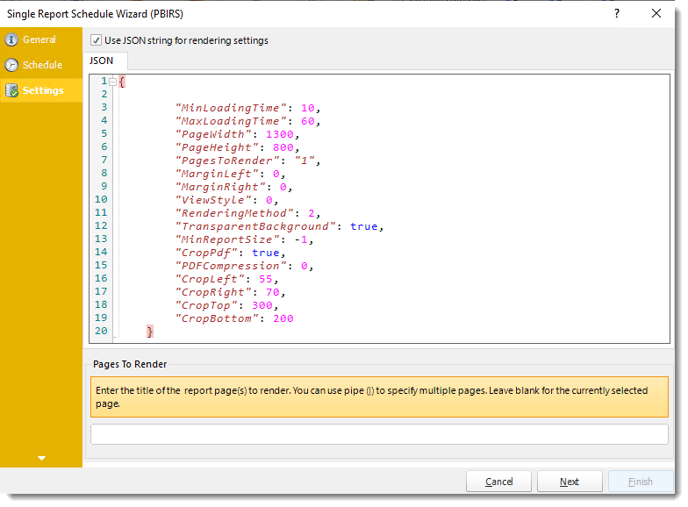
- Use JSON string for rendering settings: Check this option to use JSON string for the rendering settings.
- Enter the JSON string.
Step 8 - Click Next to save the information continue to the Filters Section of the Wizard.
Filters Wizard
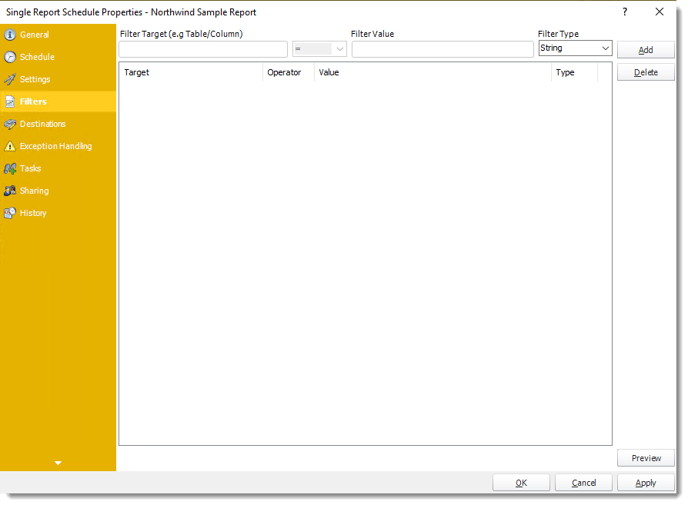
Step 9 - In this section, you will determine the filters for your report (if any). If your report has no filters, you may skip this section by clicking next.
To begin adding Filters Click Add

- Filter Target (e.g Table/Column): Choose the table and column you would like to set up the filter.
- FilterValue: Enter the filter value of your report.
- Filter Type: Use the drop-down menu to select the parameter.
- Preview: You can view the report.
Step 10 - Click Next to save the information continue to the Destination Section of the Wizard.
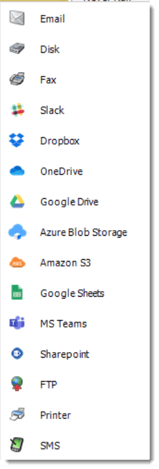
Destinations Wizard
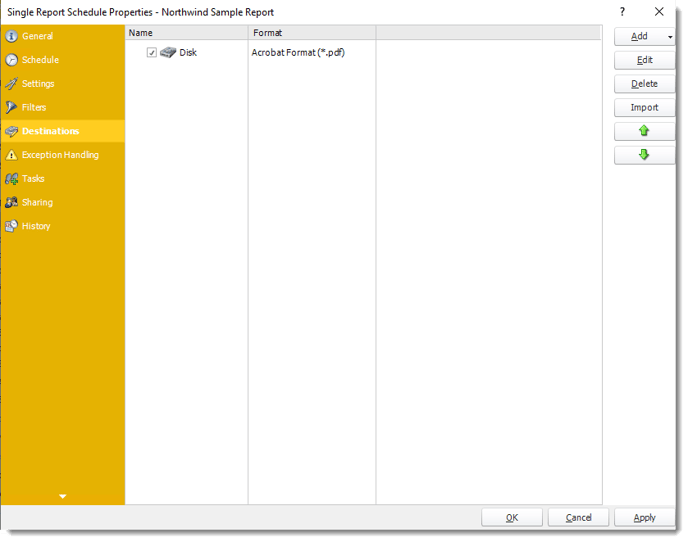
In this section, you will select the delivery options for your schedule. You may choose more then one destination. All destinations you have set up will be shown here. The order that they shown on this screen will determine which destination will receive the report exports first. You may rearrange this order by utilizing the green up and down arrows to the right.
Step 11 - Click Add to begin creating a new destination. There are several options to choose from including: Email, Disk, Fax, FTP, ODBC, Printer, SharePoint, SMS, and Dropbox, Azure Blob Storage, OneDrive.

- Edit: Select a destination and click to edit it's properties. Or simply double-click on the destination.
- Delete: Select a destination and click this button to delete it.
- Import: If you already have a default destination set up you may import it using this option.
- Green Up and Down Arrows: Once your destinations have been created you may want to change the order in which they appear on the screen. Highlight the destination you wish to move up or down the list and click on the arrows to do so until the desired list order has been achieved.
- For more information about Type of Destinations, click here.

Step 12 - Choose a required output format for the destination. For more information about Output Formats, click here.

You may also add the report URL to your destination by accessing the PBRS Inserts and simply dragging the PBIRS Report URL into the body of the destination.
Step 13 - Click Next to save the information continue to the Exception Handling Section of the Wizard.
Exception Handling Wizard
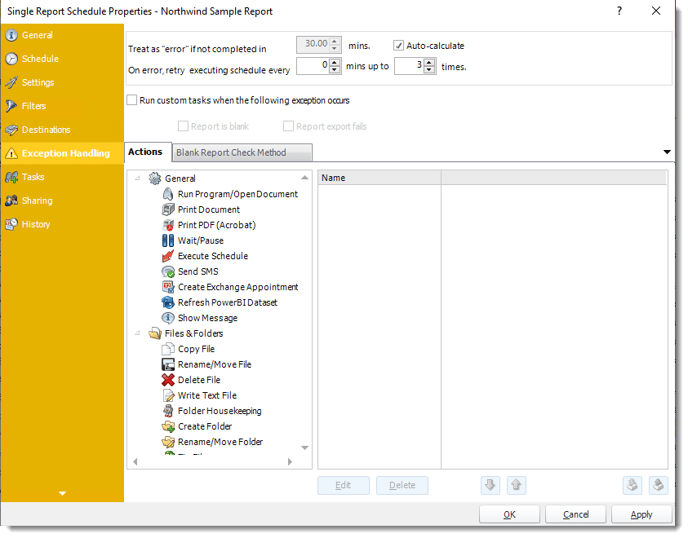
Step 14 - In this section you will determine Schedule Retries should an error occur.

- Treat as “error” if not completed in X minutes: If a report takes longer than the specified amount of time to run, this option will treat the schedule as an error and follow the appropriate action. The “Auto-calculate” option instructs PBRS to automatically determine how long a schedule should take to run the report. If it takes longer than the calculated amount of time, then it is an error.
If manually determining the error timing, please double-check the run time of the report in order to get the correct time estimate.
- On error, retry executing schedule every: If set to 0, PBRS will deem the schedule as "Failed" the first time it encounters an error. The schedule will not run again until its next scheduled time. Change the value to tell PBRS how many times you want it to retry running the report before declaring it as "Failed."
Step 15 - In this section you will determine what action should be taken if a Report Export is Blank or if the Report Export Fails.

- Check if the Report is Blank: If a report is blank because it genuinely returned no data, recipients can misconstrue this as an error with the scheduler. This option allows you to identify genuine empty reports and instruct PBRS on what to do with them.
- Ignore the report and subsequent tasks: If the report is blank, do not send the report. The report will not be delivered to the destination. No custom tasks will be run.
Method
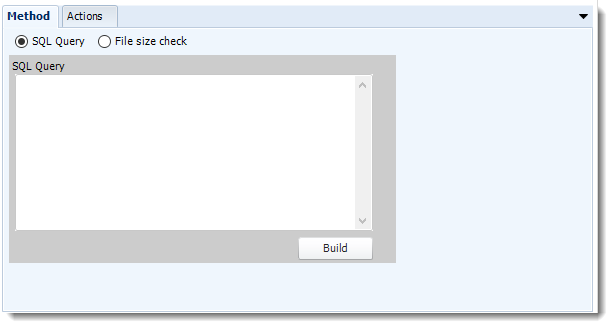
- Select the Method that will determine whether a report is blank.
- SQL Query: Select this option to use a user made query that will determine if the report is blank. If the query returns no results, the report is blank.
- Click Build.
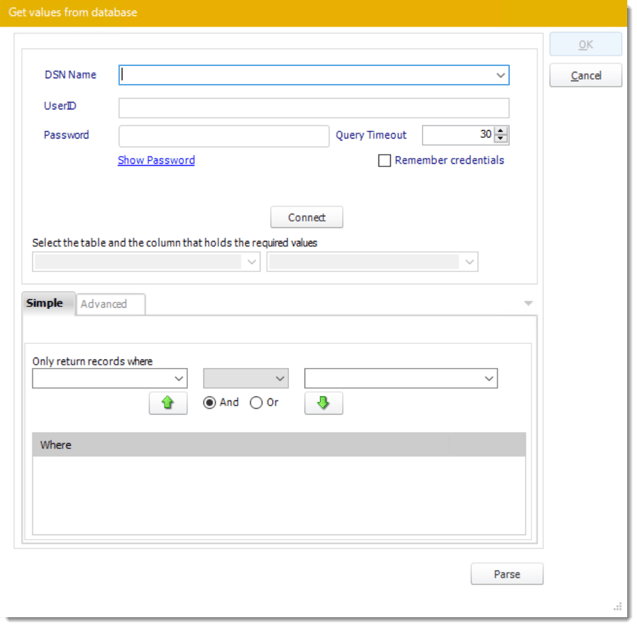
- Get values from a database window will appear. For more information about Get values from database, click here.
- File size check: Assume reports are blank if size is under "X" bytes.

Actions
Step 16 - Select an Action from the task list. This task will be executed in the event that a schedule is blank or if the report export fails.
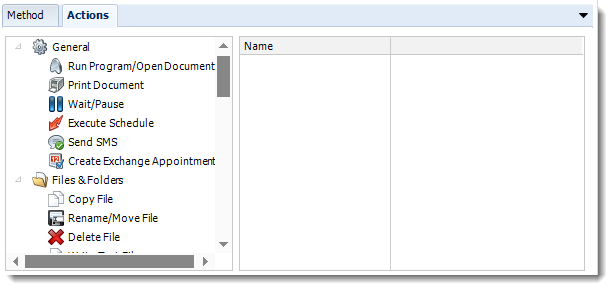
- For more information about tasks, click here.
You may send a notification if a report is considered blank instead of sending the report. Simply select “check if a report is blank” then select “Ignore the report.” In the actions tab, select “Send Email” from the list. Compose your email and save.
Step 17 - Click Next to save the information continue to the Custom Tasks Section of the Wizard.
Custom Tasks Wizard
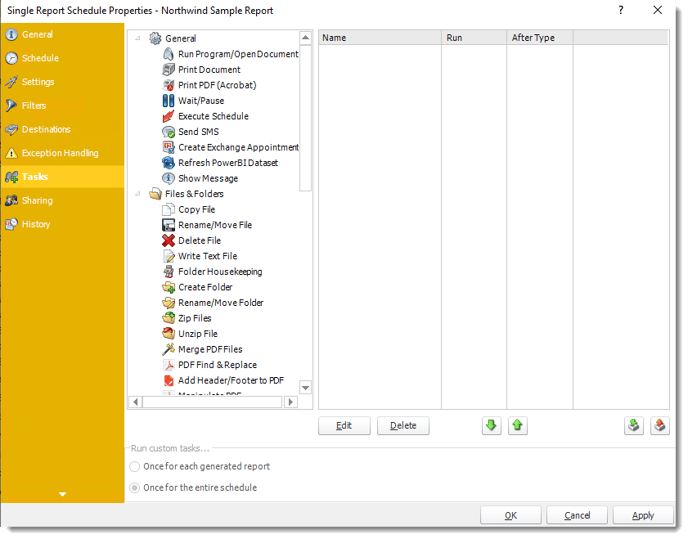
Step 18 - In the section you have the option of setting up Custom Tasks. Custom tasks are business process automation tools that can be auto triggered before or after a report runs. Simply navigate to the task you would like to set up and drag & drop to the right hand side of the screen. This will automatically open the Configuration screen for the selected task.
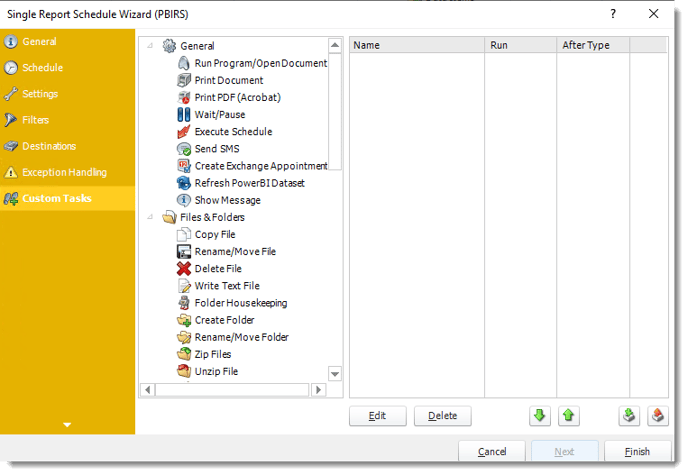
If you have no Custom Tasks to set up you may skip this step and simply click Finish to save the information and complete the Schedule set up.

- Edit: Select a Custom Task and click Edit to change it's properties. Or simply double-click on the Custom Task.
- Delete: Select a Custom Task and click delete to remove it.
- Green Up and Down Arrows: Once your Custom Tasks have been created you may want to change the order in which they appear on the screen. Highlight the Custom Tasks you wish to move up or down the list and click on the arrows to do so until the desired list order has been achieved. The order that they appear on the screen will be the order in which they are executed.
- Import: If you already have a default Custom Task List created you may import it using this option.
- Export: If you wish to create a Default Task list from the tasks created here, simply click on the Export button, give the task list a name, when prompted and it is ready to be used again and again in other schedules.
For more information on Custom Tasks, click here.
Step 19 - Once all the tasks have been added click Finish to complete the schedule to save the information and complete the Schedule set up..
Single Report Schedule Context Menu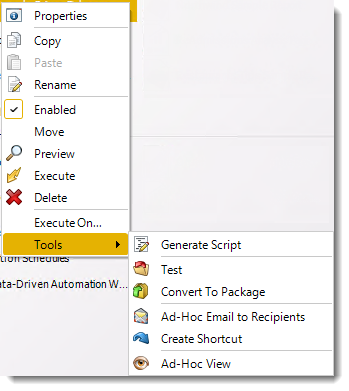
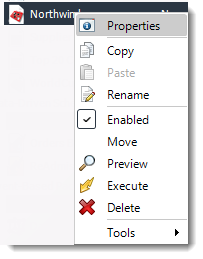
- Right-Click on a schedule to see the following actions:
- Properties: Edit the schedule from here. Or you can just double click on the schedule.
- Copy: Use this to copy the schedule. Right-click in the "white space" of the folder you wish to copy it to and select the Paste button.
- Rename: Rename the package.
- Enabled: Schedules are enabled when there is a check icon beside this option. To stop a schedule from running, or to "pause" it for a while, select this option to remove the check icon. Disabled schedules will not run until they are enabled again.
- Move: Use this option to move the report into an existing package.
- Preview: Preview the report before execution.
- Execute: This button will execute the schedule immediately. Note that the next run date and time is not moved on as a result of a manual execution. They only move on if the schedule is run automatically by one of the schedulers.
- Delete: Selecting this option will delete the schedule.
- Execute On: Use to option to execute the schedule to another collaboration server.
- Test: Use this option to test the schedule and export it to selected "test" destinations.
- Convert To Package: This button will move this report into a package. The package will have the name of the single schedule report.
- Ad-Hoc Email to Recipients: Select this option to send an ad-hoc email to all recipients of this package. You can use this to alert recipients to a planned system outage, or any other useful information.
- Create Shortcut: Use this option to create a shortcut you can save in any location on your PC. Execute the shortcut to execute the schedule in PBRS.
- Ad-Hoc View: This button allows you to preview the report.
Single Report Schedule Properties
- To access your schedule properties, right-click on a schedule and select properties.
- Similar to the schedule wizard, you adjust settings to your schedule such as timing, error handling, or custom tasks.
- General
You can view the Schedule Unique ID in the General Wizard.
- Schedule
- Settings
- Filters
- Destinations
- Exception Handling
- Tasks
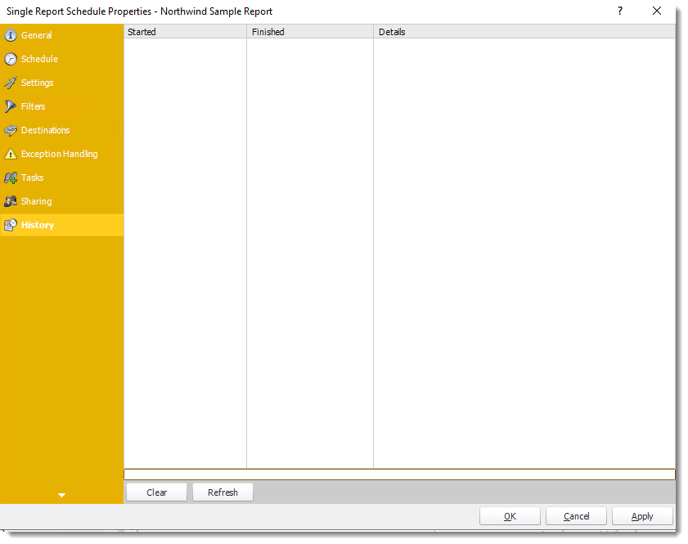
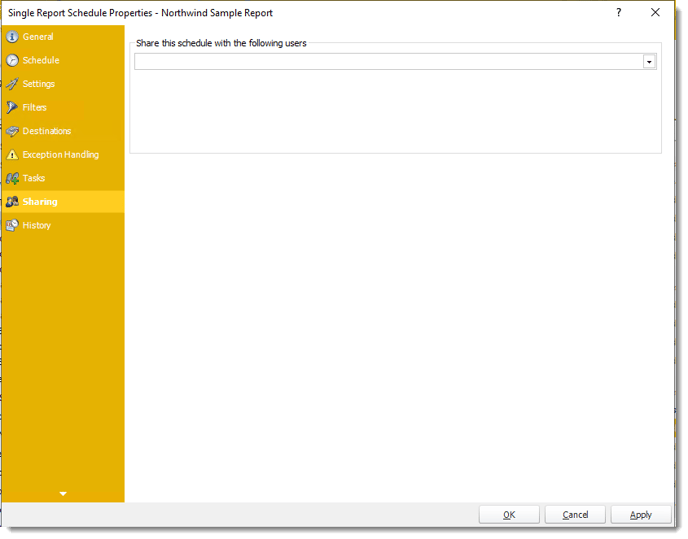
- Sharing: Here you can share this schedule with multiple users.
- History: Review the schedule's history. Successes, failures, and other data is located here.